


Outlook für Mac
Barrier-free
This page contains alternative texts for images/graphics.
The new Outlook for Mac cannot be used with an Exchange account currently. Using it via IMAP is also not recommended, as this also stores your credentials (user name and password) and all mailbox content on the Microsoft servers.
Further information and how you can revert from the new version to the old version can be found here.
Setup Outlook for Mac (Legacy version)
At present it is not yet possible to integrate the Exchange mailbox in the new Outlook for Mac. To switch to the legacy version of Outlook for Mac, click Outlook → New Outlook and click Restore. To do this, click on Outlook → New Outlook and then on Revert. Now you can continue with the setup as described below.
If you have not yet integrated an e-mail account in Outlook, the setup wizard will appear as soon as you open it. You can then skip the next step.
Additional account
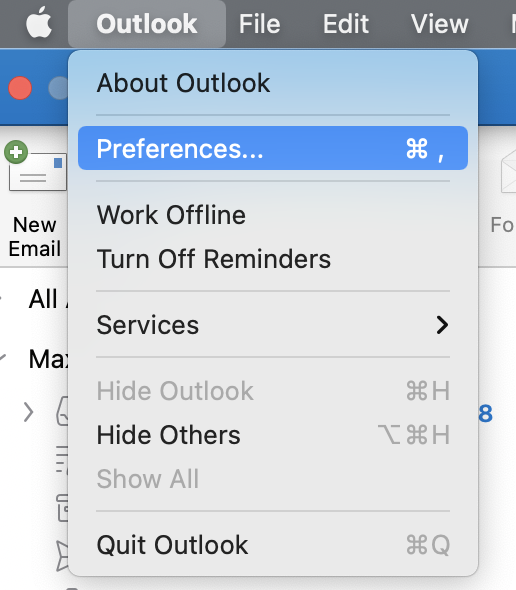
If you want to include the Exchange account as another account, click Outlook in the menu bar and then select "Settings" (alternatively, you can press the command key and the comma at the same time).
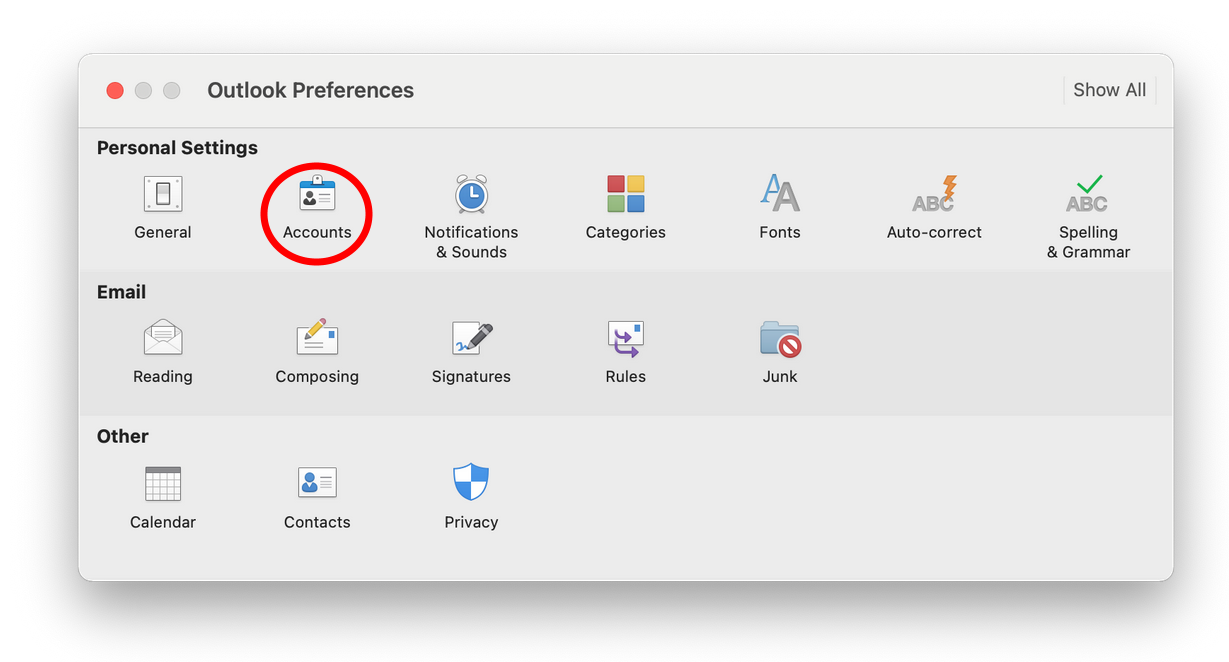
Then select "Accounts" under "Personal settings".
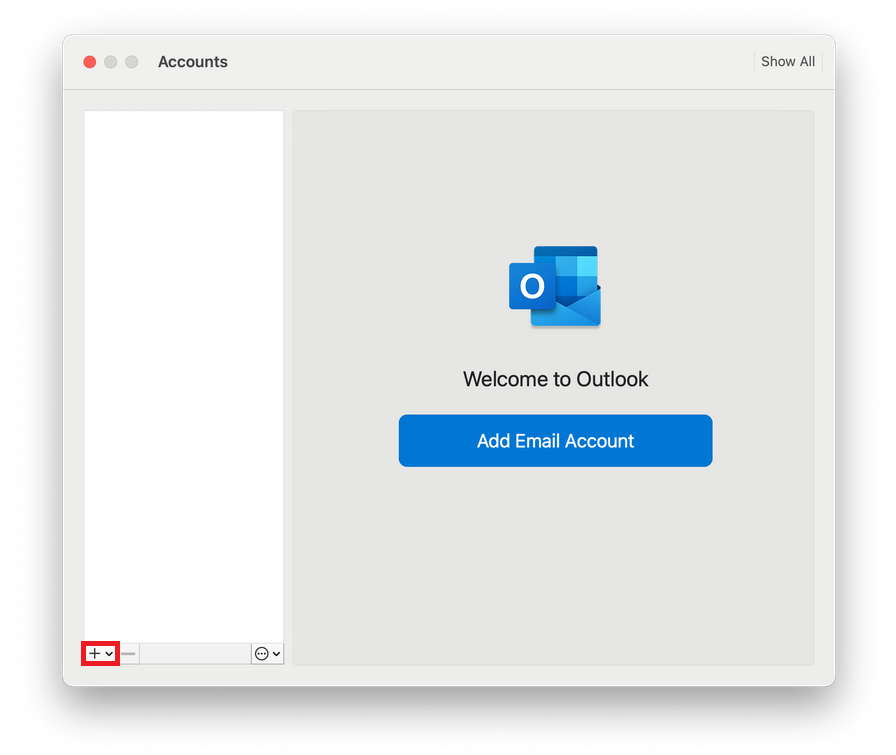
Select "Add email account".
You then start the setup wizard via the plus at the bottom left.
The setup wizard
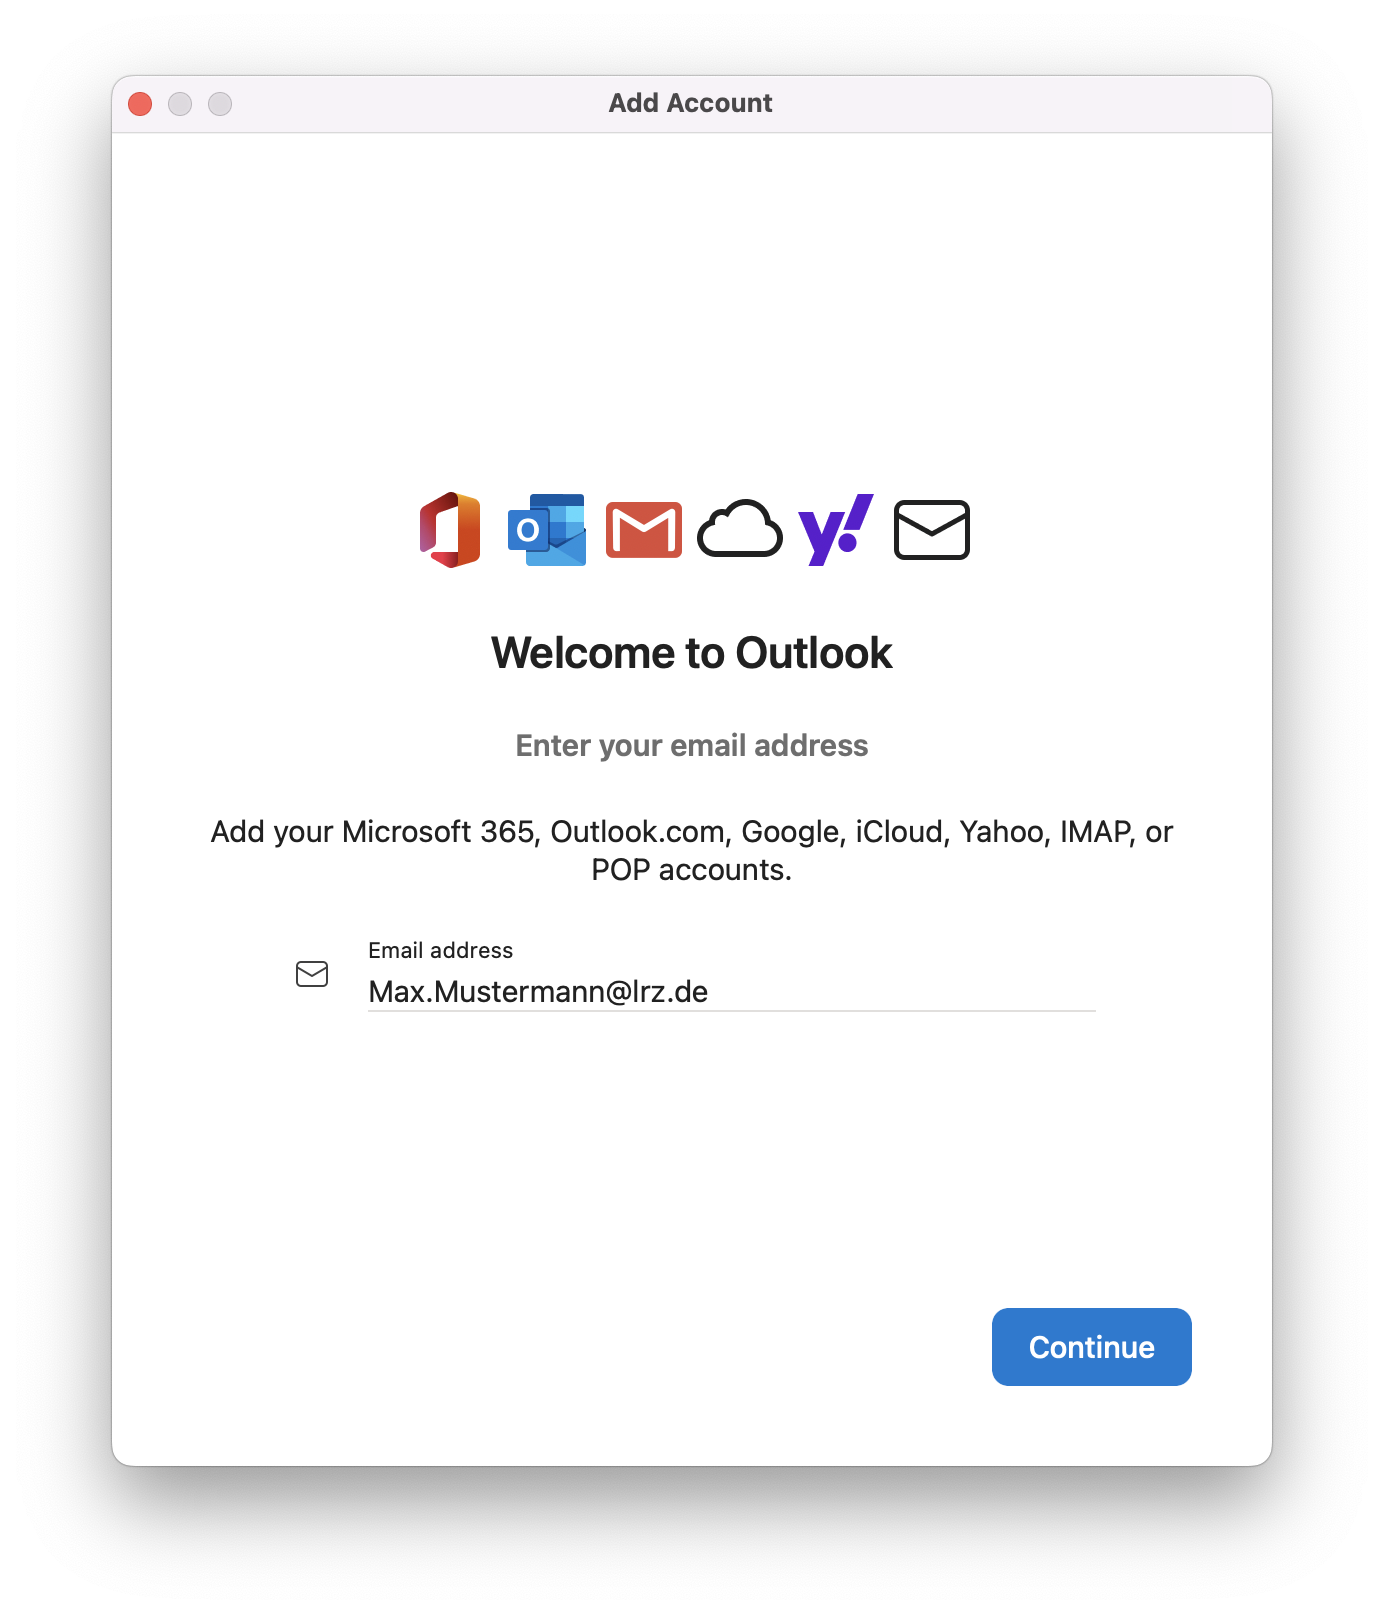
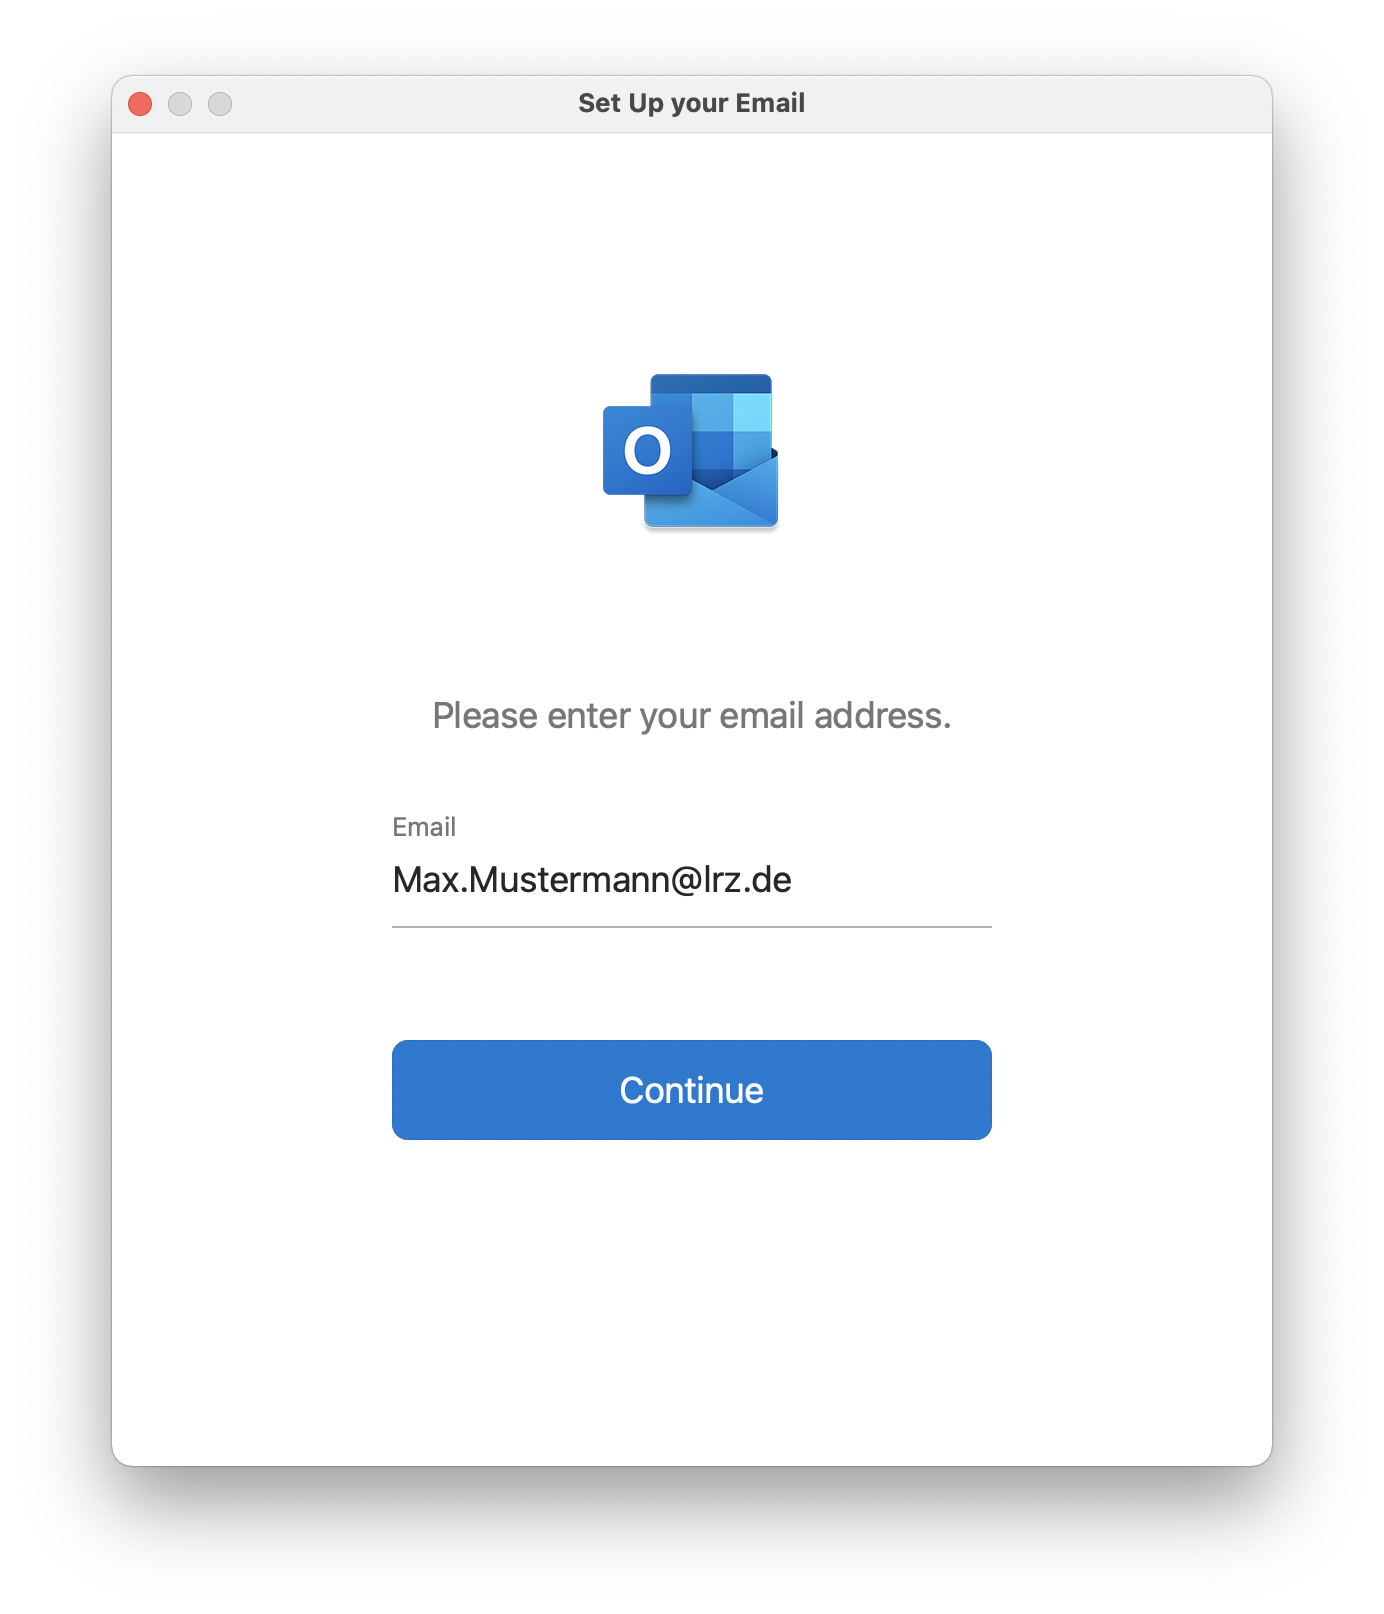
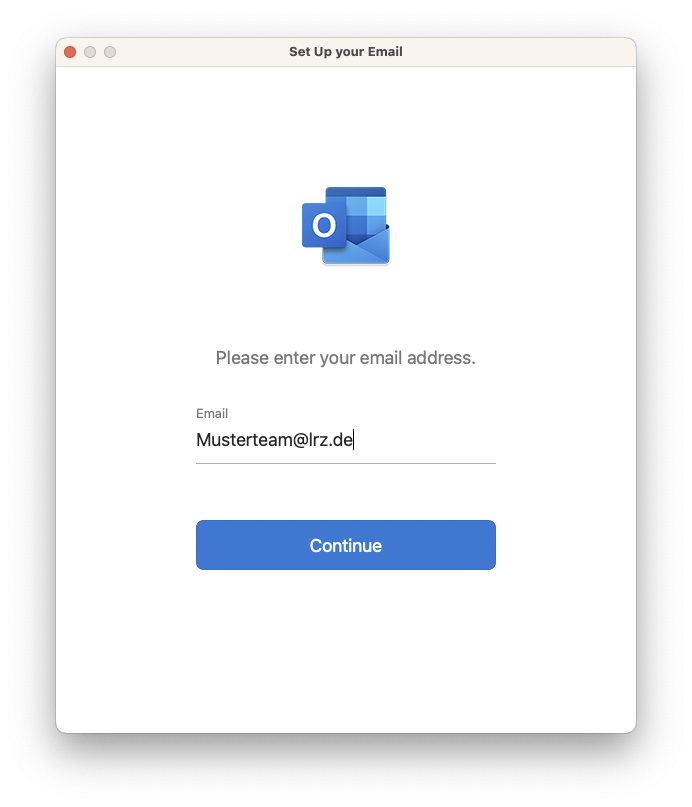
Enter your primary email address here and click continue.
The screenshot of the setup wizard opposite is from the new Outlook. If you are setting up in the legacy version of Outlook for Mac, you can skip the first steps.
To add an Exchange account in the current version of Outlook for Mac, you must first deactivate synchronisation with the Microsoft Cloud. Only then is it possible to select Exchange.
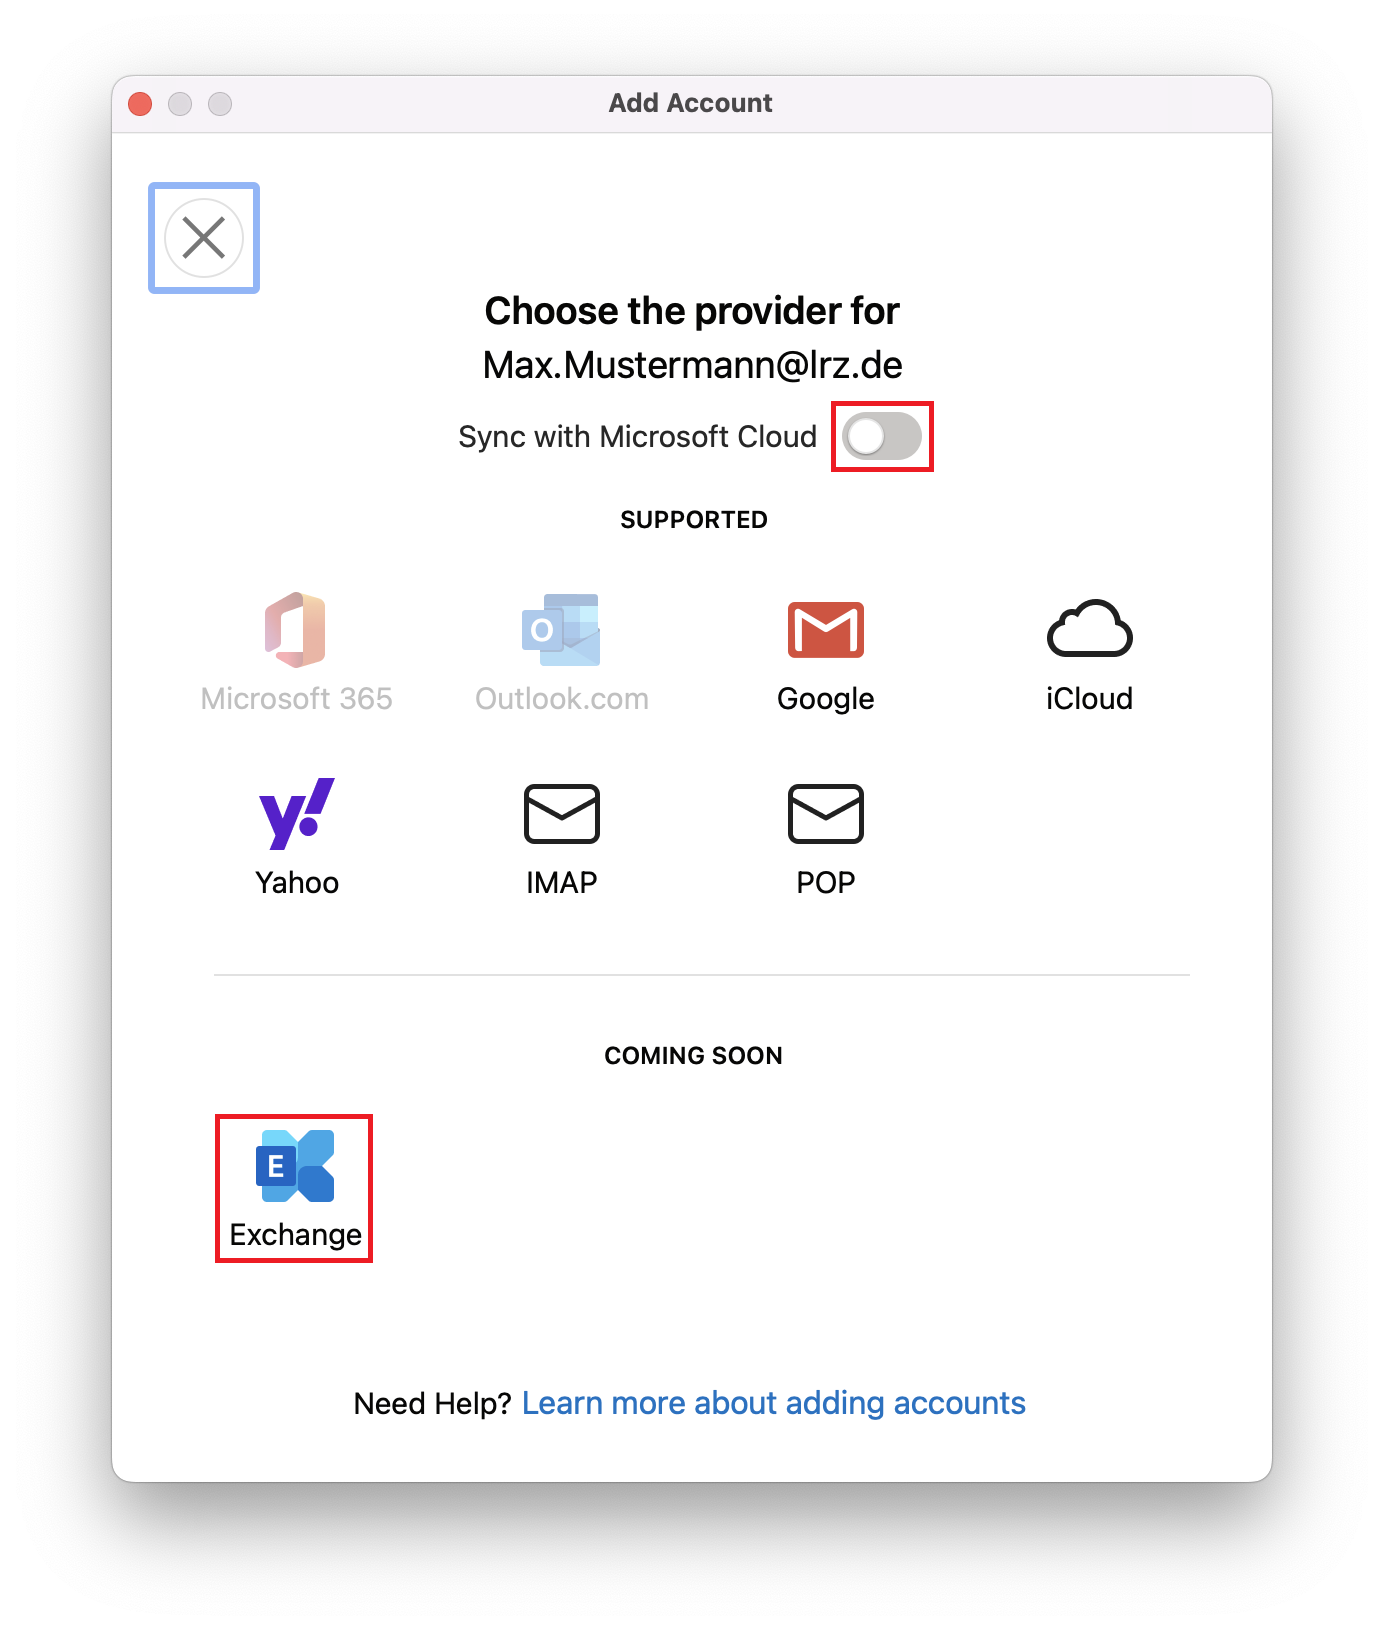
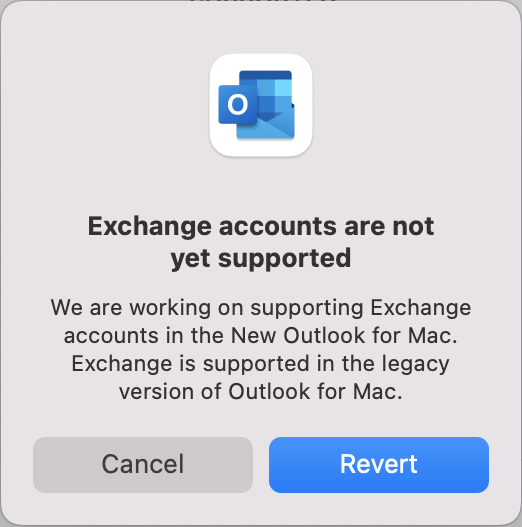
Confirm that you want to use the legacy version of Outlook for Mac by clicking Revert.
Enter your primary email address here and click continue.
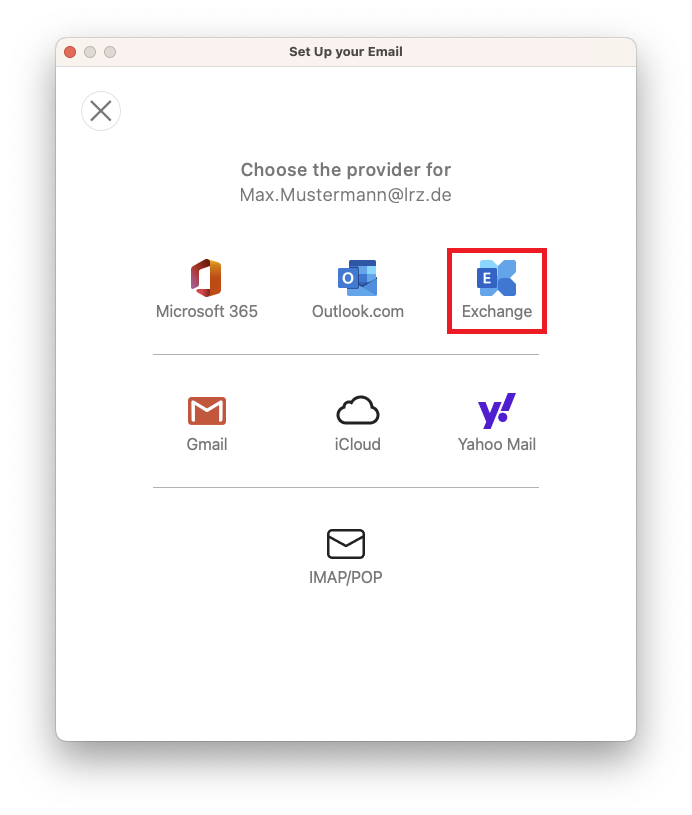
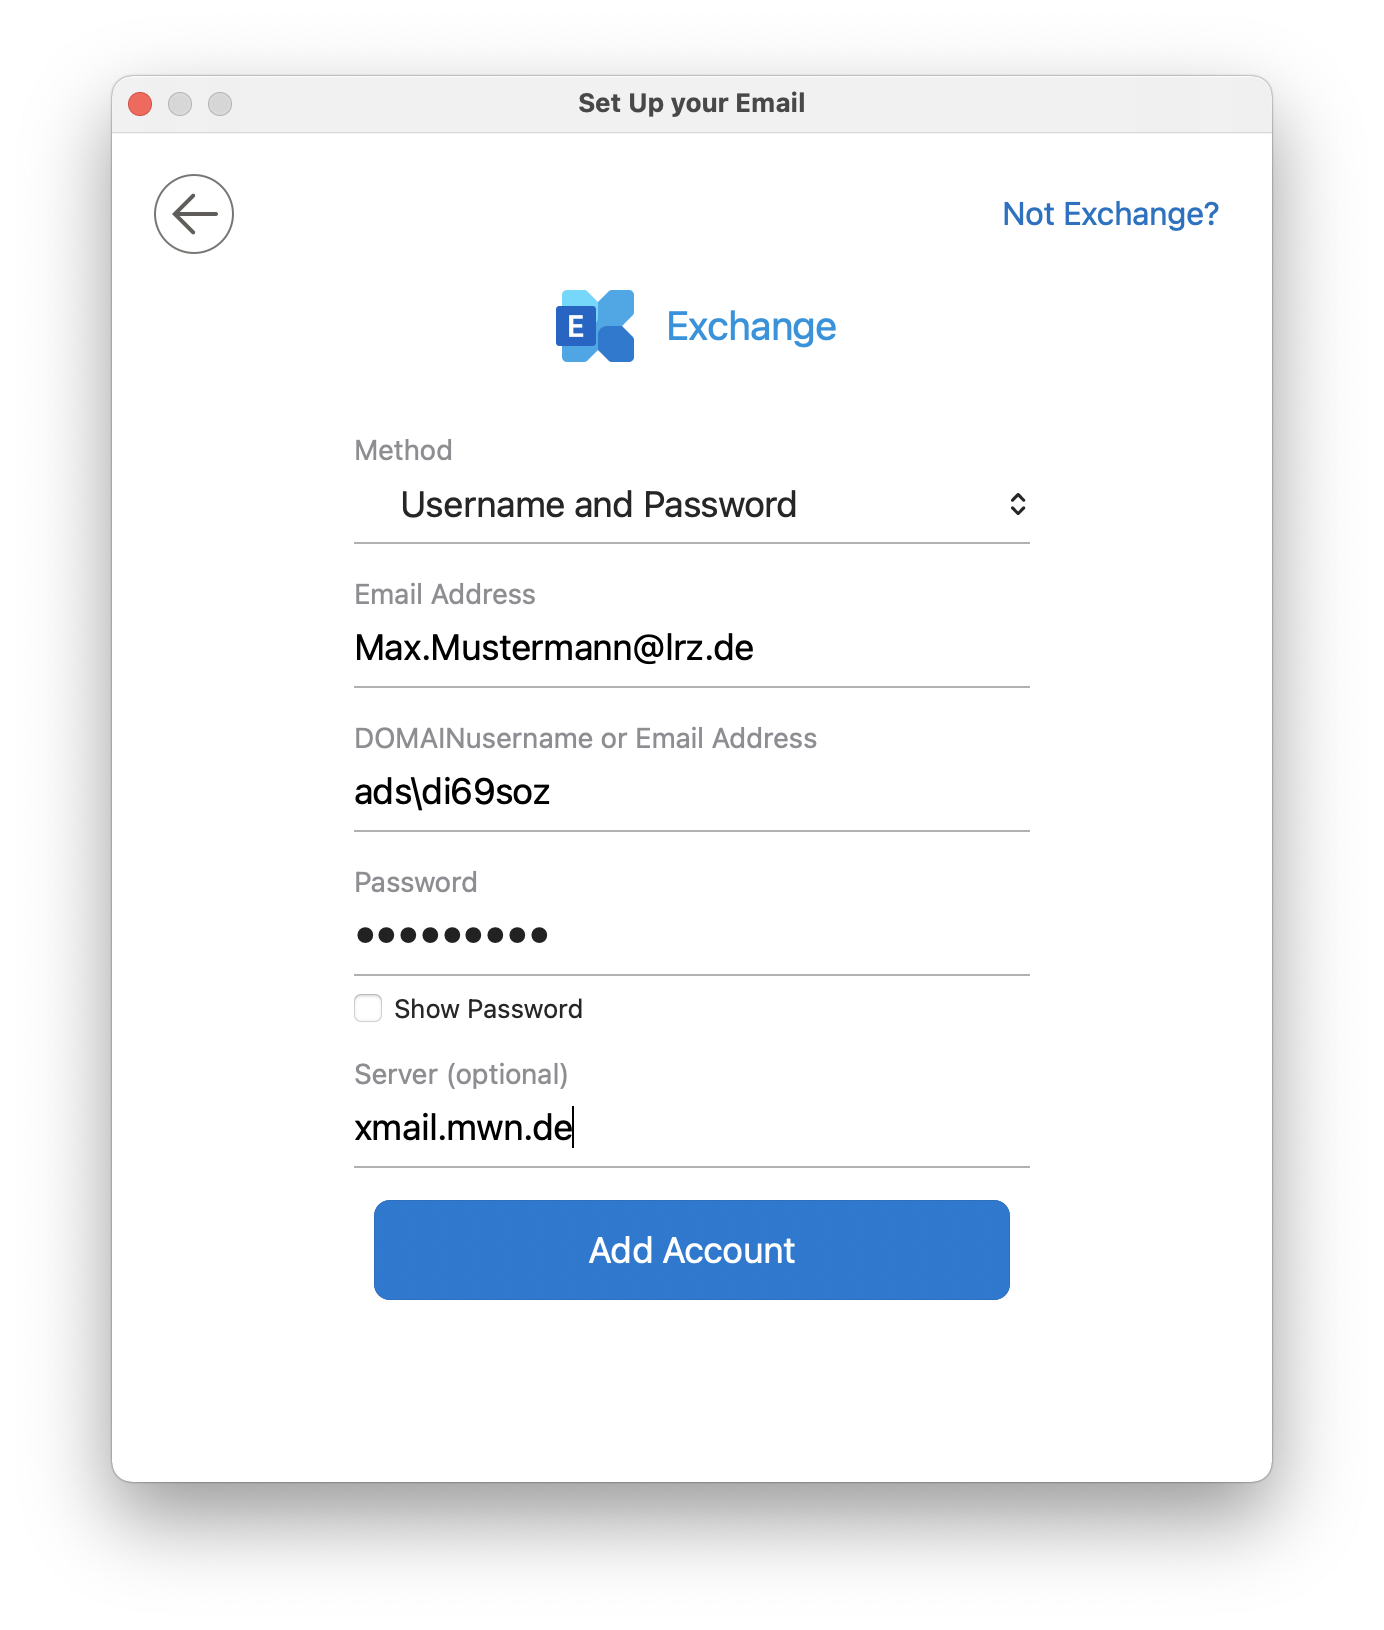
Choose Exchange.
In the next step, select "User name and password" as the authentication method.
Then enter your user name and password. Note, however, that you place the domain in the form "ads\" in front of your identifier.
You can also specify the server name "xmail.mwn.de". However, this is not mandatory, because Outlook looks for the necessary settings itself via Autodiscover.
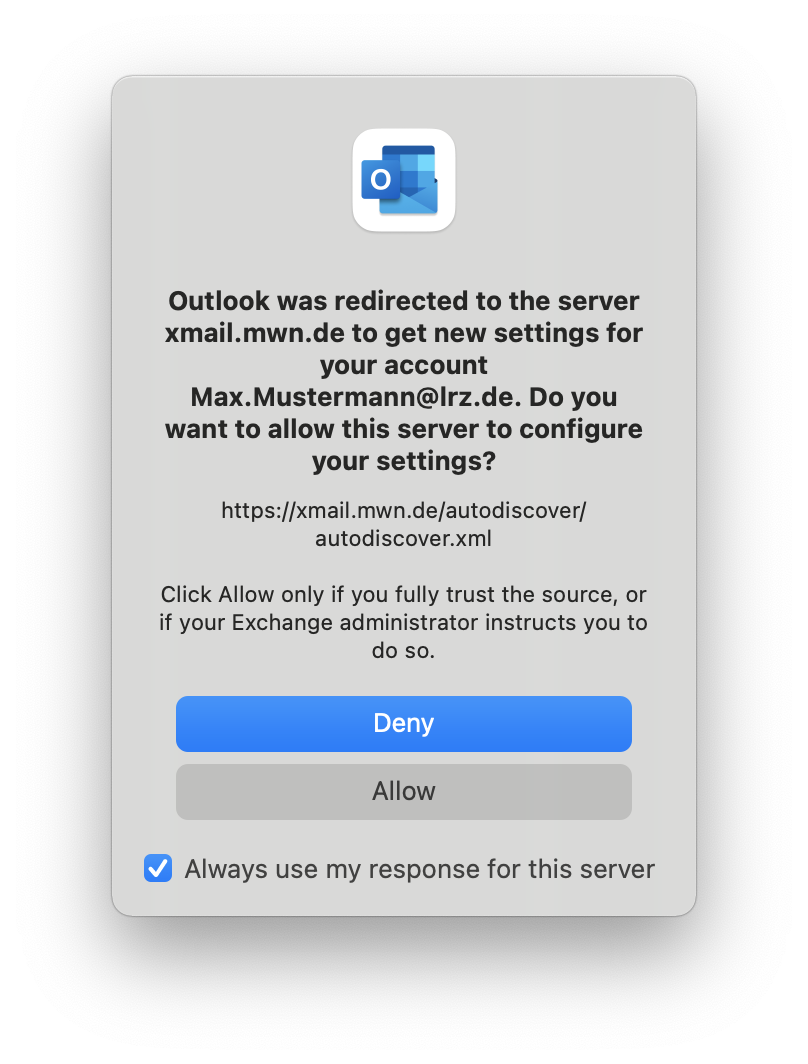
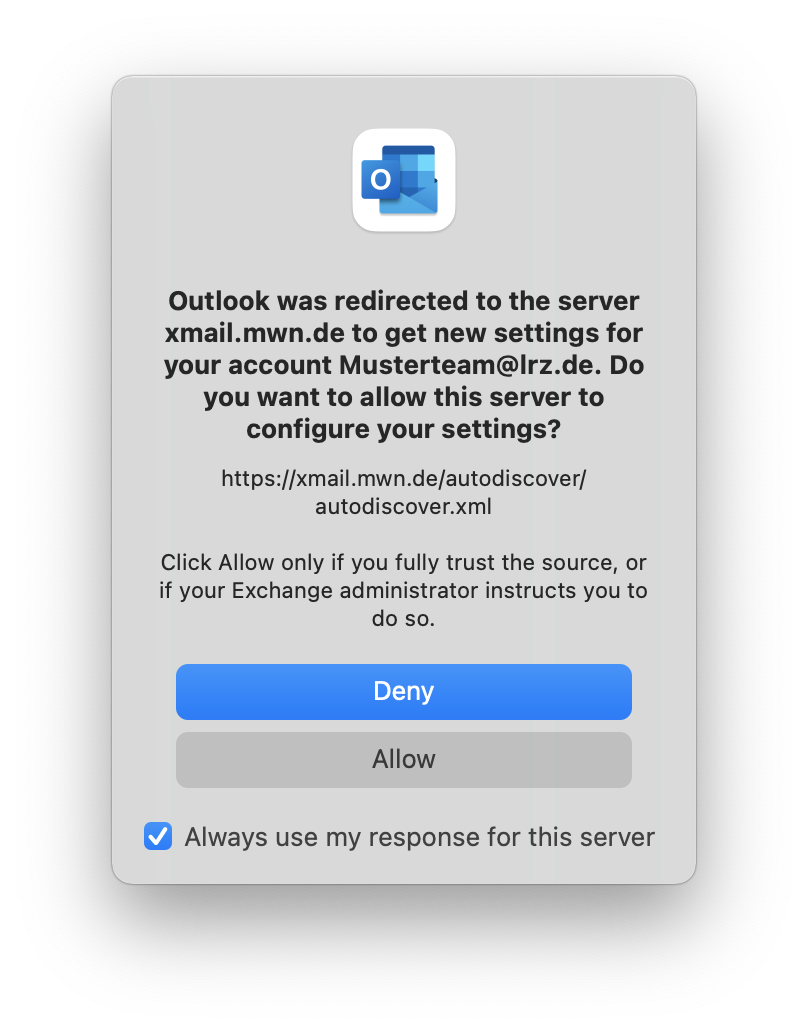
Confirm the request for autoconfiguration with "Allow". As you can see in the screenshot, Autodiscover points to our Exchange server "xmail.mwn.de". It makes sense that you check the box for "Always use my responce for this server" so that Outlook doesn't ask you again at every startup if you want to allow communication with it. Please note that this has nothing to do with saving the password, but only concerns the communication with this server.
Shared Mailbox
Open the Outlook preferences and select "Accounts" there.
In Outlook for Mac, a shared mailbox can either be included as a separate account or additionally in the account of your own mailbox.
Integrating a mailbox as a separate account
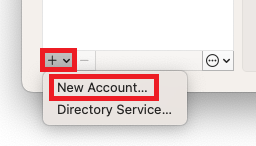
Start the setup wizard by clicking on the plus sign at the bottom left → "New account...".
Now enter the e-mail address of the shared mailbox. Afterwards, the setup process is equivalent to that of a personal mailbox.
Integrating a mailbox via delegations
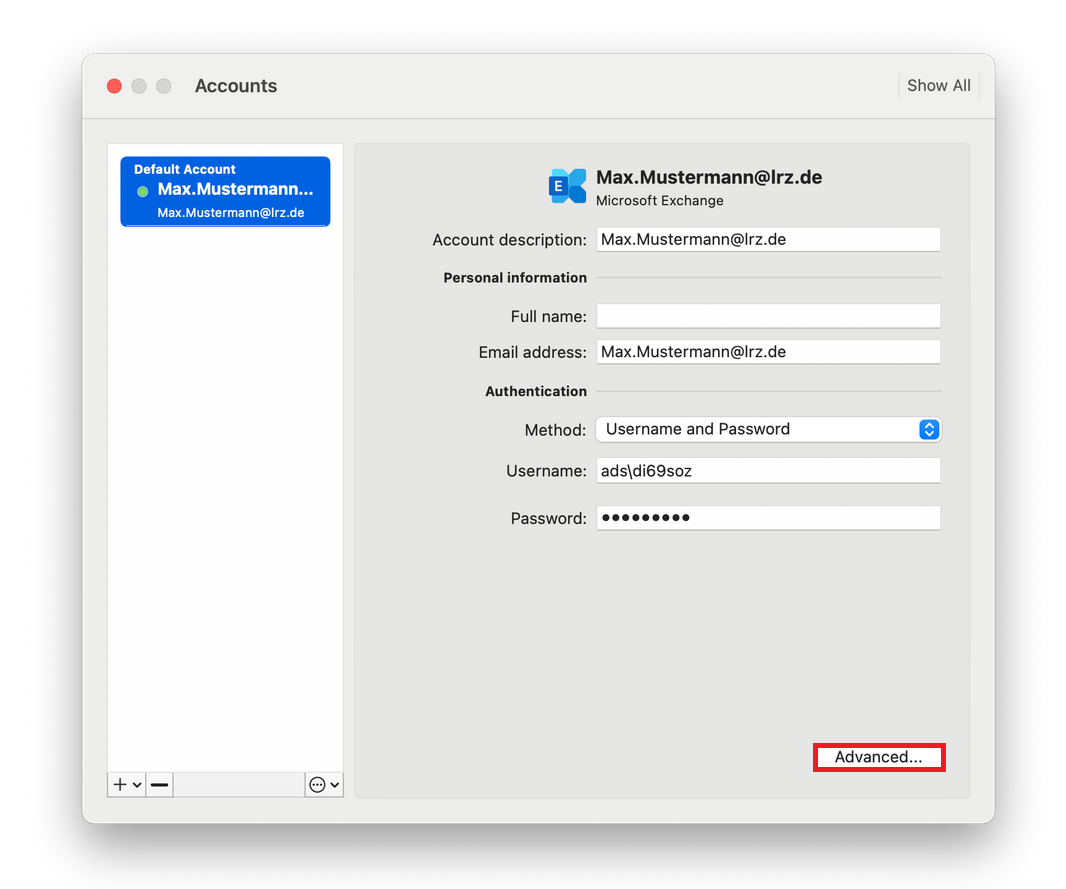
Select your Exchange account and click "Advanced".
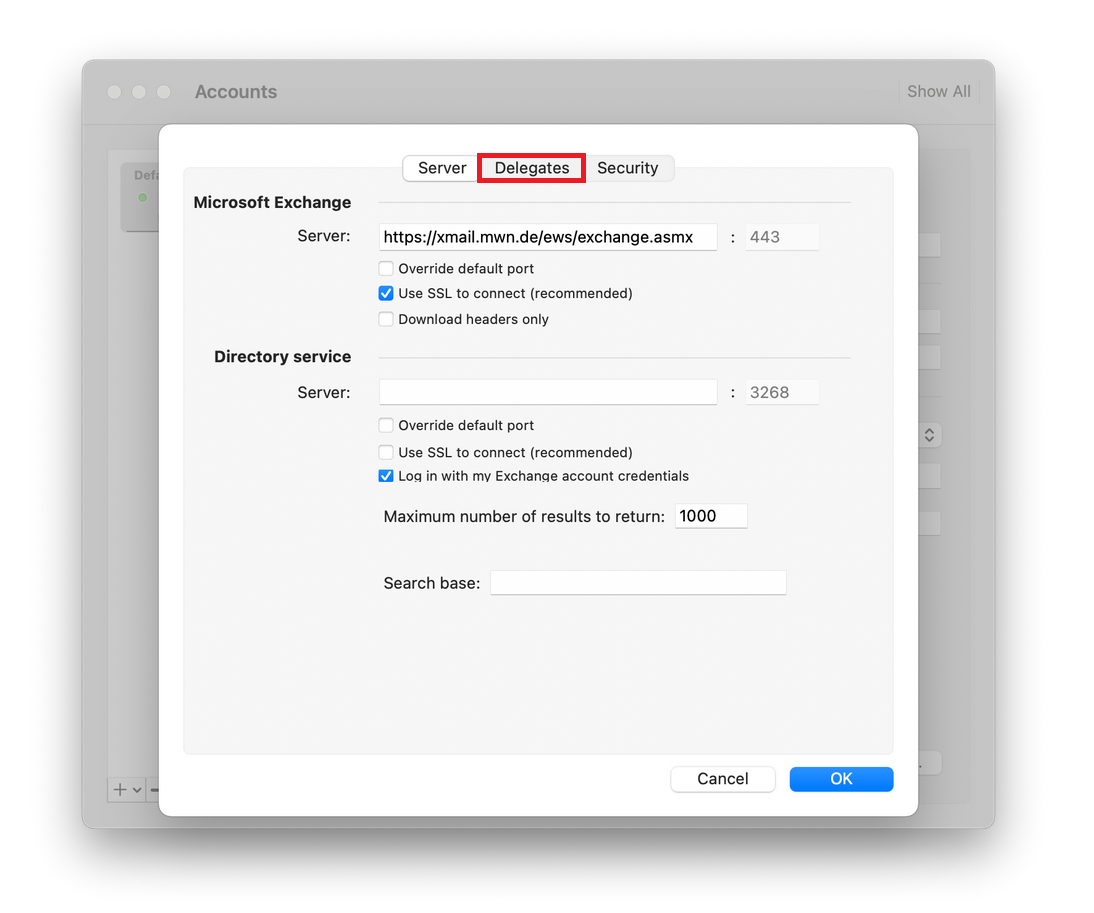
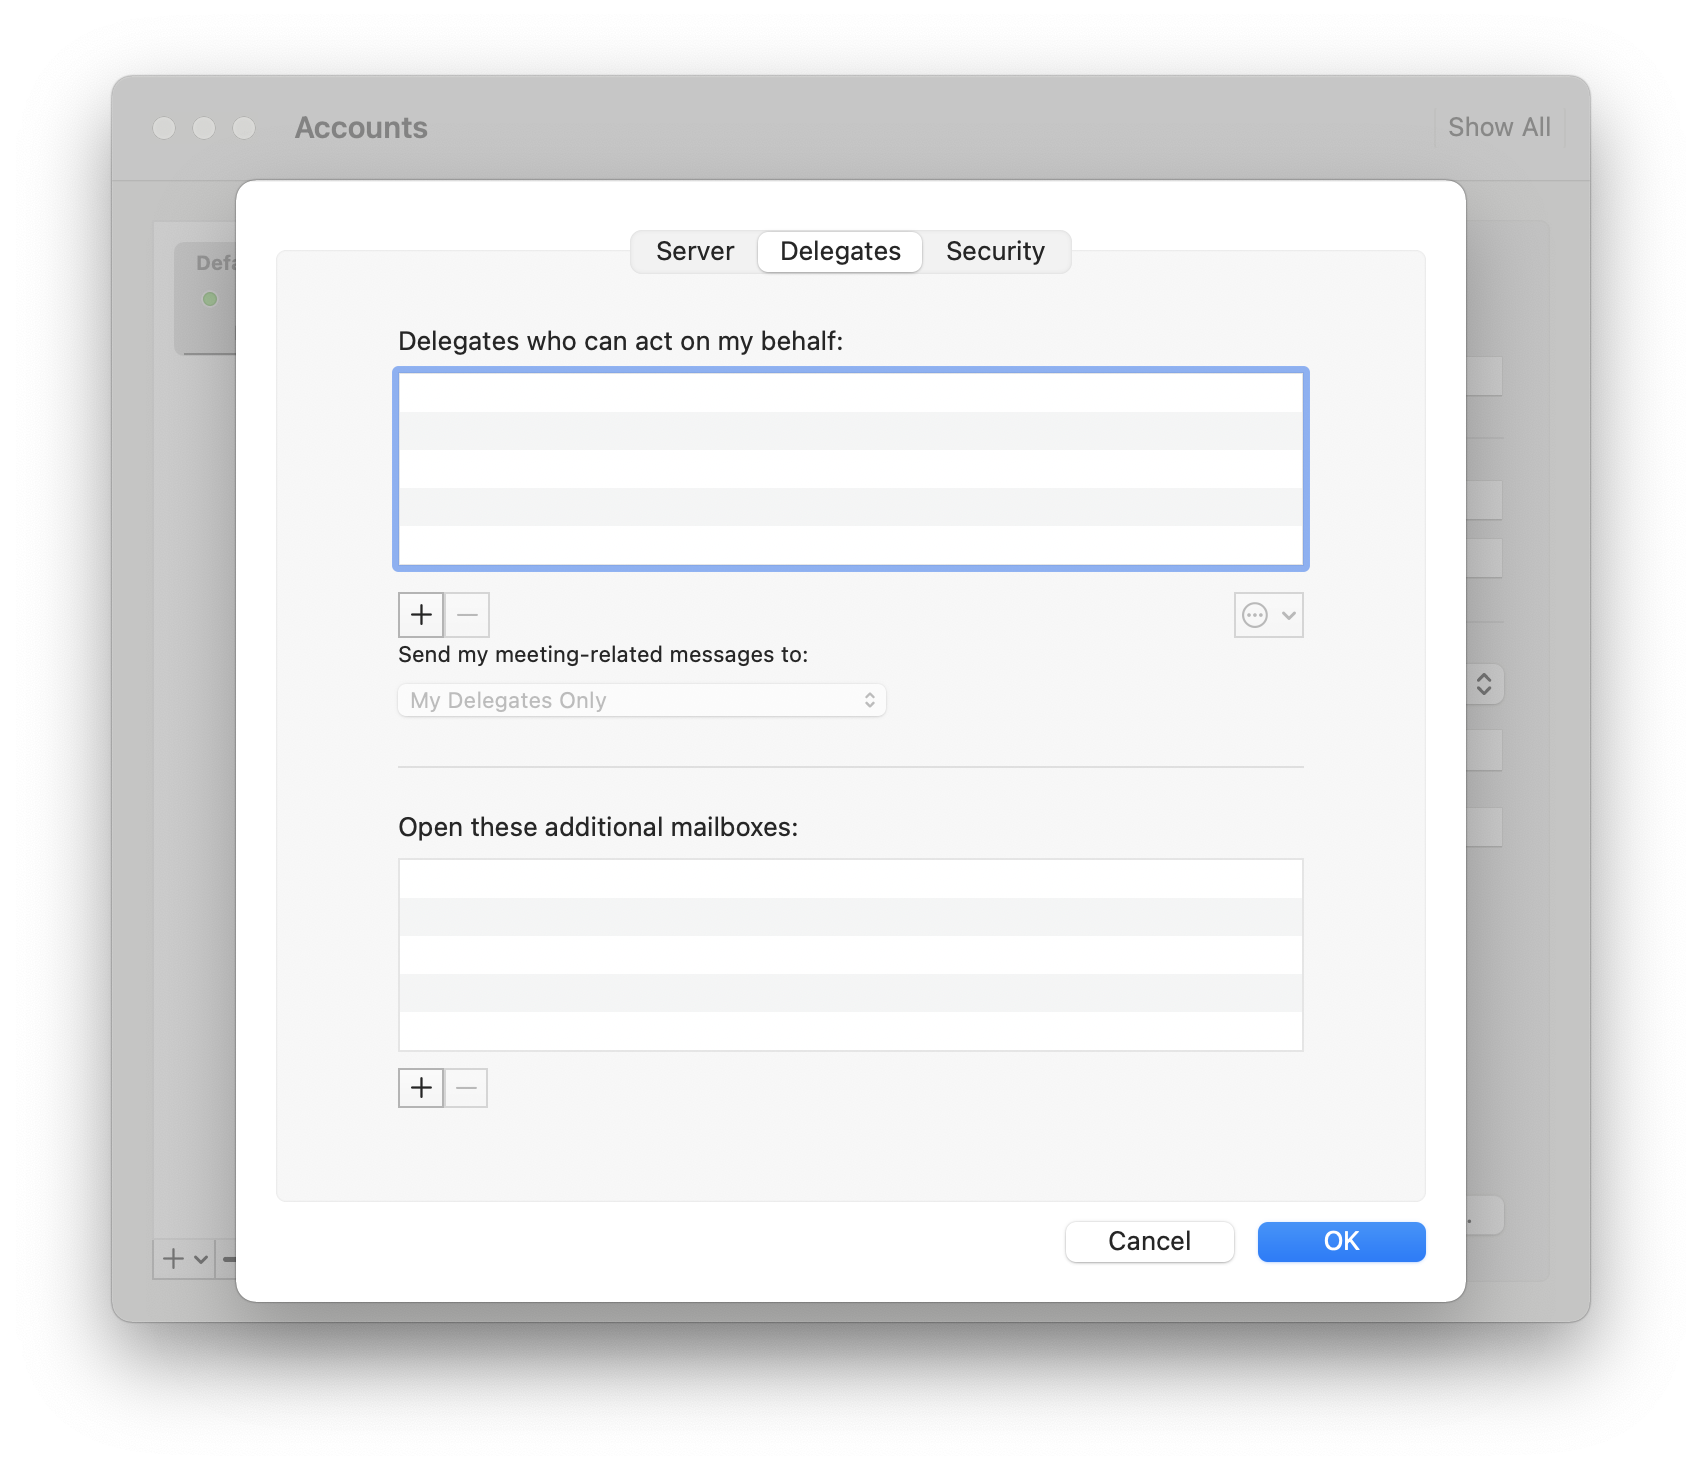
Then switch to the "Delegates" tab.
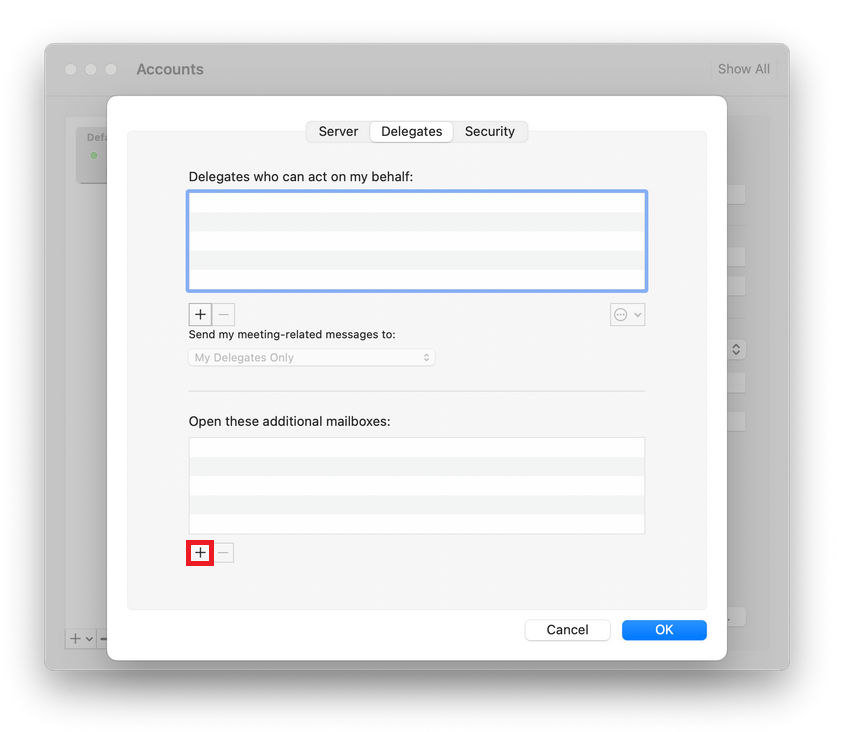
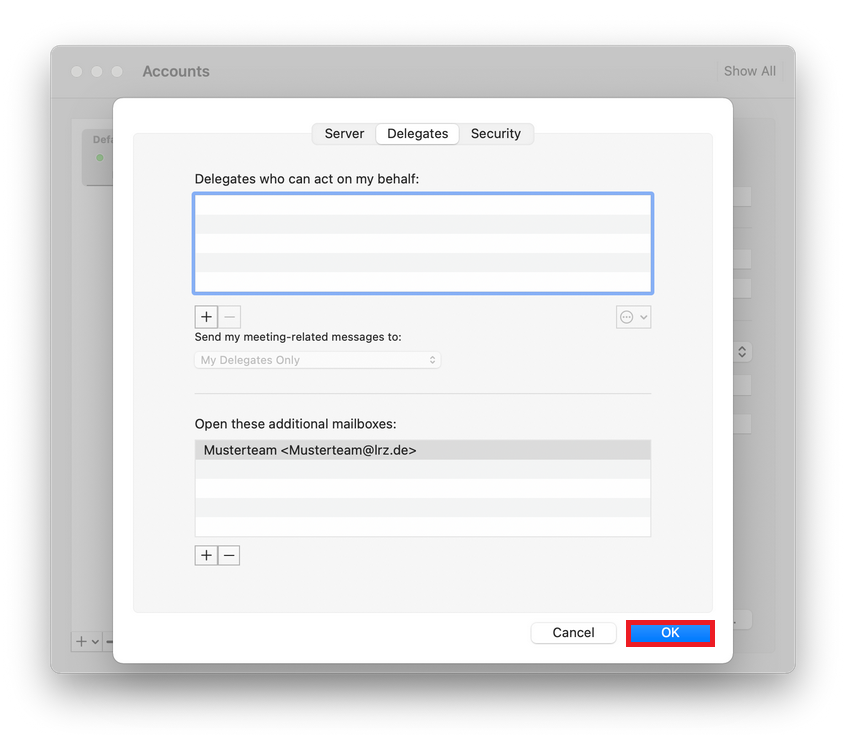
By clicking on the plus on the left below the second field ("open these additional mailboxes:") a shared mailbox is added.
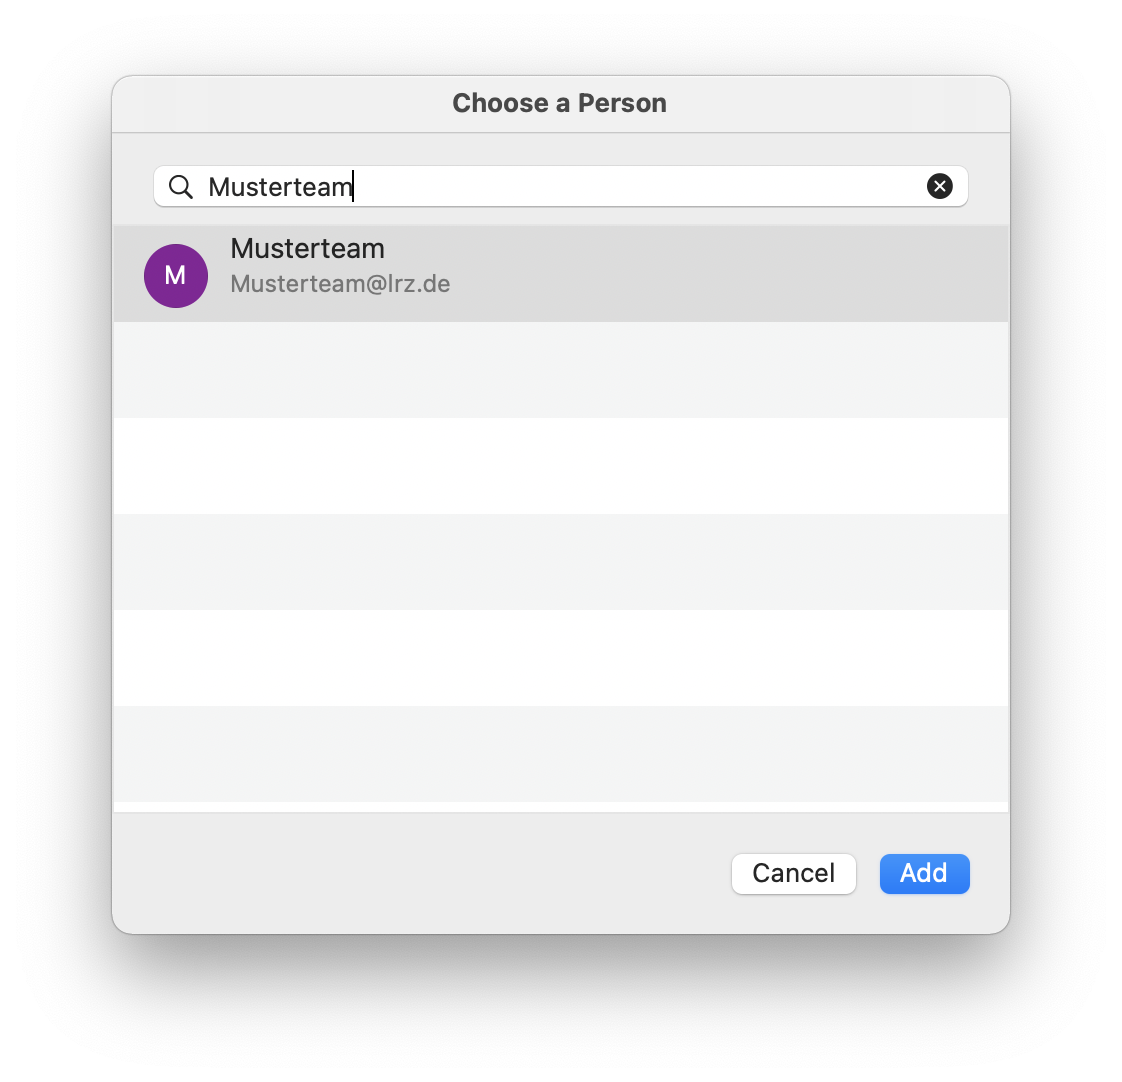
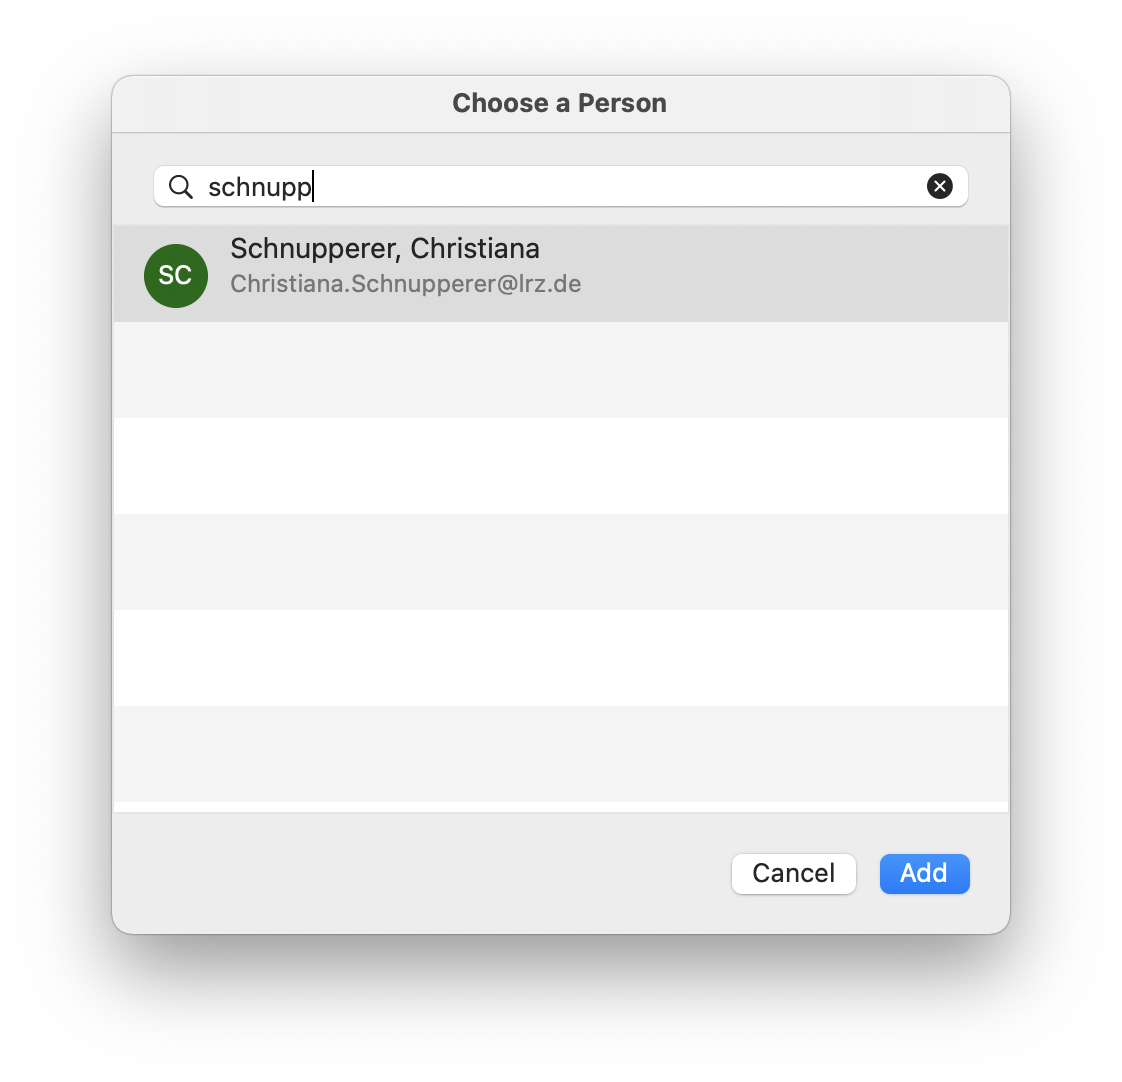
First a window opens, there you search for the shared mailbox (enter account or email address of the shared mailbox).
After you have added the mailbox you need to confirm again with OK.
You will then be asked again if you want to allow the server to configure the settings. Here you have to check the box and then finish the setup with "Allow".
Calendar and mailbox sharing
The following explains how to grant people or groups access to parts of your Exchange account and how to access shares that have been granted to you.
![]() Access to the Exchange account can only be granted to people and groups/distribution lists that can be found in the Address Book.
Access to the Exchange account can only be granted to people and groups/distribution lists that can be found in the Address Book.
Please note that only people, shared mailboxes, resources (rooms and devices) and distribution lists are listed in the address book. If you cannot find a group in your address lists, it means that this group is not a distribution list.
Determining which people have access to which part of my data
This can be done in Outlook by right-clicking on the resource for which you have granted shares (i.e., for example, on the calendar icon in the left bar, as you can see in the next picture).
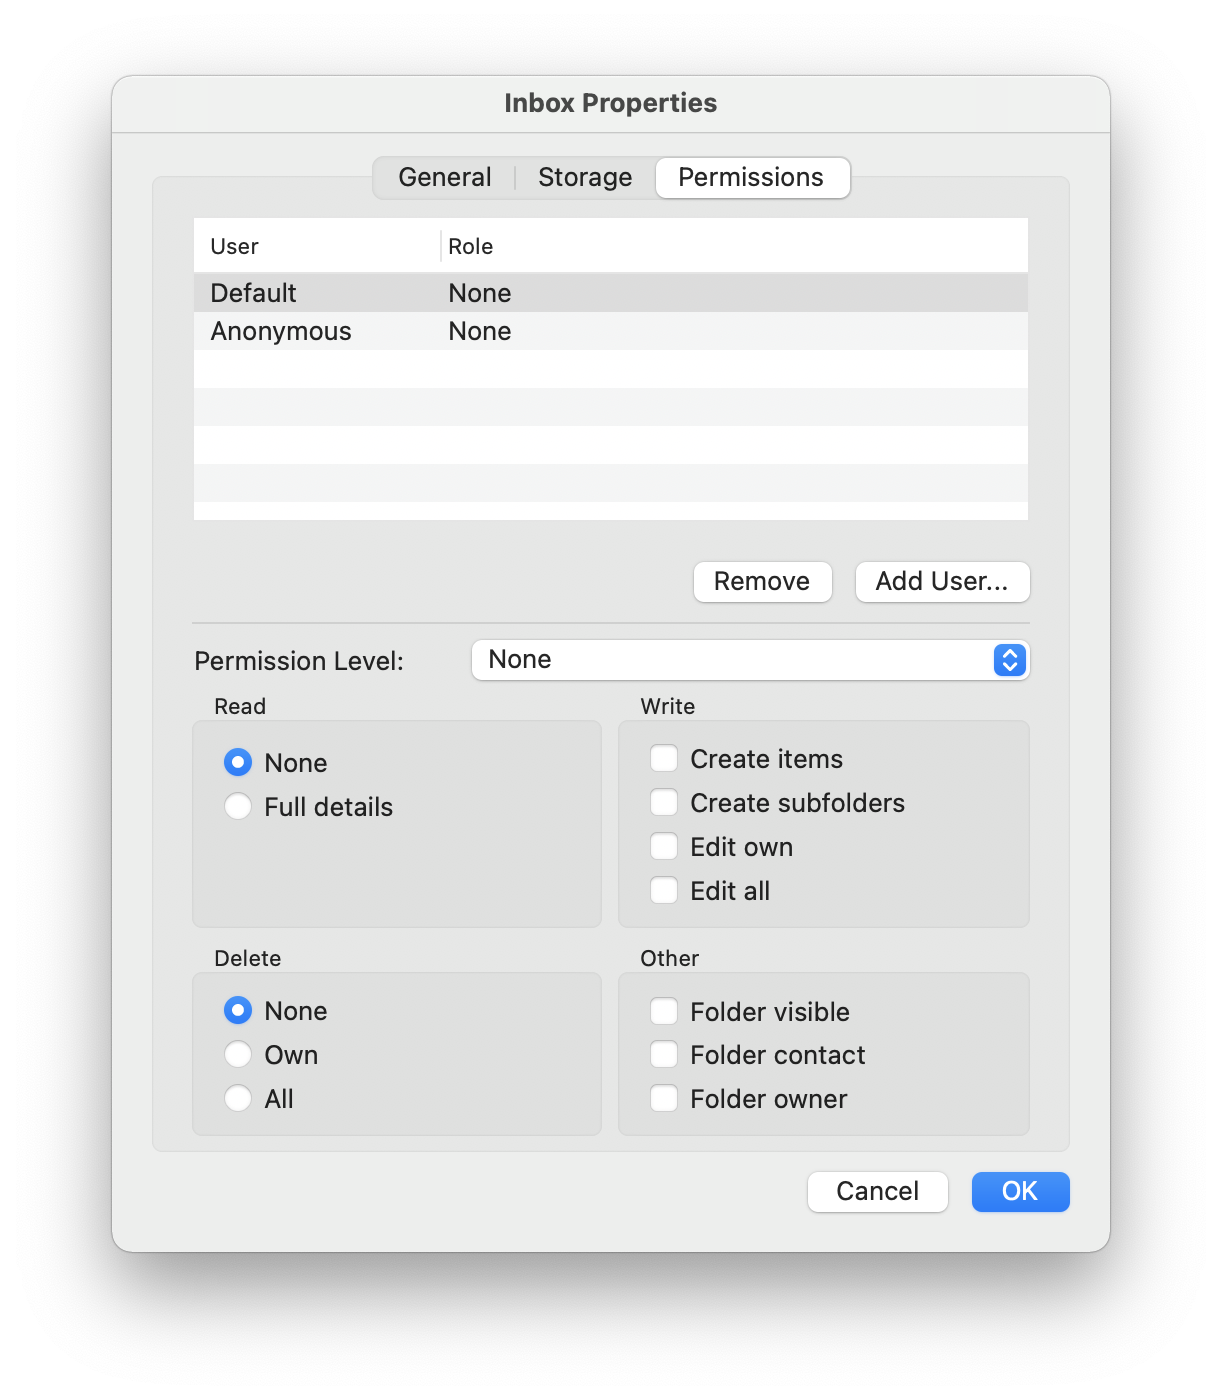
The "Properties" command will show you all the properties of the resource. Click on the tab "Permissions" to see who is allowed to access the resource and how. You can also make changes at this point.
Give approvals
You can give people or groups access to your email, calendar and contacts. To do this, right-click on the folder you want to share and then select "Sharing Permissions...".
Use "Add User..." to find the person or group you want to grant access to the folder in the address book and then add them.
Once you have selected the person, you can either click together the permissions you want them to have individually, or select a permission level from the list.
A description of the permission levels can be found below.
![]() Please note: If a subfolder is to be shared, the "Folder visible" permission must also be assigned for all folders above it (including the mailbox itself) in the hierarchy. Permissions are not inherited downwards.
Please note: If a subfolder is to be shared, the "Folder visible" permission must also be assigned for all folders above it (including the mailbox itself) in the hierarchy. Permissions are not inherited downwards.
Permission Levels
Permission Level | Activities that a share user can perform |
Owner | Create, read, modify and delete all items in the shared folder. As an owner, a user can change the permission levels that others have for the folder. |
Publilshing Editor | Create, read, modify and delete all items and create subfolders. |
Editor | Create, read, modify and delete all items. |
Publilshing Author | Create and read items, create subfolders, and modify and delete items you have created. |
Author | Create and read items, as well as modify and delete items you have created. |
Non-editing Author | Create and read items and delete items you have created. |
Reviewer | Read items only. |
Contributor | Create items only. |
Custom | Perform activities defined by the folder owner. |
None | Execution of no activities. The user remains in the permission list, but has no permission and cannot open the folder. |
Additional permission levels for calendars
Permission Level | Activities that a share user can perform |
Free/Busy time, subject and location | Only for calendar shares, reading the free/busy information and subject and location of calendar events. |
Free/Busy only | Only for calendar sharing, reading free/busy information, calendar events. |
Free/Busy times
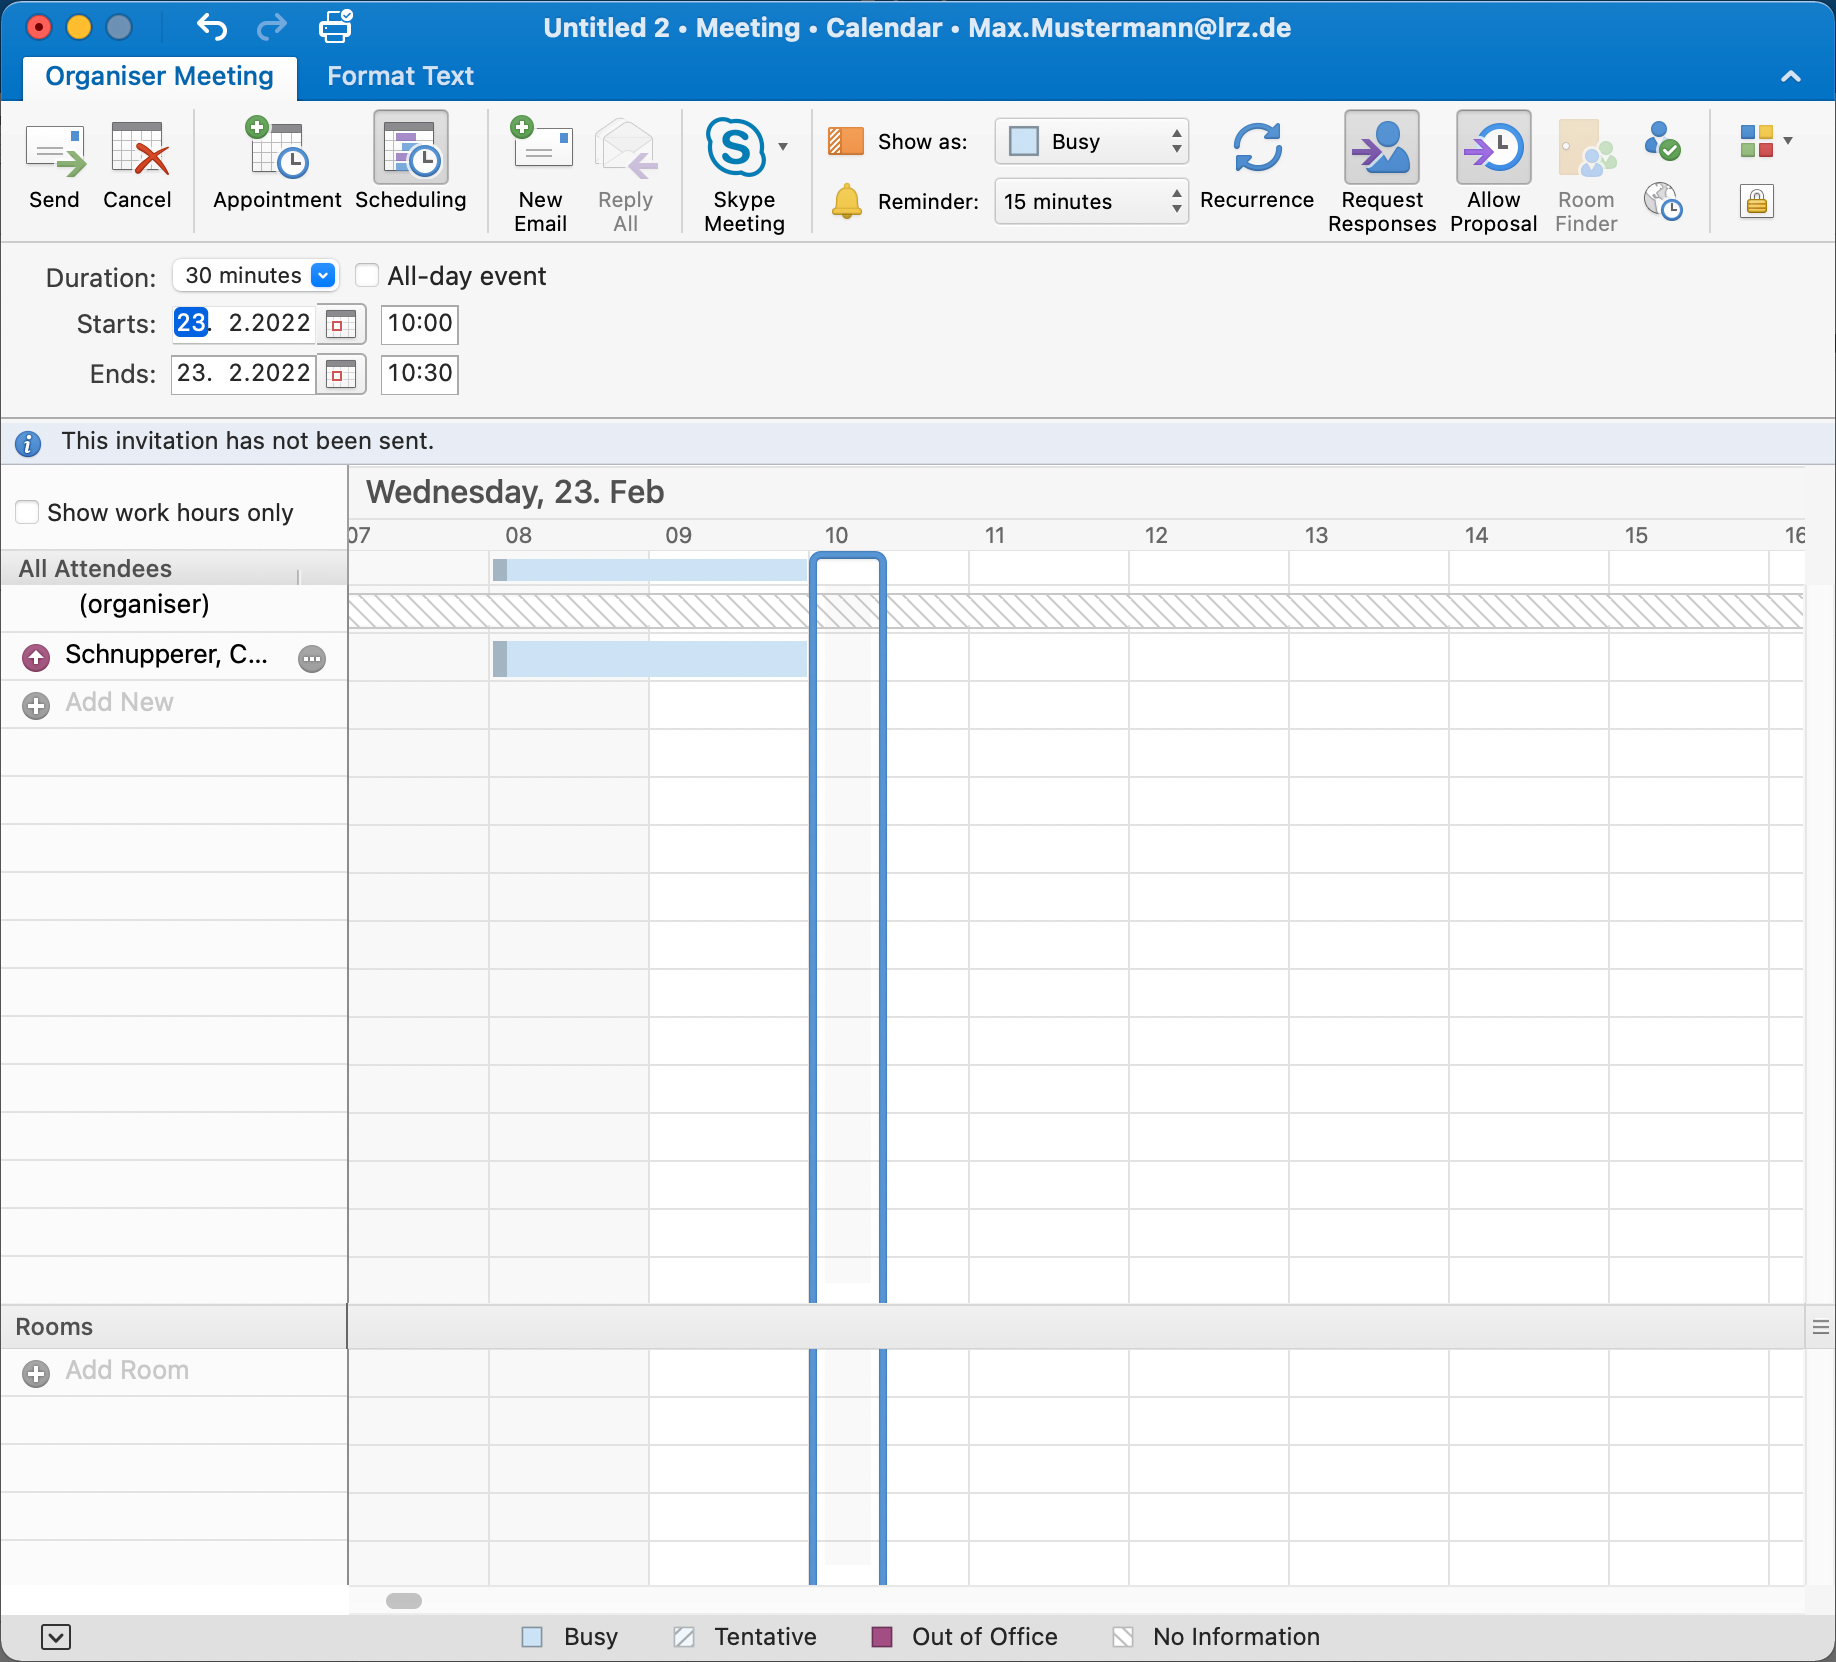
If you enable the free/busy only, others can see when you have appointments or when you are available. The default setting for most clients is the "Free/Busy only" permission level. This is helpful when organizing meetings, because it allows the inviter to see at a glance in the scheduling wizard when which participant does not have time or when the best time is.
In Outlook for Mac, you cannot open other people's calendars if you only have the "Free/Busy only" permission level. However, you can see the times in the scheduling wizard.
Proceed as follows:
- Switch to the calendar view,
- Click on Calendar Permissions in the ribbon,
- "Add user",
- Select person or group,
- Enter permissions.
In order to release or restrict the free/busy only for everyone, you must edit the permissions of the "Default" entry. There you can e.g. define that besides the free/busy time also subject and location or also all details are visible.
If you don't want your free/busy time to be visible to everyone, you can turn it off as follows:
- Switch to the calendar view,
- Click on Calendar permissions in the ribbon,
- Click on the entry "Default",
- In the "Read" section click the "None" button.
You can also add people in the way described above and specify in detail what they are allowed to do and what not.
Opening shared calendars and mailboxes
To open calendars or mailboxes shared with you, click File on the menu bar.
Then select "Open" from the list.
Click on "Other User's Folder..." to open the adjacent window. Here you can search for the mailbox with the shared resources.
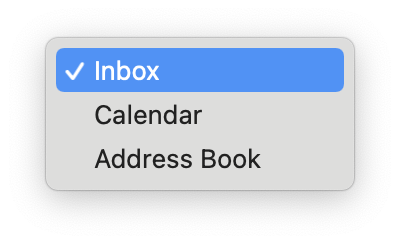
At the bottom in the middle under "Folder type" you can select whether you want to open the calendar, the inbox or the address book of the other mailbox.
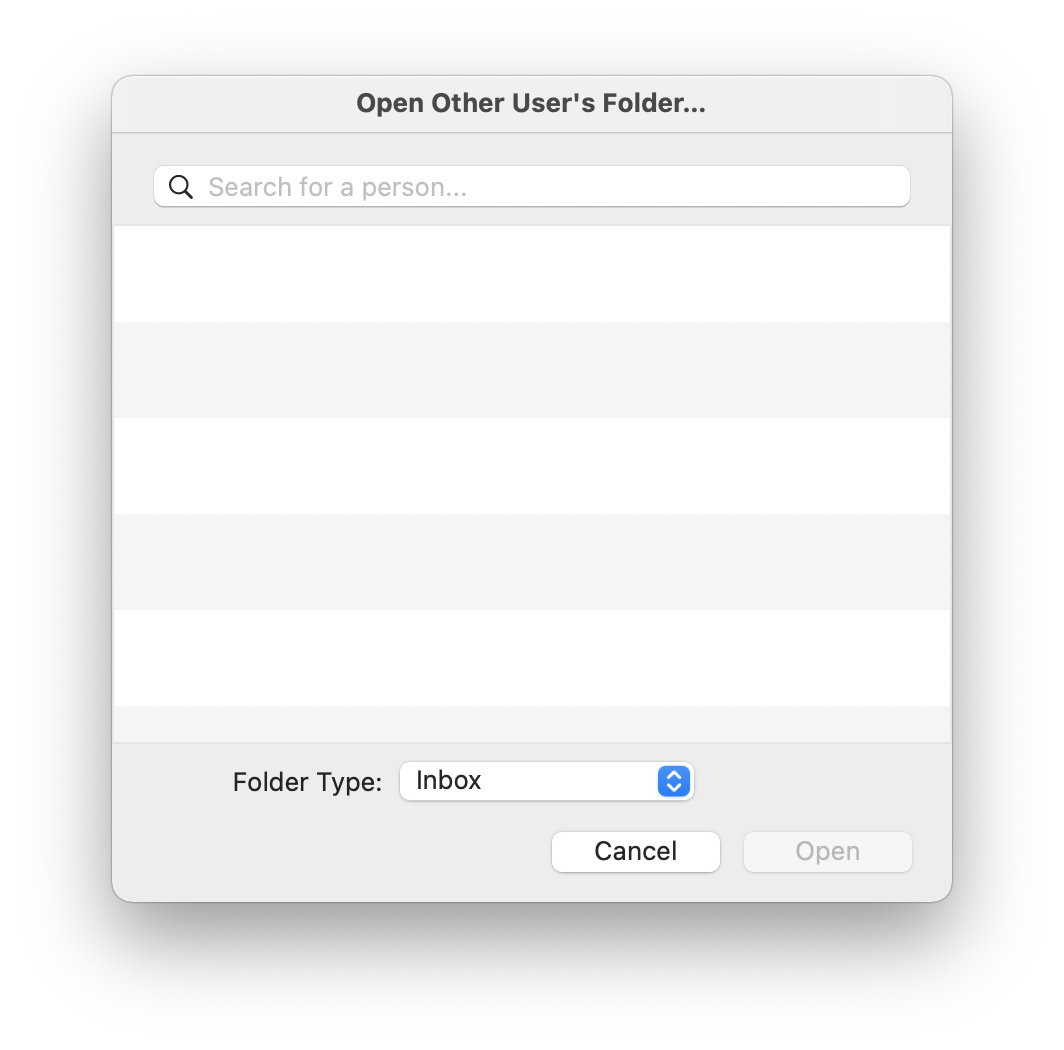
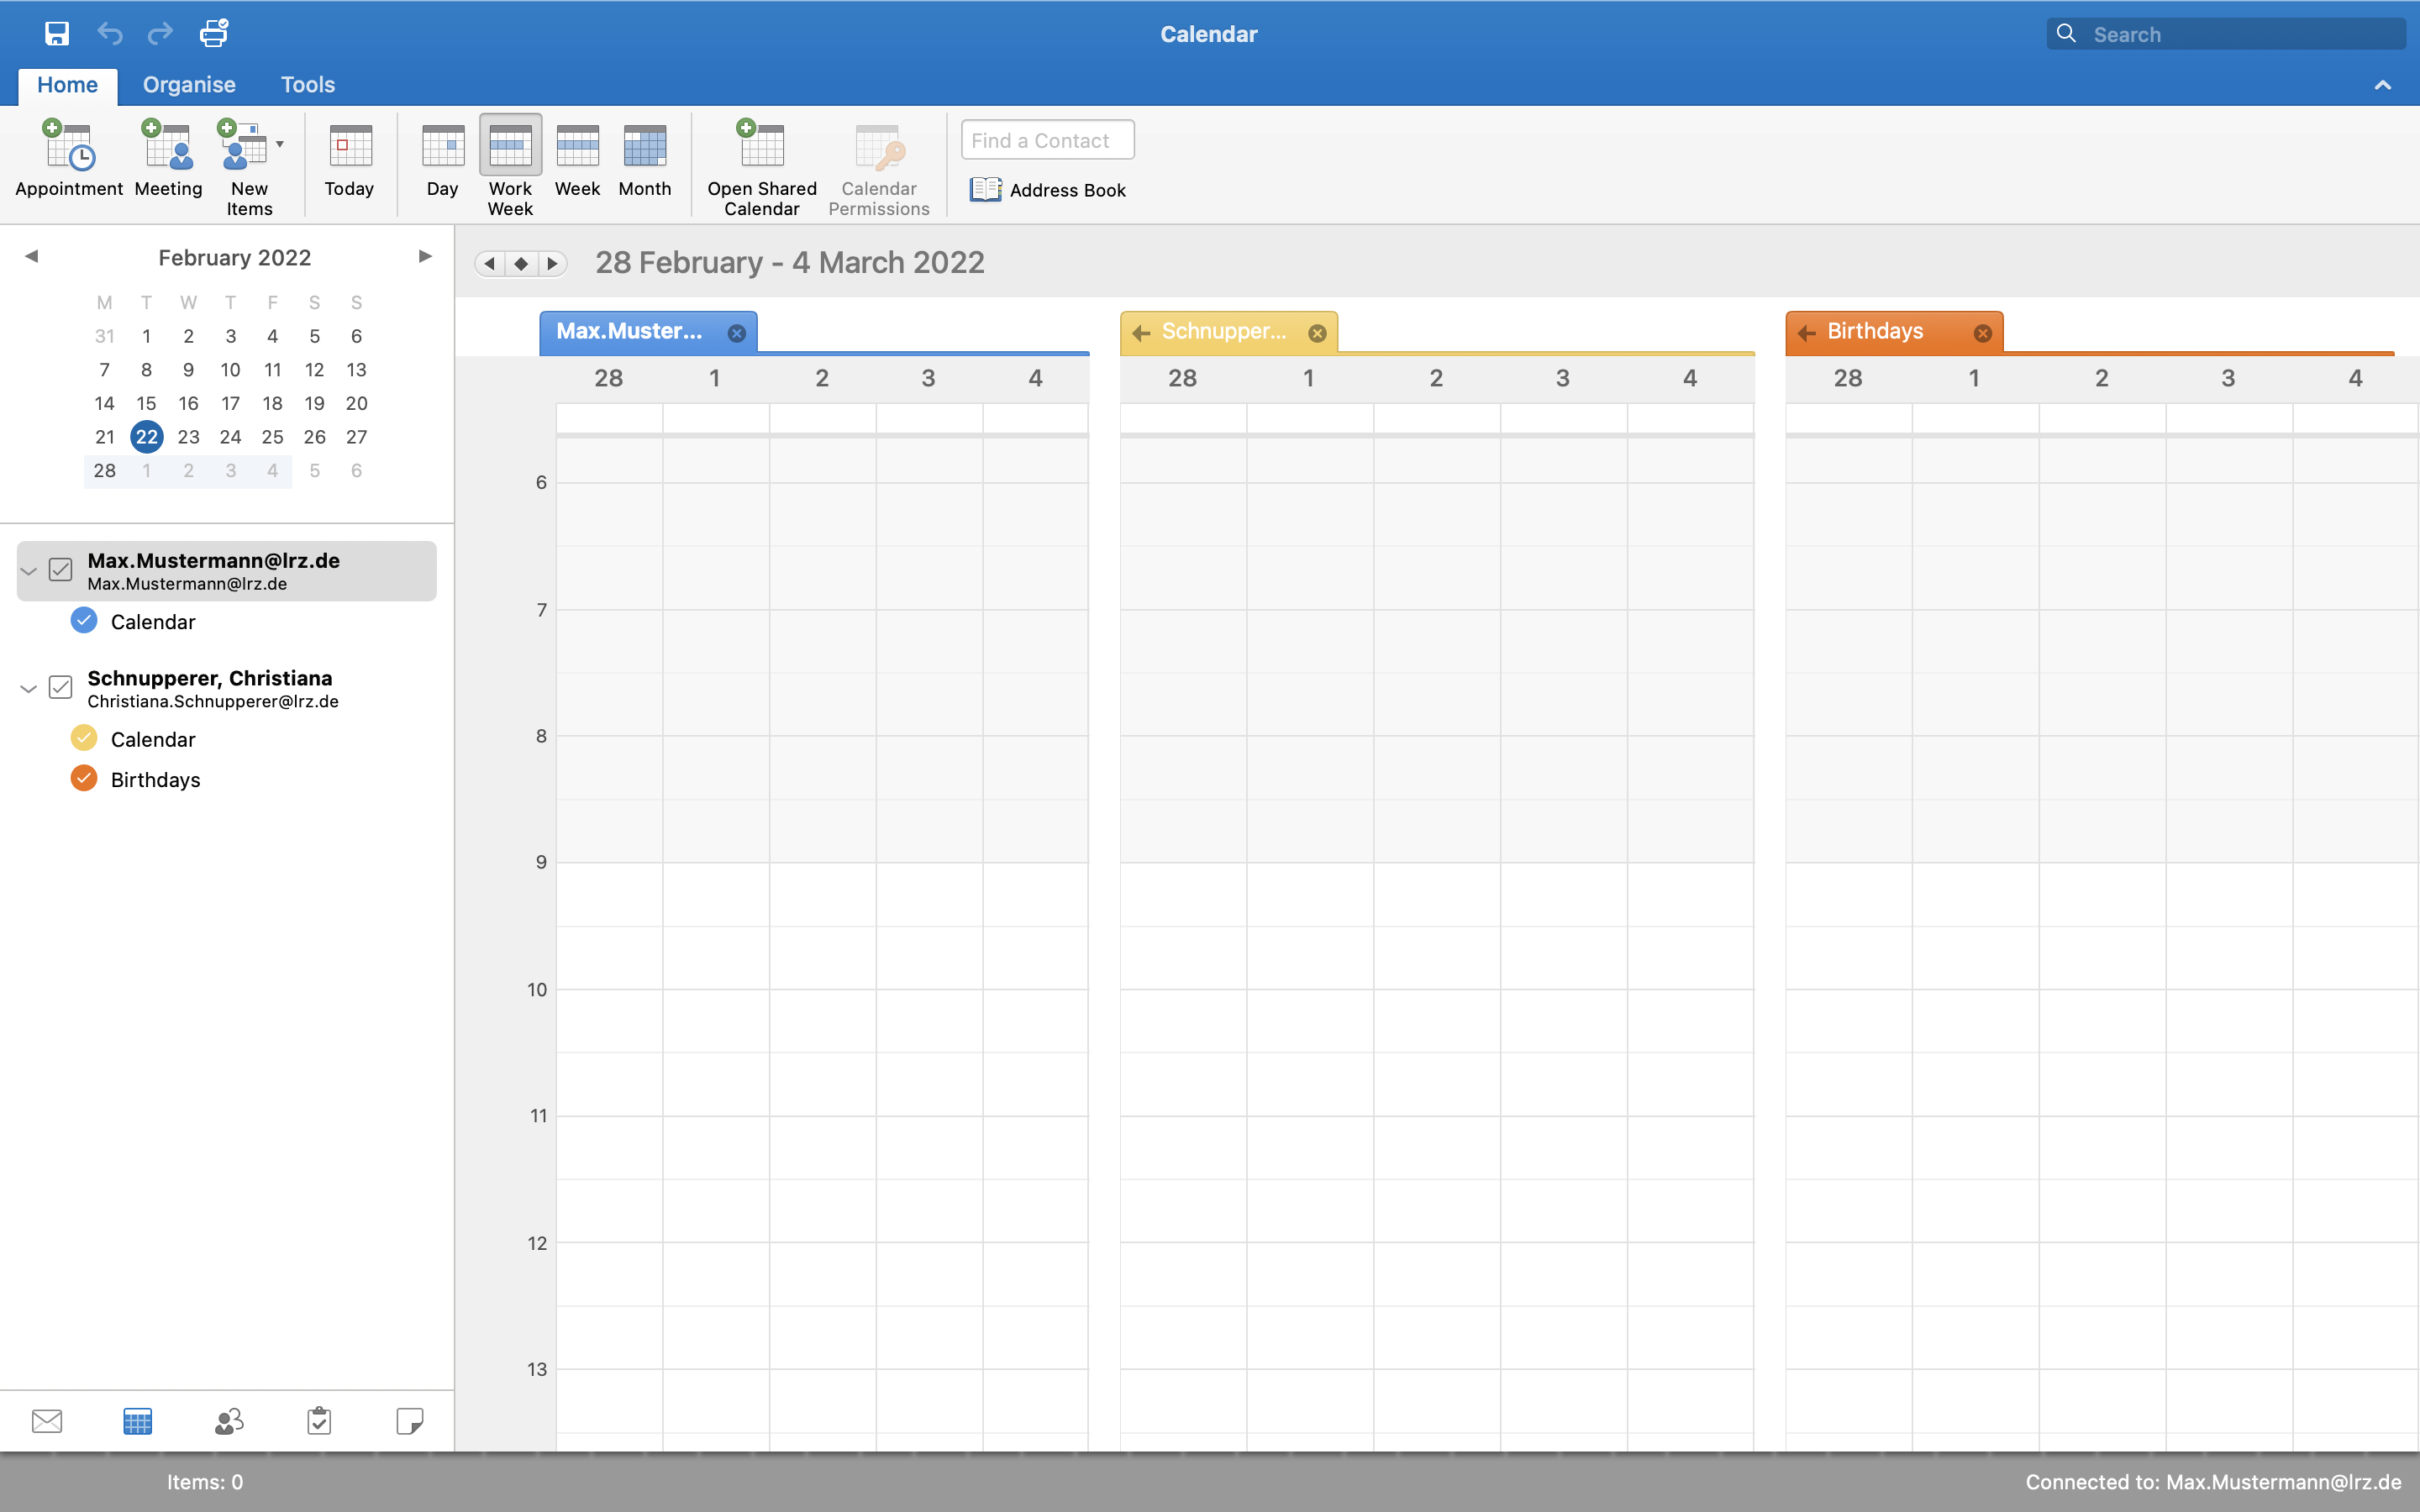
After you have selected the mailbox and the folder type, confirm with "Open".
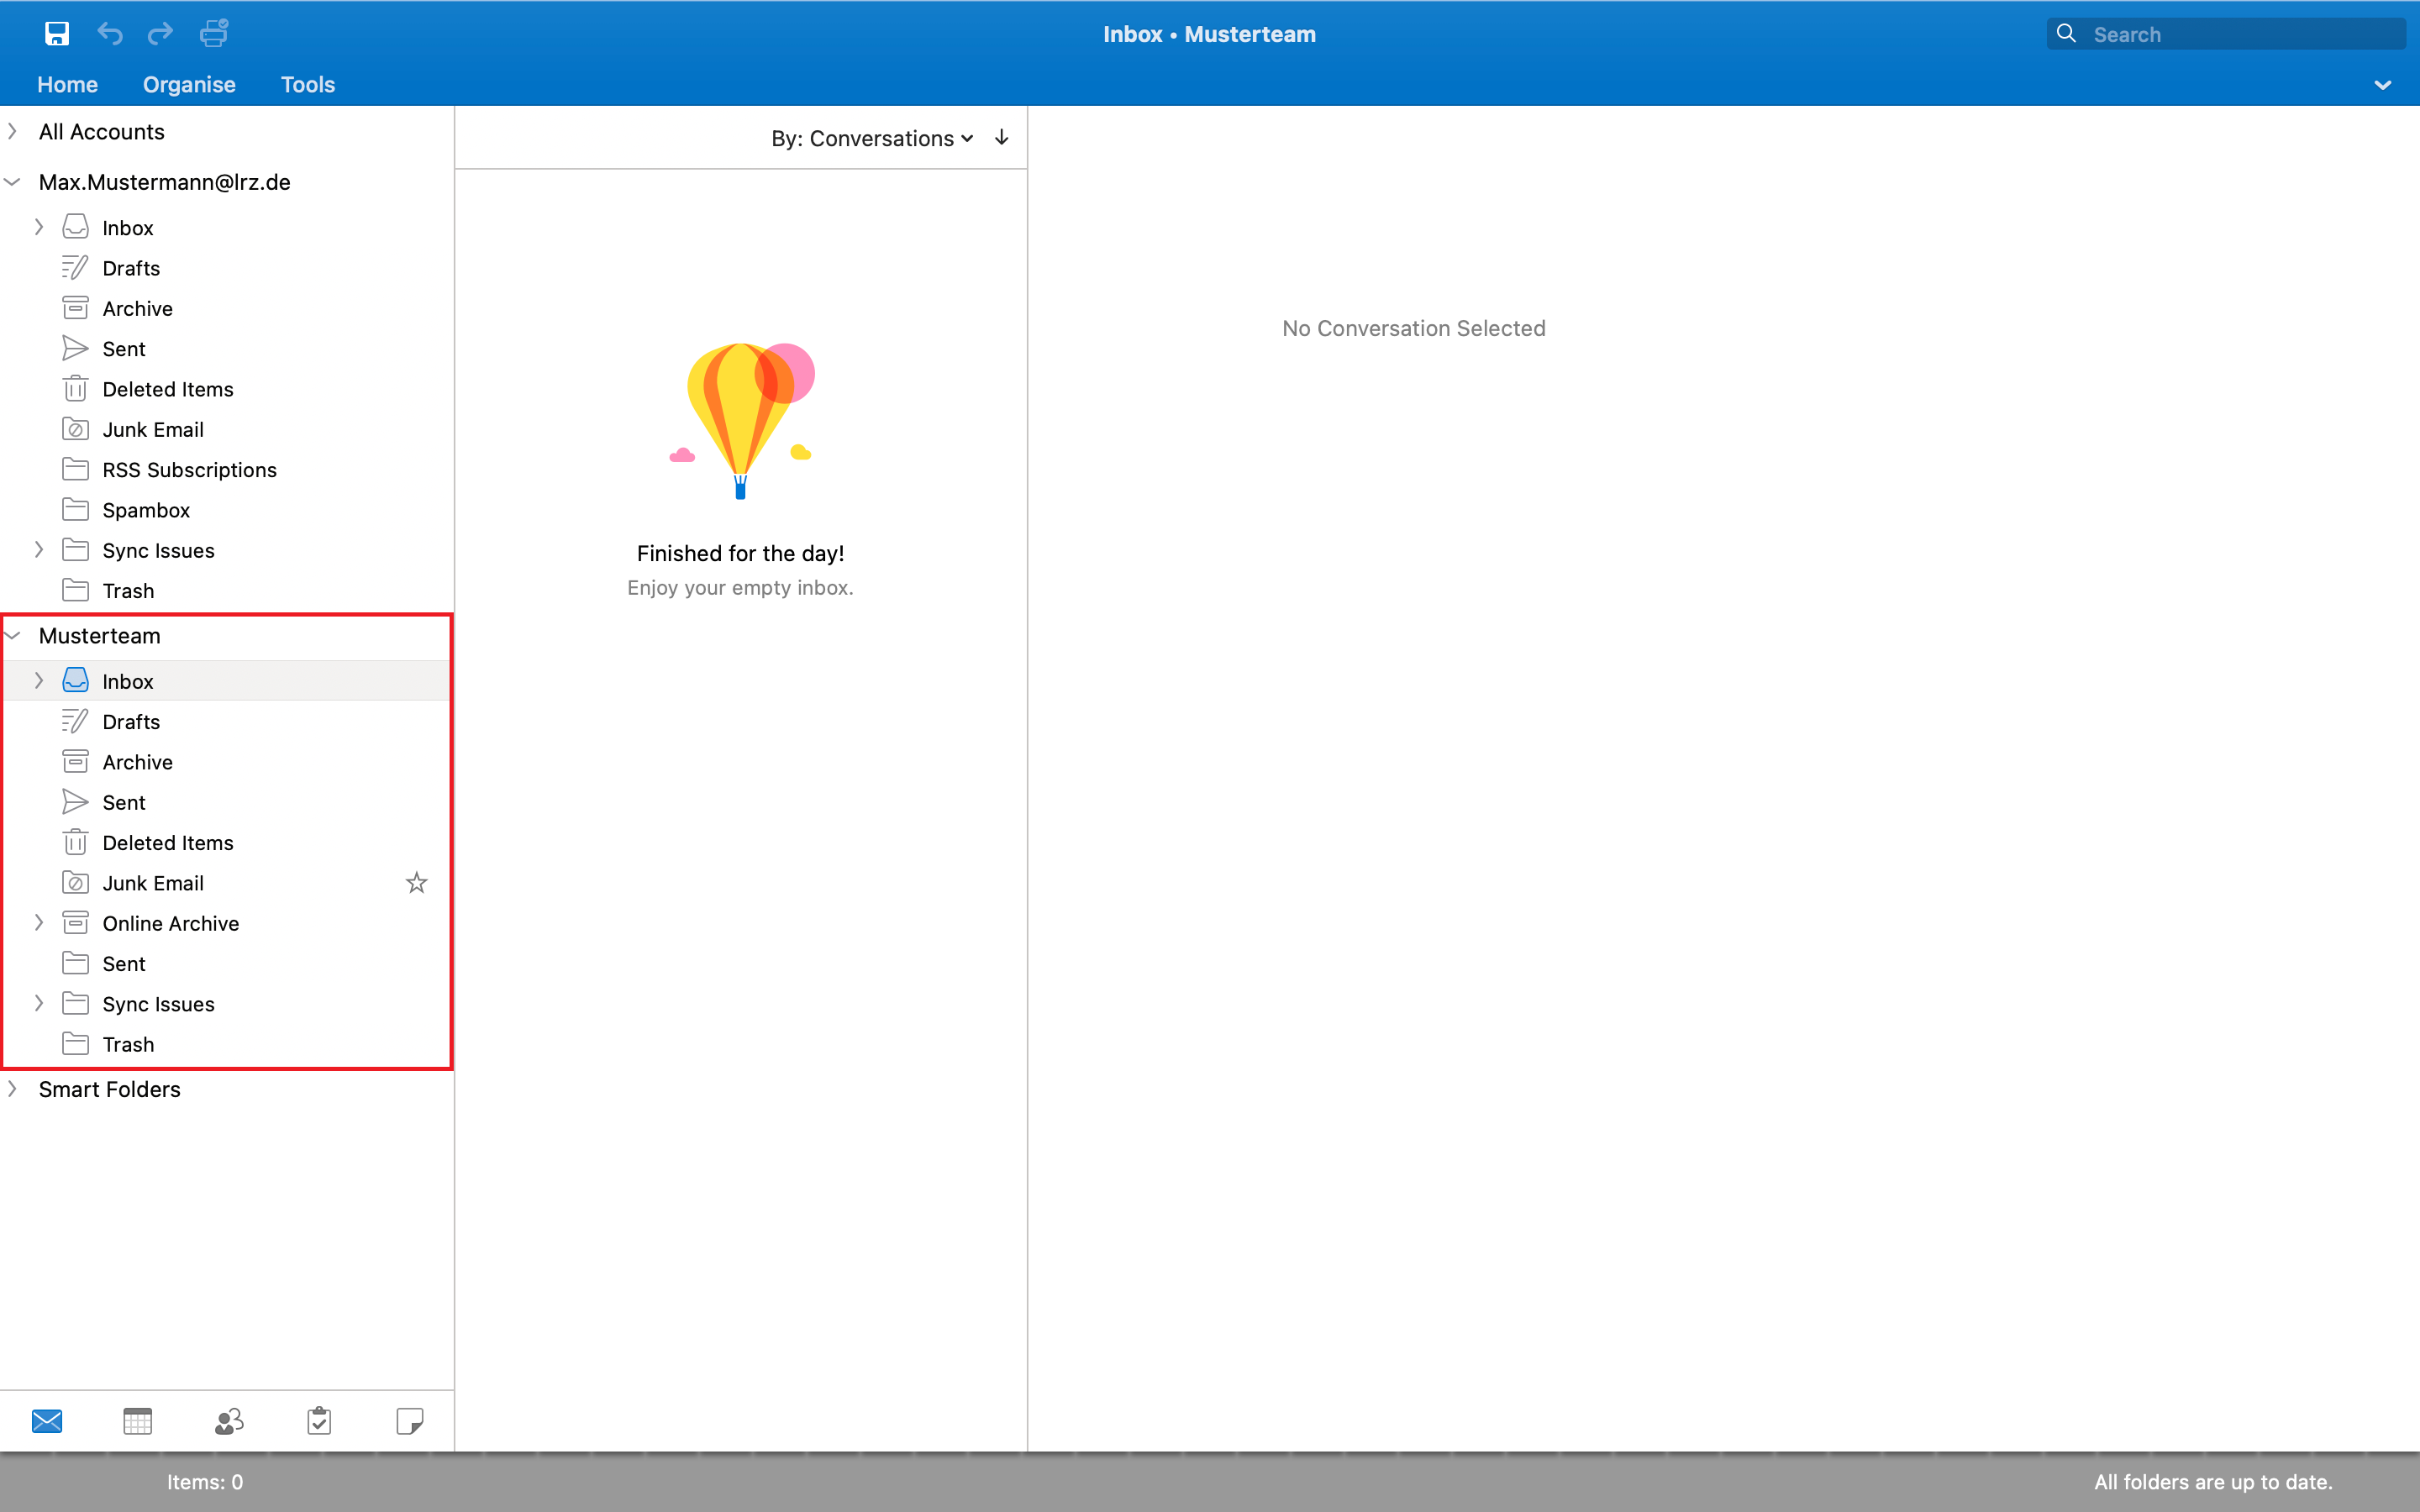
All folders to which you have rights are automatically included. For example, you have included the calendar and all sub-calendars shared with you at once.
Delegates
You may perform the following tasks, provided you have been authorized to do so:
- Write mails on behalf of the other person:
When writing a new email, you can select from the drop-down menu next to "From:" whether the email should be sent with your sender address or the other person's sender address. In the latter case, your mail address will be recorded in an additional header line "Sender", so that it is obvious for the receiving persons who sent the mail.
- Replying to mails in the name of the other person: analog.
- "Save sent items in the Sent Items folder of another user": see section of the same name in Outlook Online Help.
- Creating meeting requests/meetings on behalf of another person:
From another person's calendar, automatically create requests on their behalf.
Delegation settings
Open the Outlook settings. To do this, either click on "Outlook" in the menu bar and then select " Preferences..." or press the command key and the comma at the same time. Select "Accounts" and then select your Exchange account.
Then in the settings, click on "Advanced" in the bottom right corner. In the advanced settings, switch from "Server" to "Delegations".
Set up delegate access and "Send on Behalf" for others
Open the advanced preferences as described above and click on the plus under the upper field.
A window will open where you can search for the person in the address book. If you do not find the person you want to enter as a delegate, he/she is not in the address book and you cannot enter him/her as a delegate.
If the person is in the address book, select him/her and confirm with "OK".
In the next step, you can select what your delegate is allowed to access. By default, it is set that the permission "Editor" is assigned for calendar and tasks and additionally that your delegate receives meeting invitations.
You can change the permission level for tasks and calendar to Reviewer (read only) or Author (read and edit). In addition, you can also assign these 3 permission levels for your inbox, notes, and on your contacts.
A delegate, as long as you do not allow them to do so, cannot view private items. If you want to allow this, check the box "Delegate can see private items".

After you have set the permissions as you wish, you can have them sent to you as a summary by e-mail. To do this, check the "Send authorization summary" box.
Confirm with "OK".
Use Delegate access and "Send on Behalf
Open the advanced settings as described above and click on the plus under the lower field.
A window will open where you can search the address book for the person who gave you the delegation. If you do not find the person whose proxy you want to make, he/she is not in the address book and you will not be able to open their mailbox.
If the person is in the address book, select them and confirm with "Add" and then again with "OK".
You will be asked again if you want to allow the configuration by the server. Here you have to check the box and then finish the setup with "Allow".
Email Rules
To increase the clarity in a mailbox, it is often useful to automatically sort incoming e-mails into other folders based on certain criteria. Exchange offers you the possibility to create server-side filter rules.
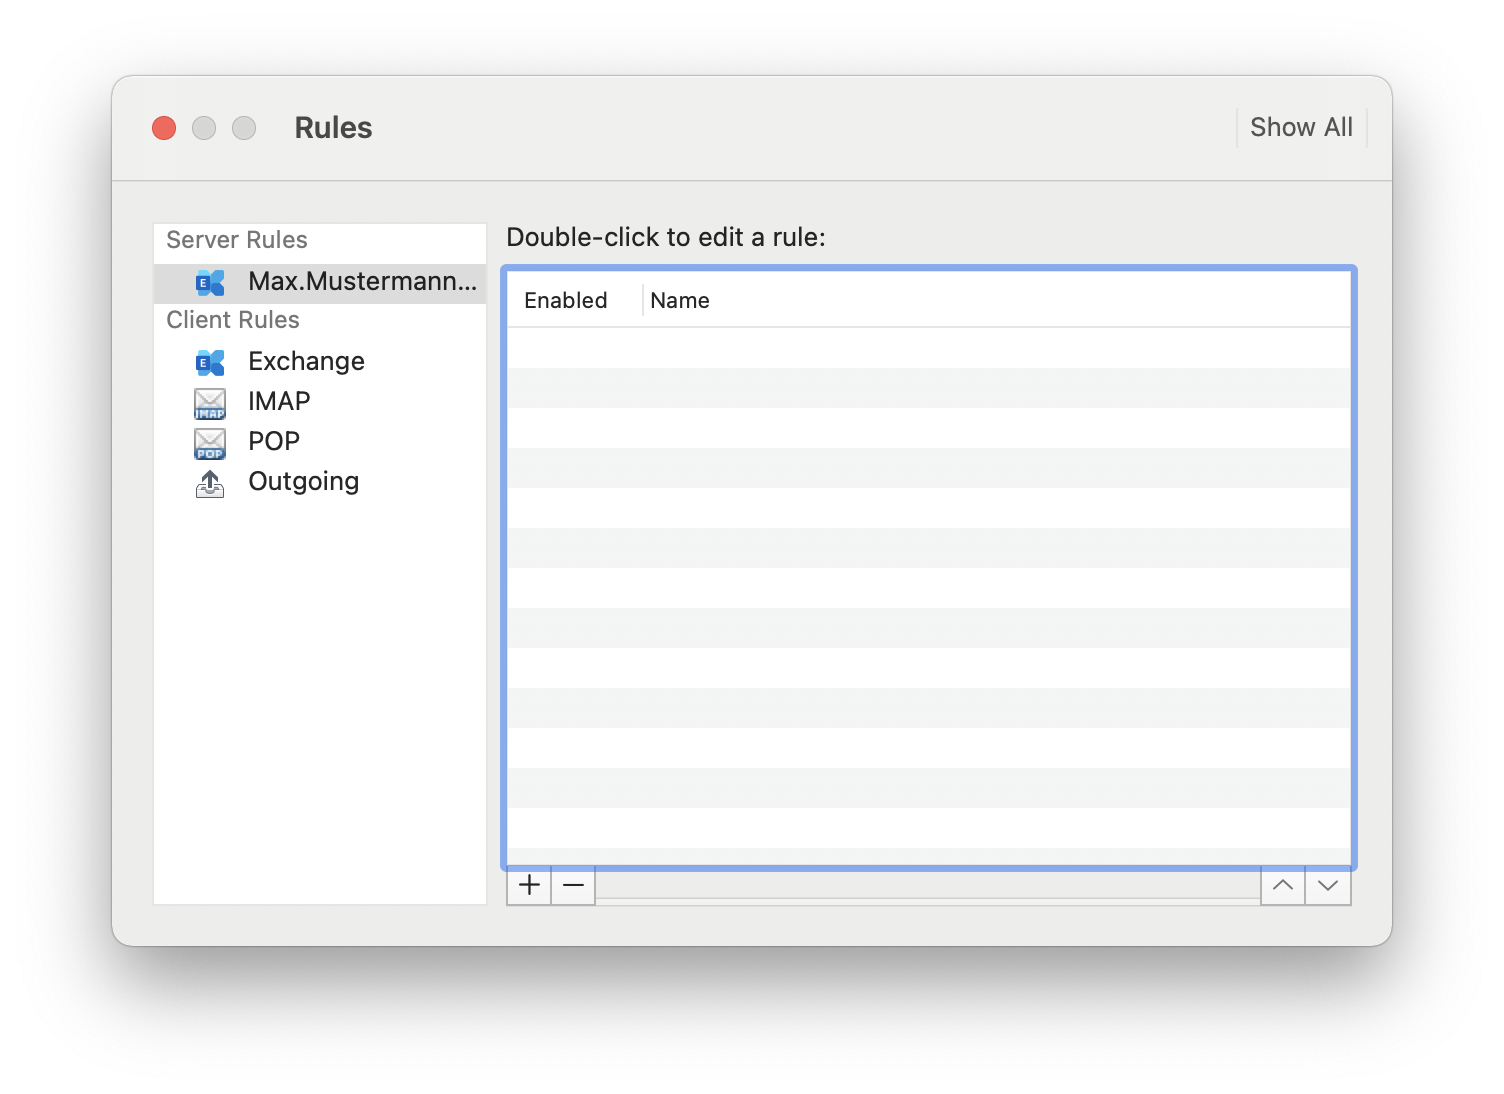
In Outlook, you can create these by clicking on "Tools" in the menu bar and then selecting "Rules...". When you click on it, the adjacent window will open.
Here you can create new rules or edit existing ones.
Examples for filter rules
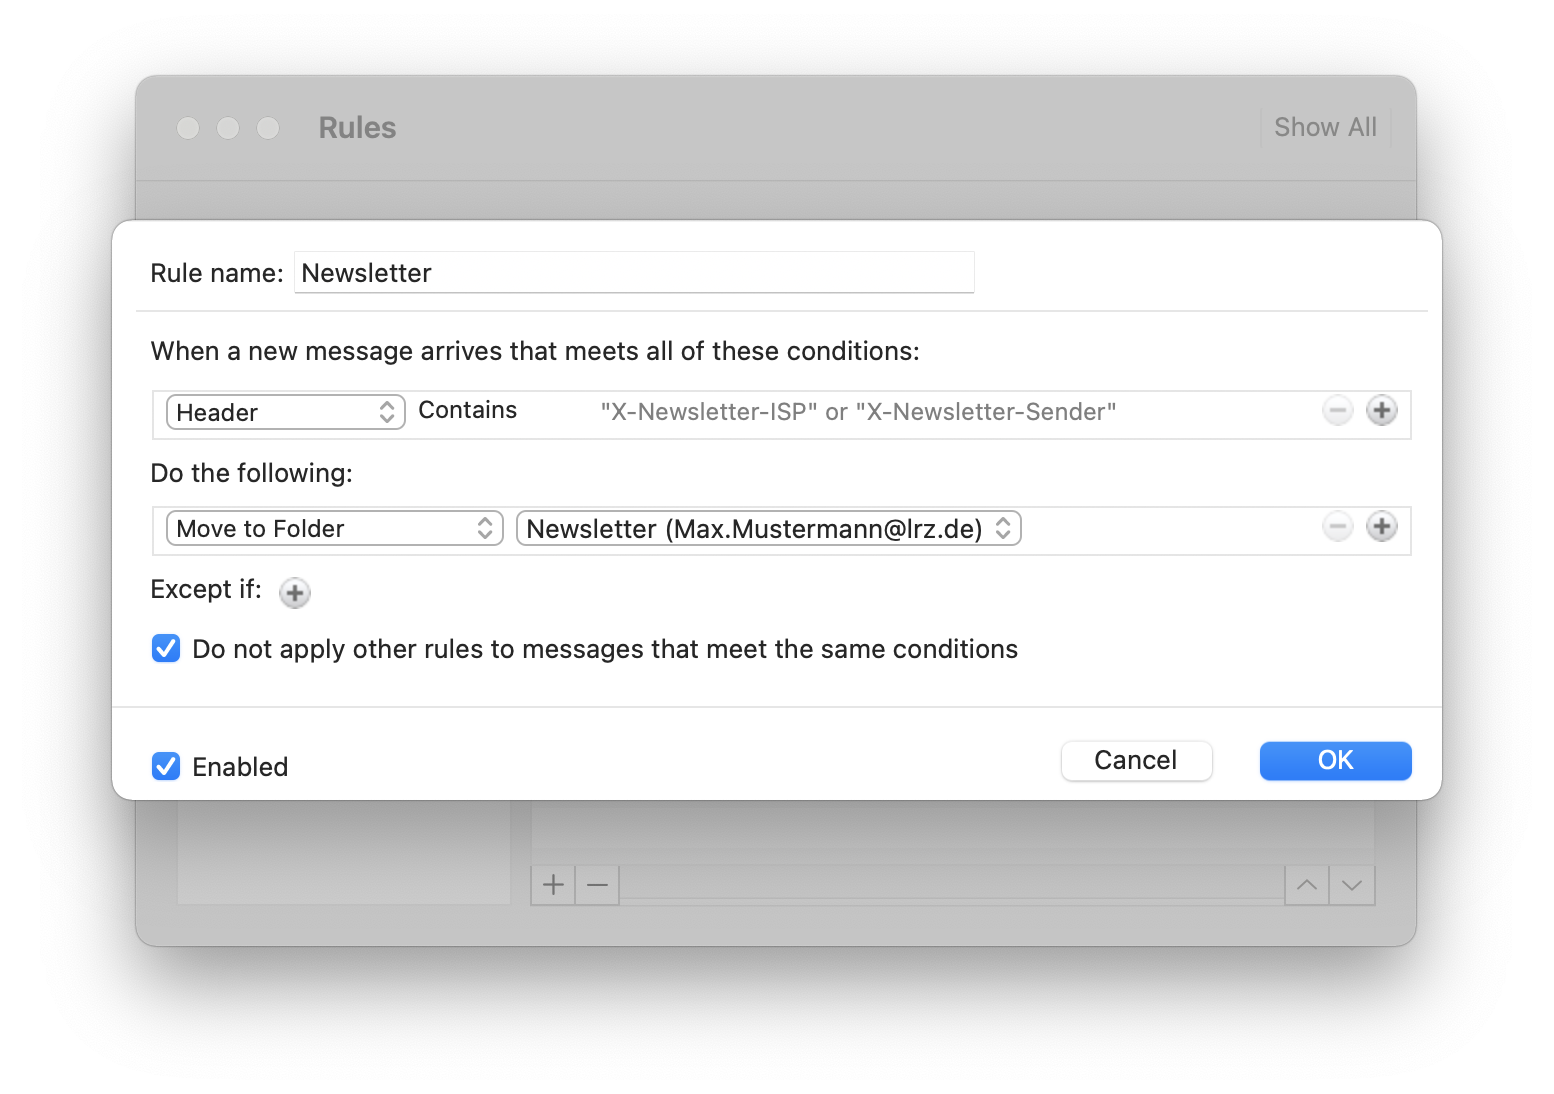
Filter newsletters...
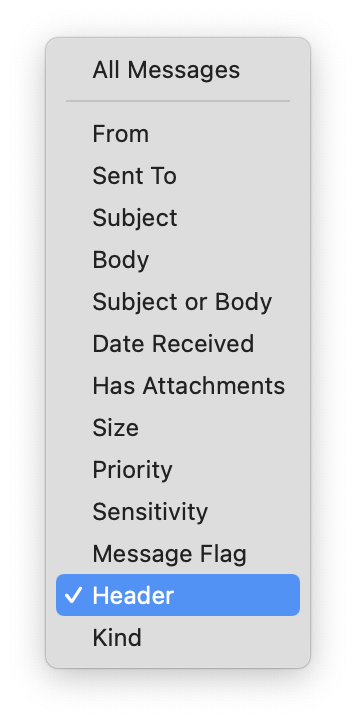
Select "Header" as condition and then add "Contains 'X-Newsletter-ISP' or 'X-Newsletter-Sender'" at "Add search terms".
Then select another folder to move the newsletters to and finish the wizard.
Filter mailing lists...
Select "Header" as a condition and then add "Contains 'List-ID' or 'List-Unsubscribe'" to "Add search terms".
Then select another folder to move the mailing list to and finish the wizard.
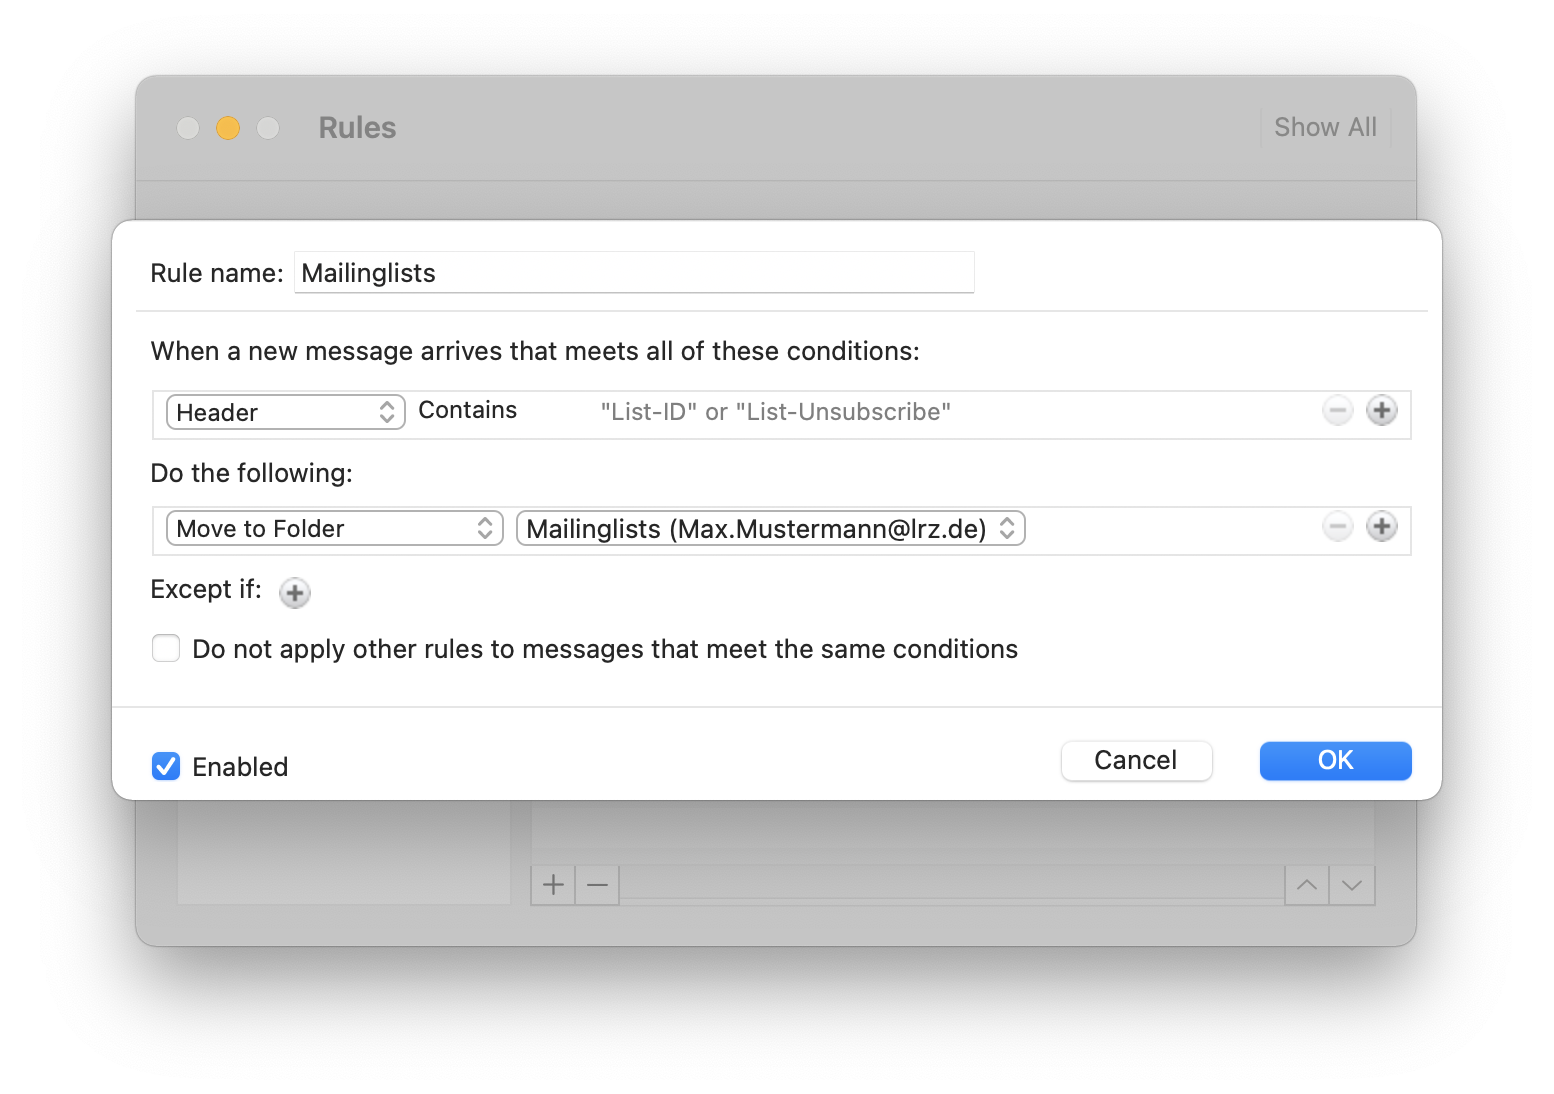
Note, if you want to filter newsletters as well, that many newsletters also use these fields. That is why the filter for newsletters should come before the filter for mailing lists in the list of filter rules.
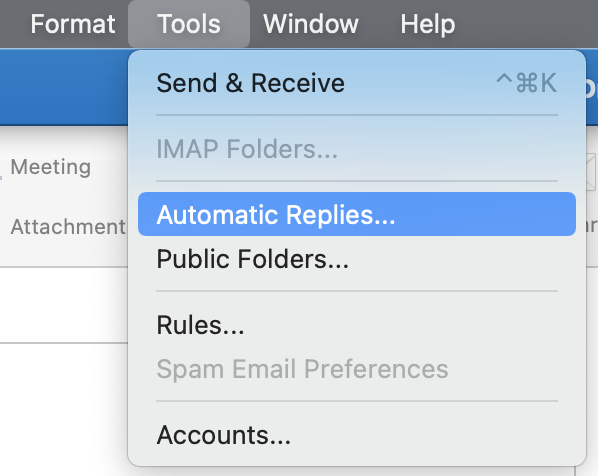
How do I set up an out of office message?
To do this, proceed as follows:
- Tools → Automatic Replies...
You can configure different out of office messages for senders inside (all users on the Exchange Server) and outside the organization.
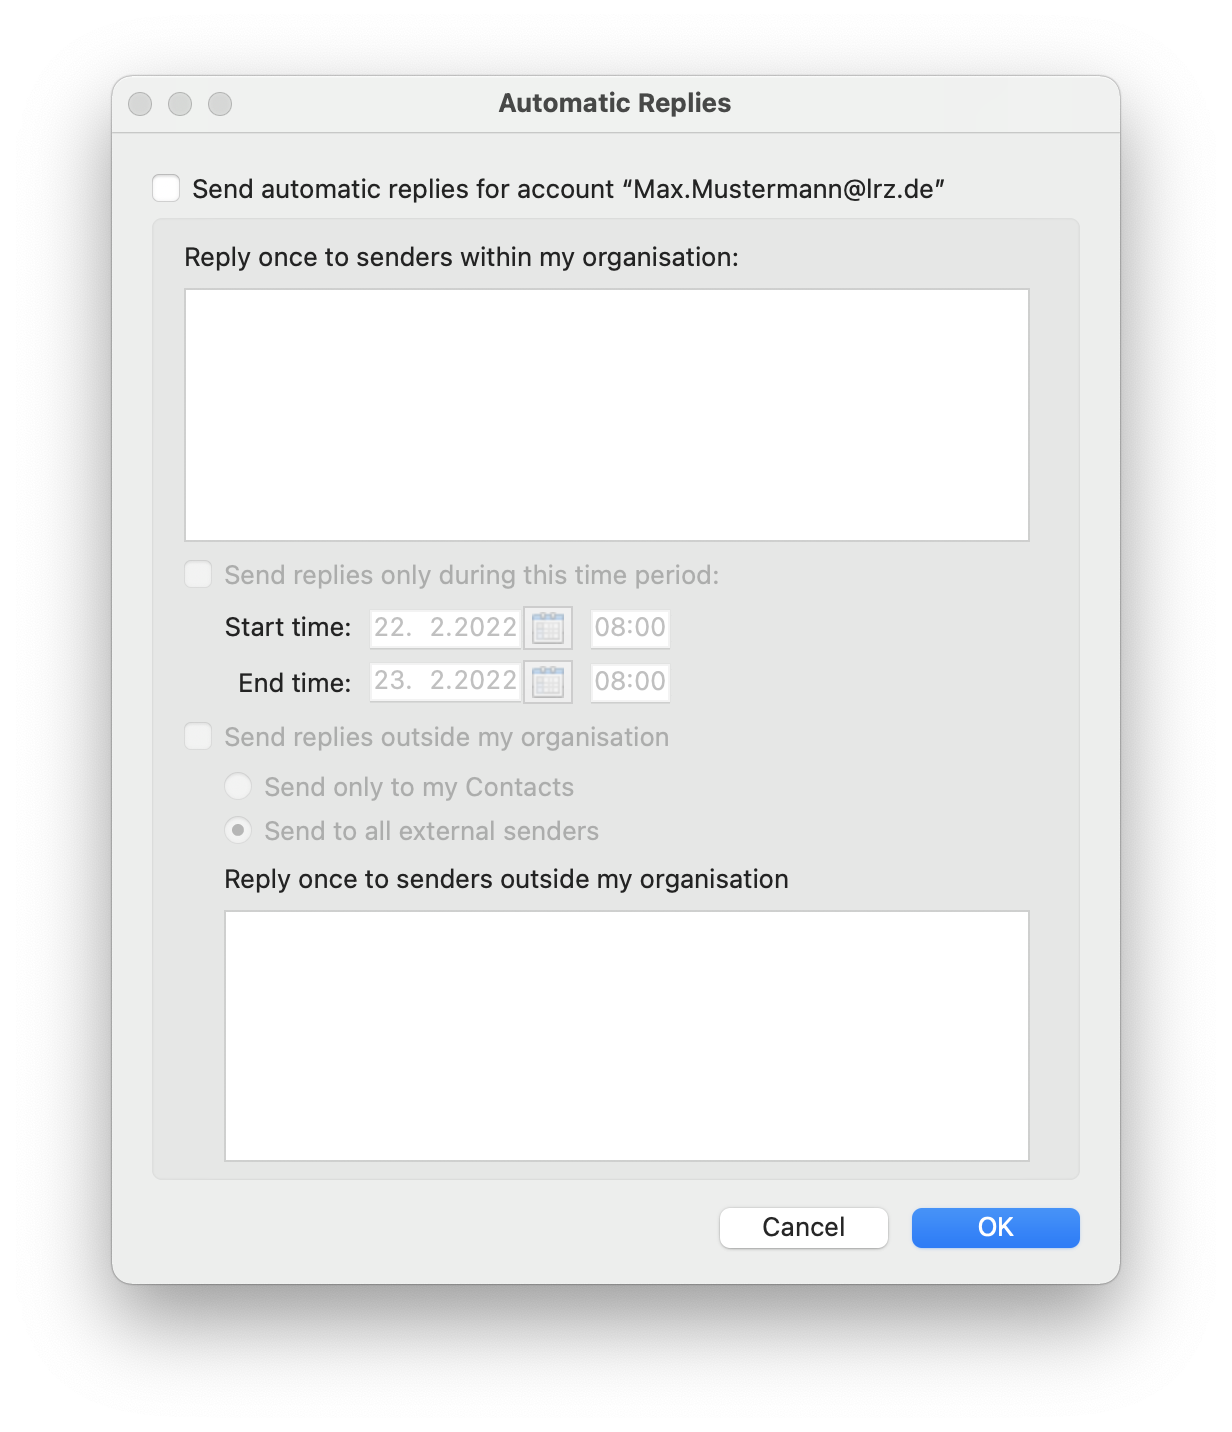
By the way, your out of office message will not be triggered for mail from mailing lists and mail marked as spam.
Typical error messages
Why can't I send e-mails anymore?
If you have sent a lot of emails or emails with a high number of recipients in one day, it is possible that you will not be able to send any more emails and when you try, this message will pop up at the bottom right. After clicking you will see more details.

As explained in this message, you have exceeded the limit of 250 recipients within 24 hours. The limit resets automatically after 24 hours.
The purpose of the limit is to ensure that only a limited number of emails are sent, even via compromised accounts, thus minimizing the risk of LRZ mail servers ending up on so-called "denylists".
Full mailbox
Your mailbox has a certain size (usually 5 GiB), if you exceed it you will not be able to send or receive emails.
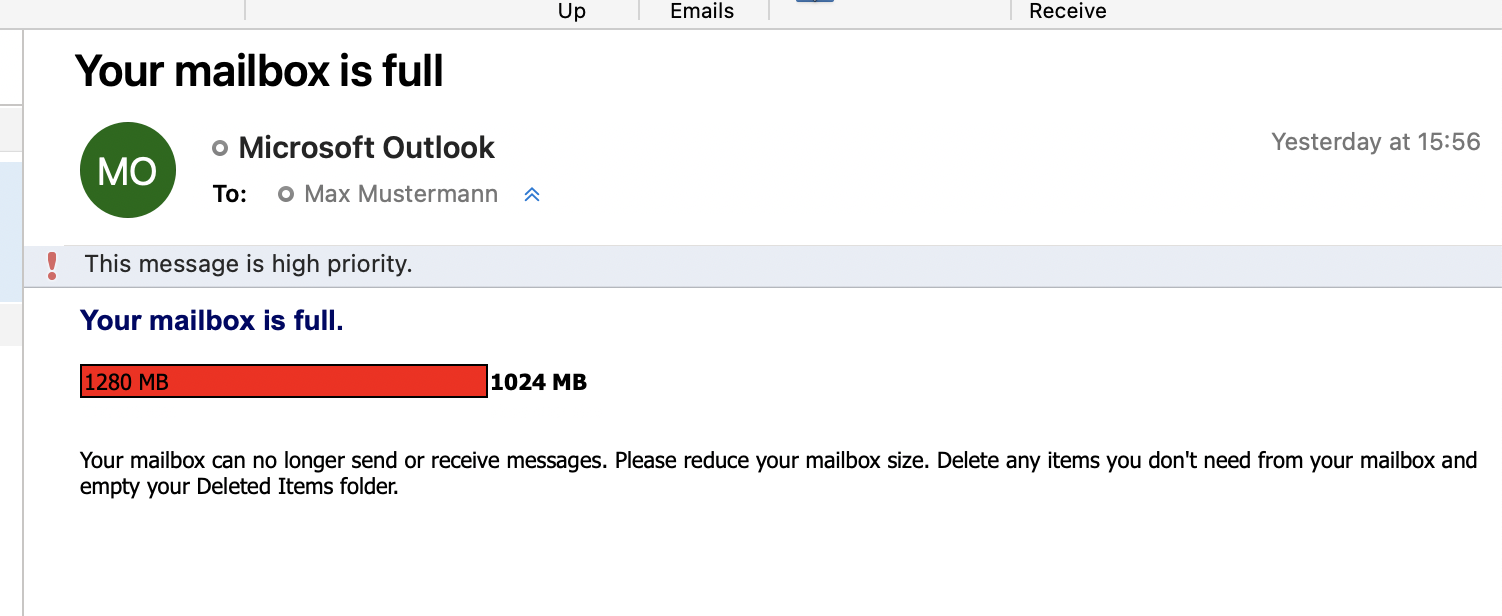
When you reach the limit, you will first receive a warning mail (From: Microsoft Outlook - quota-warning@ads.mwn.de), if the memory consumption continues to increase, you will not be able to send any messages, if the quota is significantly exceeded, you will not be able to receive any messages either.
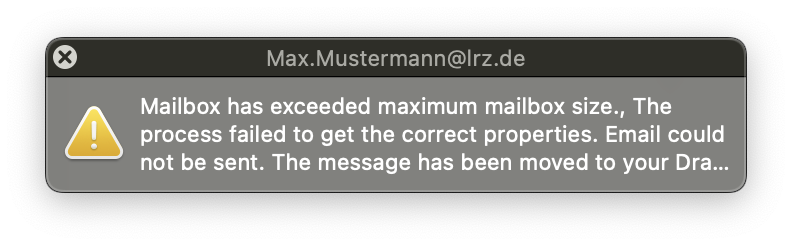
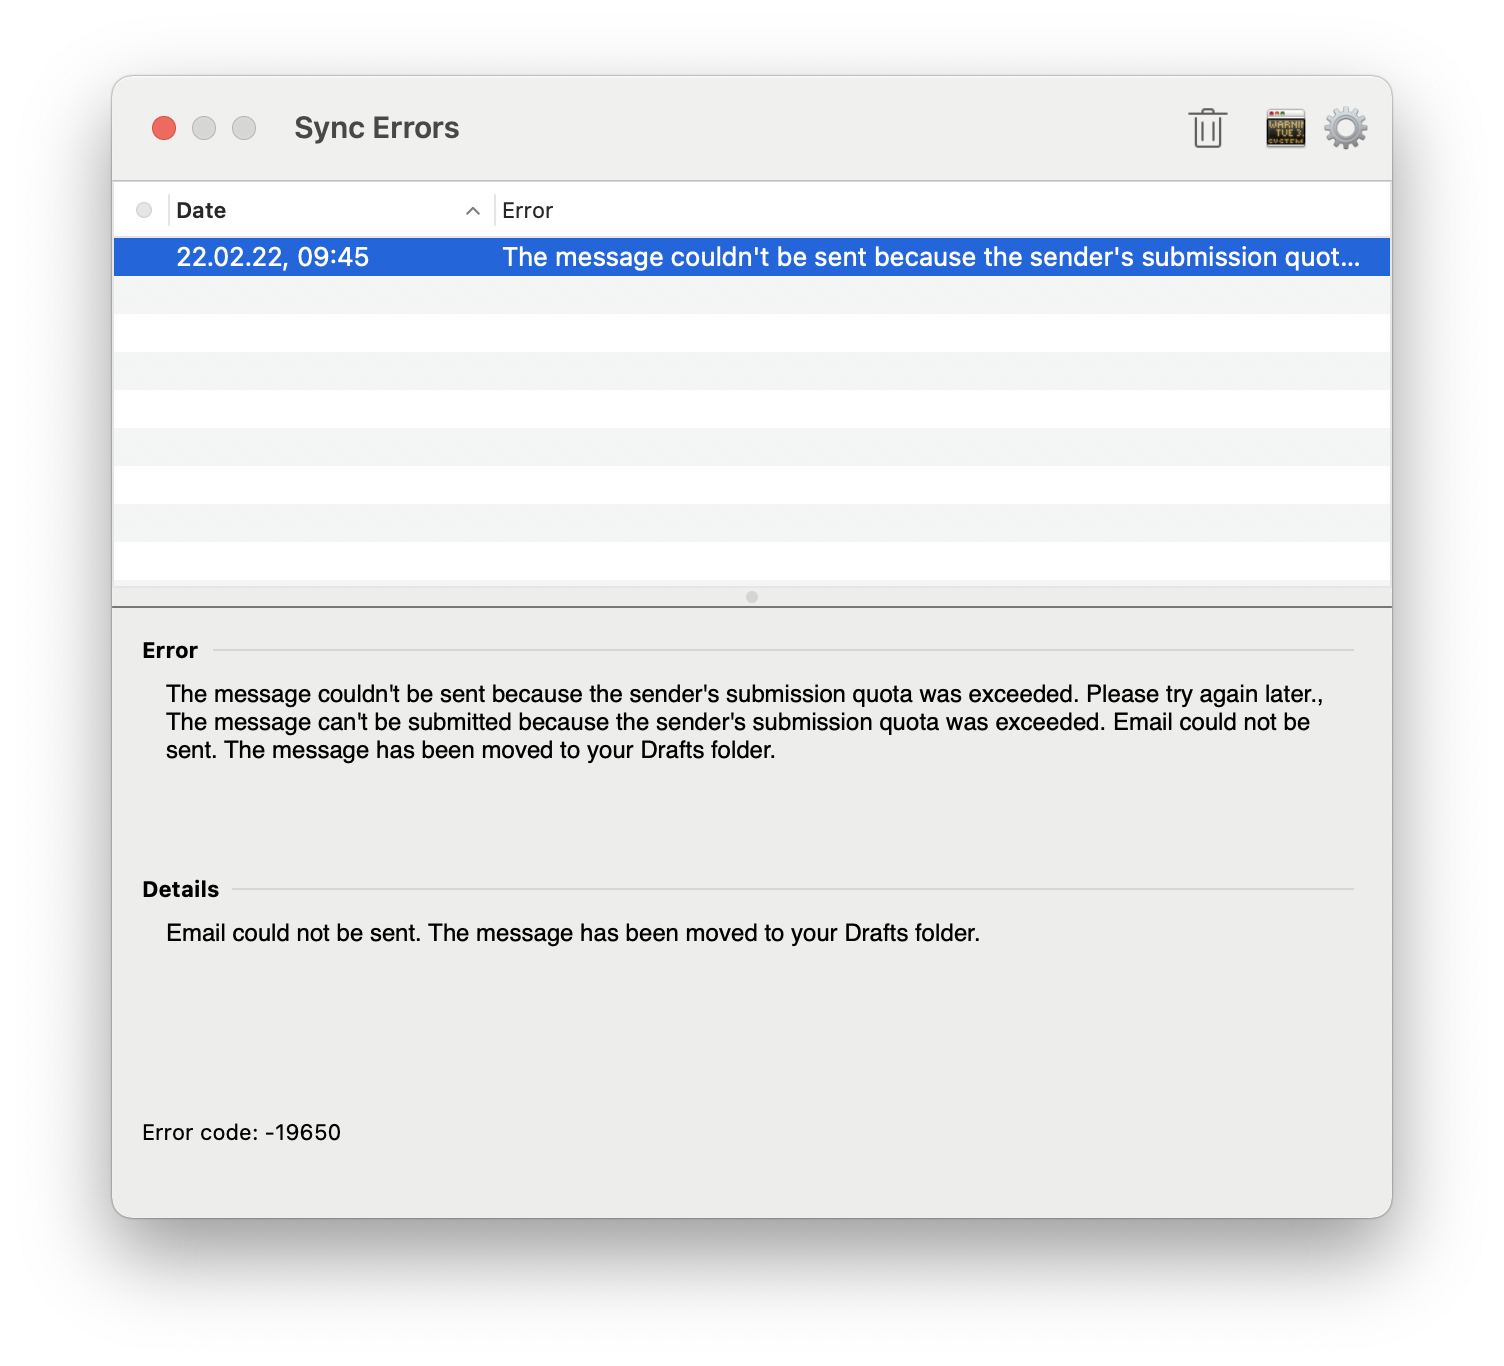
When you have reached the limit that you cannot send any more emails, a message will pop up at the bottom left when you try to send a mail. This message says that the message could not be sent because you have reached the maximum mailbox size. After clicking on it you will see more details.
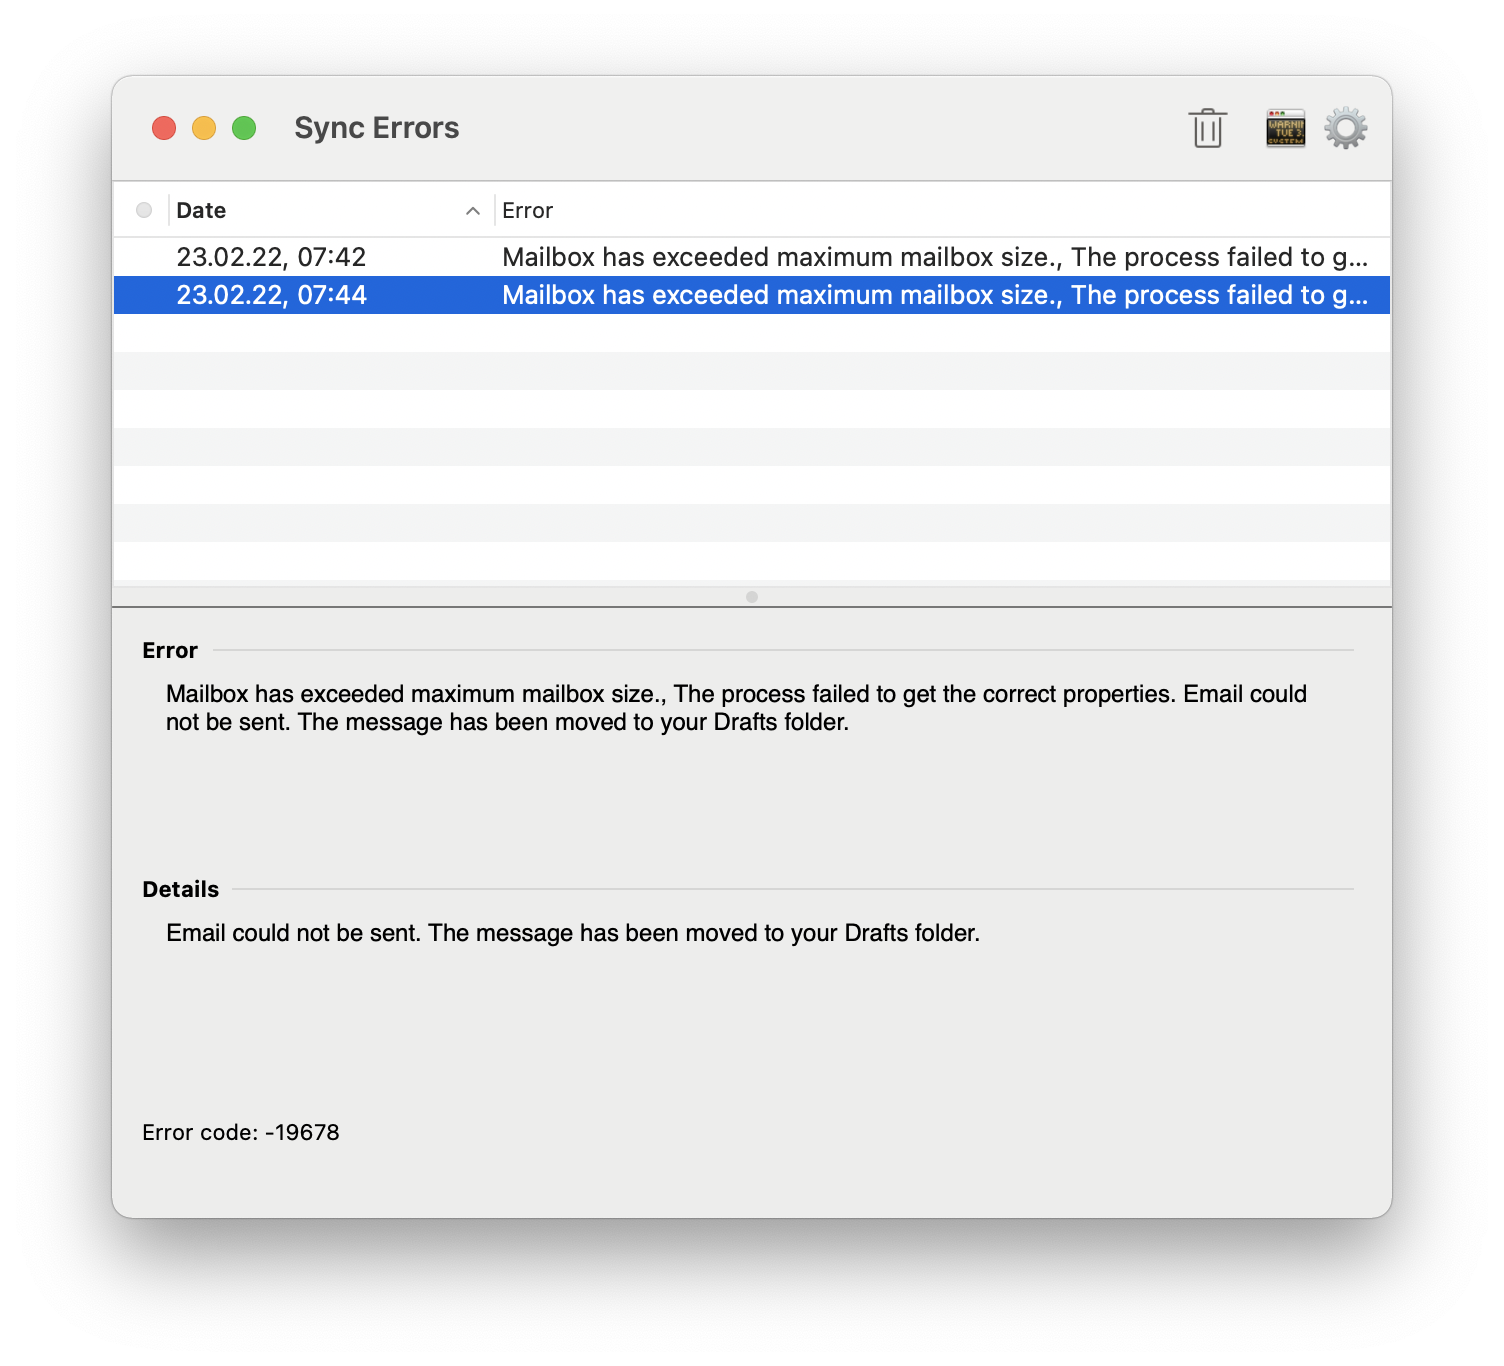
A window opens in which the error is described once again.
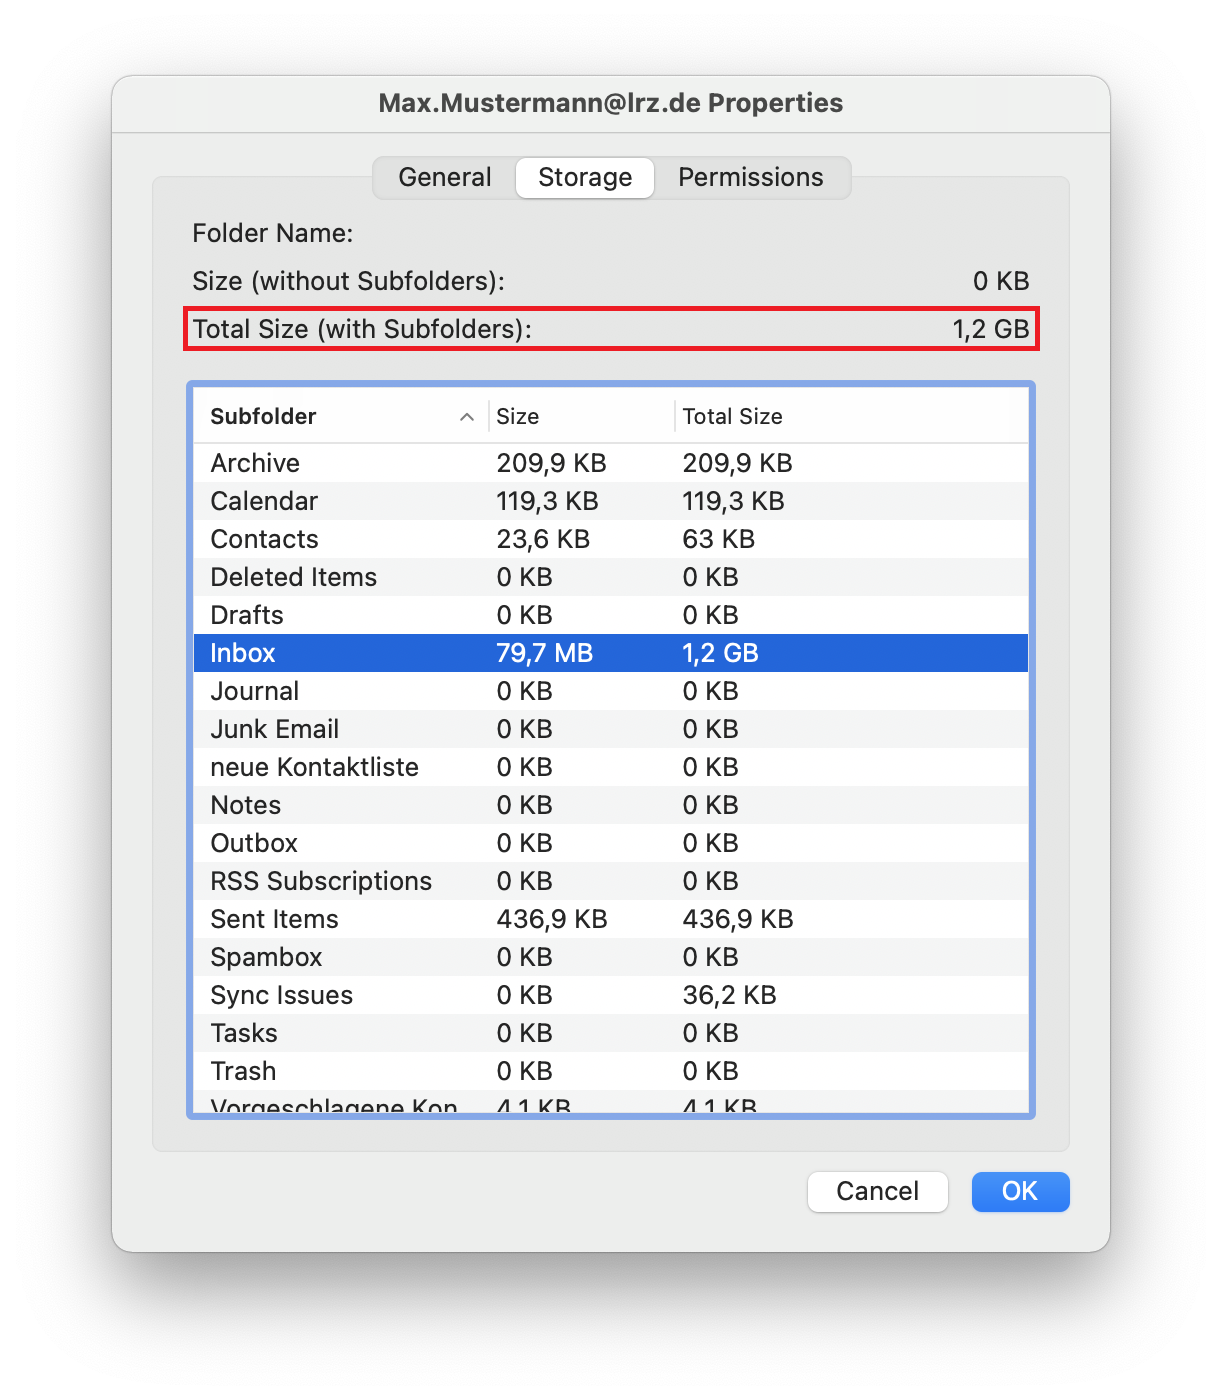
You can see the current size of your mailbox by right-clicking on the top mailbox level (your email address above Inbox).
Then select "Properties..." and switch to "Storage". There you can also see the sizes of the individual folders. Unfortunately, you can't see what quota (how big your mailbox may become) you have, nor how much percent your mailbox is occupied. But you can check this in Outlook on the Web.
Encrypt and sign
In order to send e-mails signed or encrypted with S/MIME using Outlook, you need a personal user certificate.
As a member of TUM, you can find information on how to apply for a certificate at https://www.it.tum.de/en/it/certificates/. If you have any difficulties in doing so, please contact the IT support of TUM (it-support@tum.de).
For the other institutions of the MWN, we are currently not aware of any way to obtain a personal user certificate.
Please pay attention to the correct format when downloading your certificate. Unfortunately, some operating systems (e.g. Windows, MacOS) only support TripleDES-SHA1.
For further information, please visit https://doku.tid.dfn.de/de:dfnpki:tcs:usercert#auswahl_des_key_protection_algorithms_in_formularen_fuer_p12-dateien.
Please note that the encryption method with S/MIME described here is not compatible with the PGP method which is especially widespread under Unix/Linux. PGP is not supported by Outlook and Outlook on the Web.
Briefly, the essential properties of signed and encrypted e-mails:
- Signing an e-mail ensures that it cannot be manipulated unnoticed on its way from the sender to the recipient. Whether the e-mail is transmitted in encrypted form depends on whether the mail systems involved support transport encryption.
- By encrypting an e-mail, the content is already encrypted before it is sent and is therefore transmitted in encrypted form (and also stored in the mailbox in encrypted form) regardless of the properties of the mail systems involved. When working with encryption, it is essential to keep your own certificate (especially the private key) in a loss-proof manner, as otherwise encrypted e-mails can no longer be read - neither those you have encrypted yourself nor those you have received.
General preparations
Before you can sign or encrypt e-mails, you have to import your user certificate on your computer. If you want to send digitally signed or encrypted e-mails from multiple computers, you must import the certificate on each of these computers. This also applies if you want to read encrypted emails on multiple PCs.
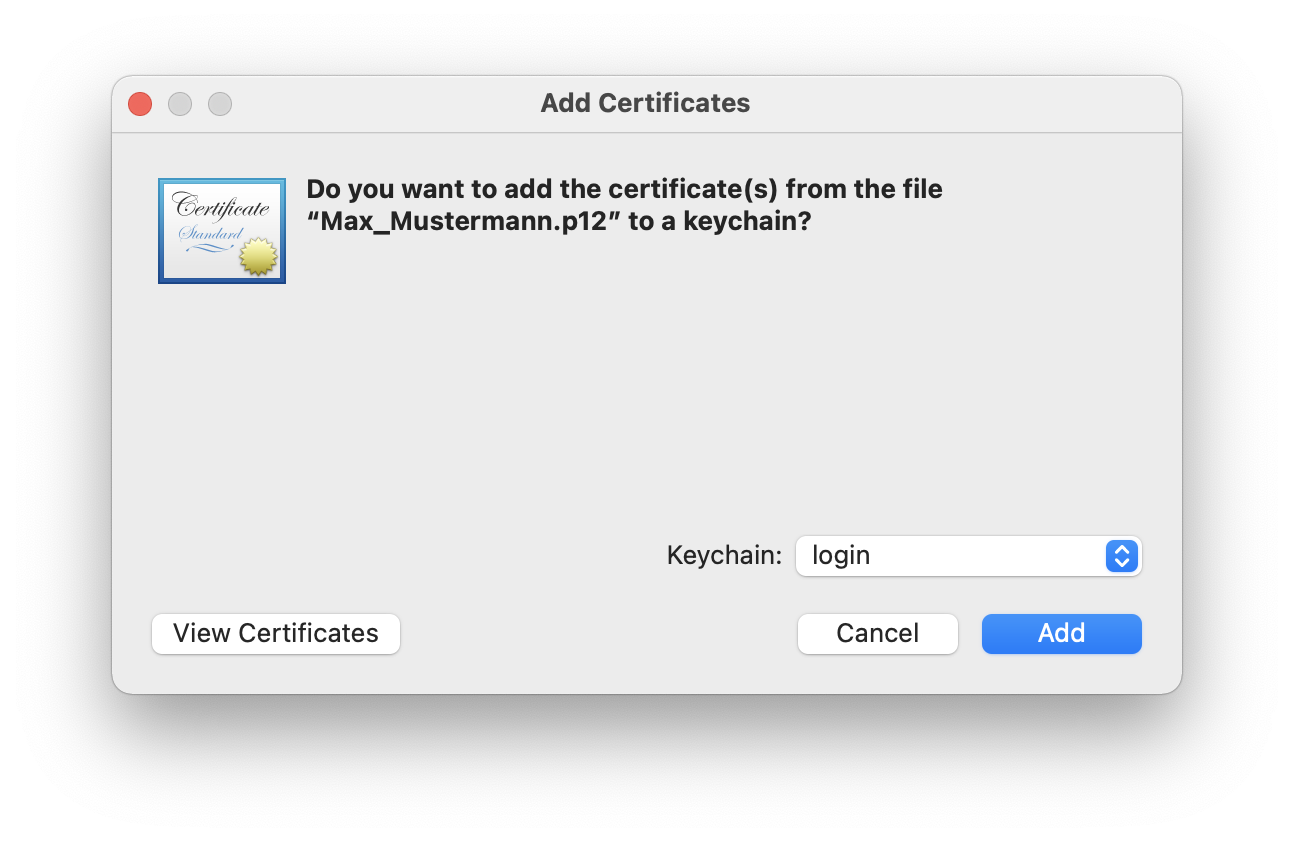
By double-clicking on your certificate file (file with extension ".p12" or ".pfx" ), a certificate import wizard opens. The keyring management opens automatically with the question whether the certificate should be added. There you select (if not already preselected) the item "login" from the drop-down list and click on "Add".
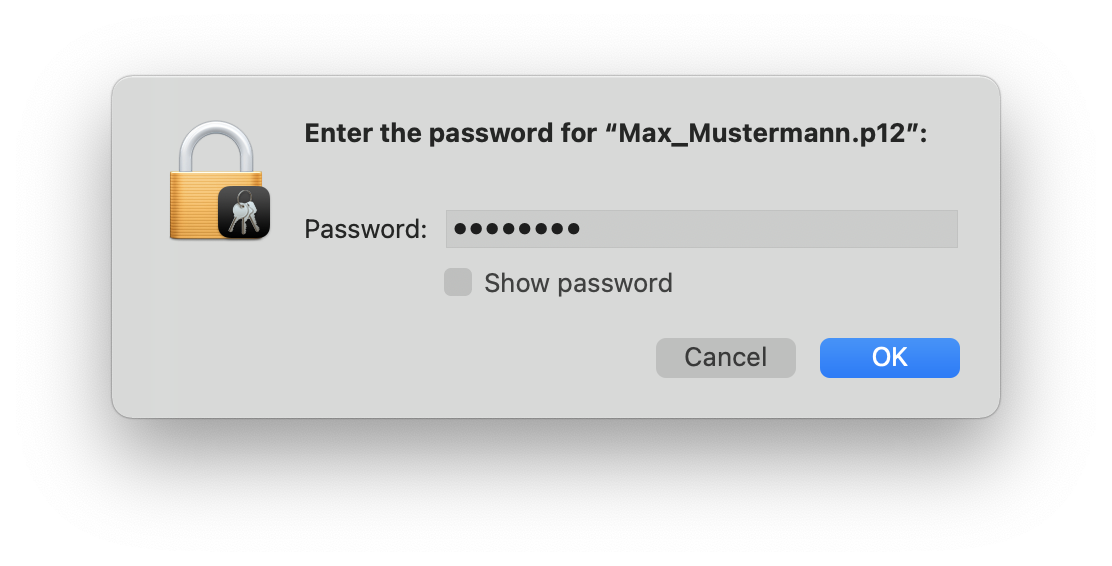
A new window opens asking you to enter a password. This password was set by you before you exported the certificate and its private key to the P12 file.
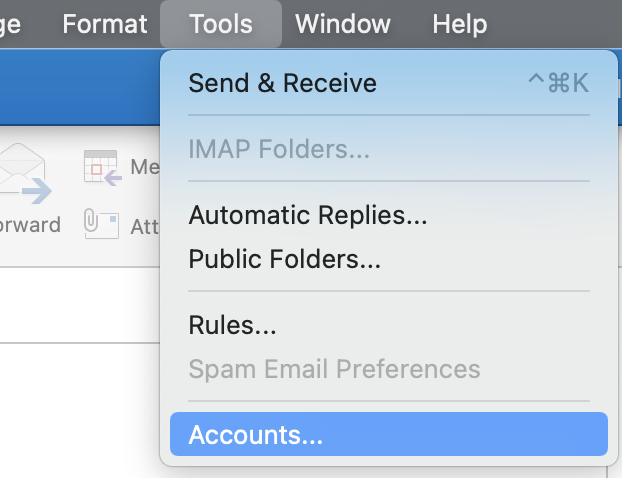
Now open Microsoft Outlook. Click on the "Tools → Accounts" item in the menu bar.
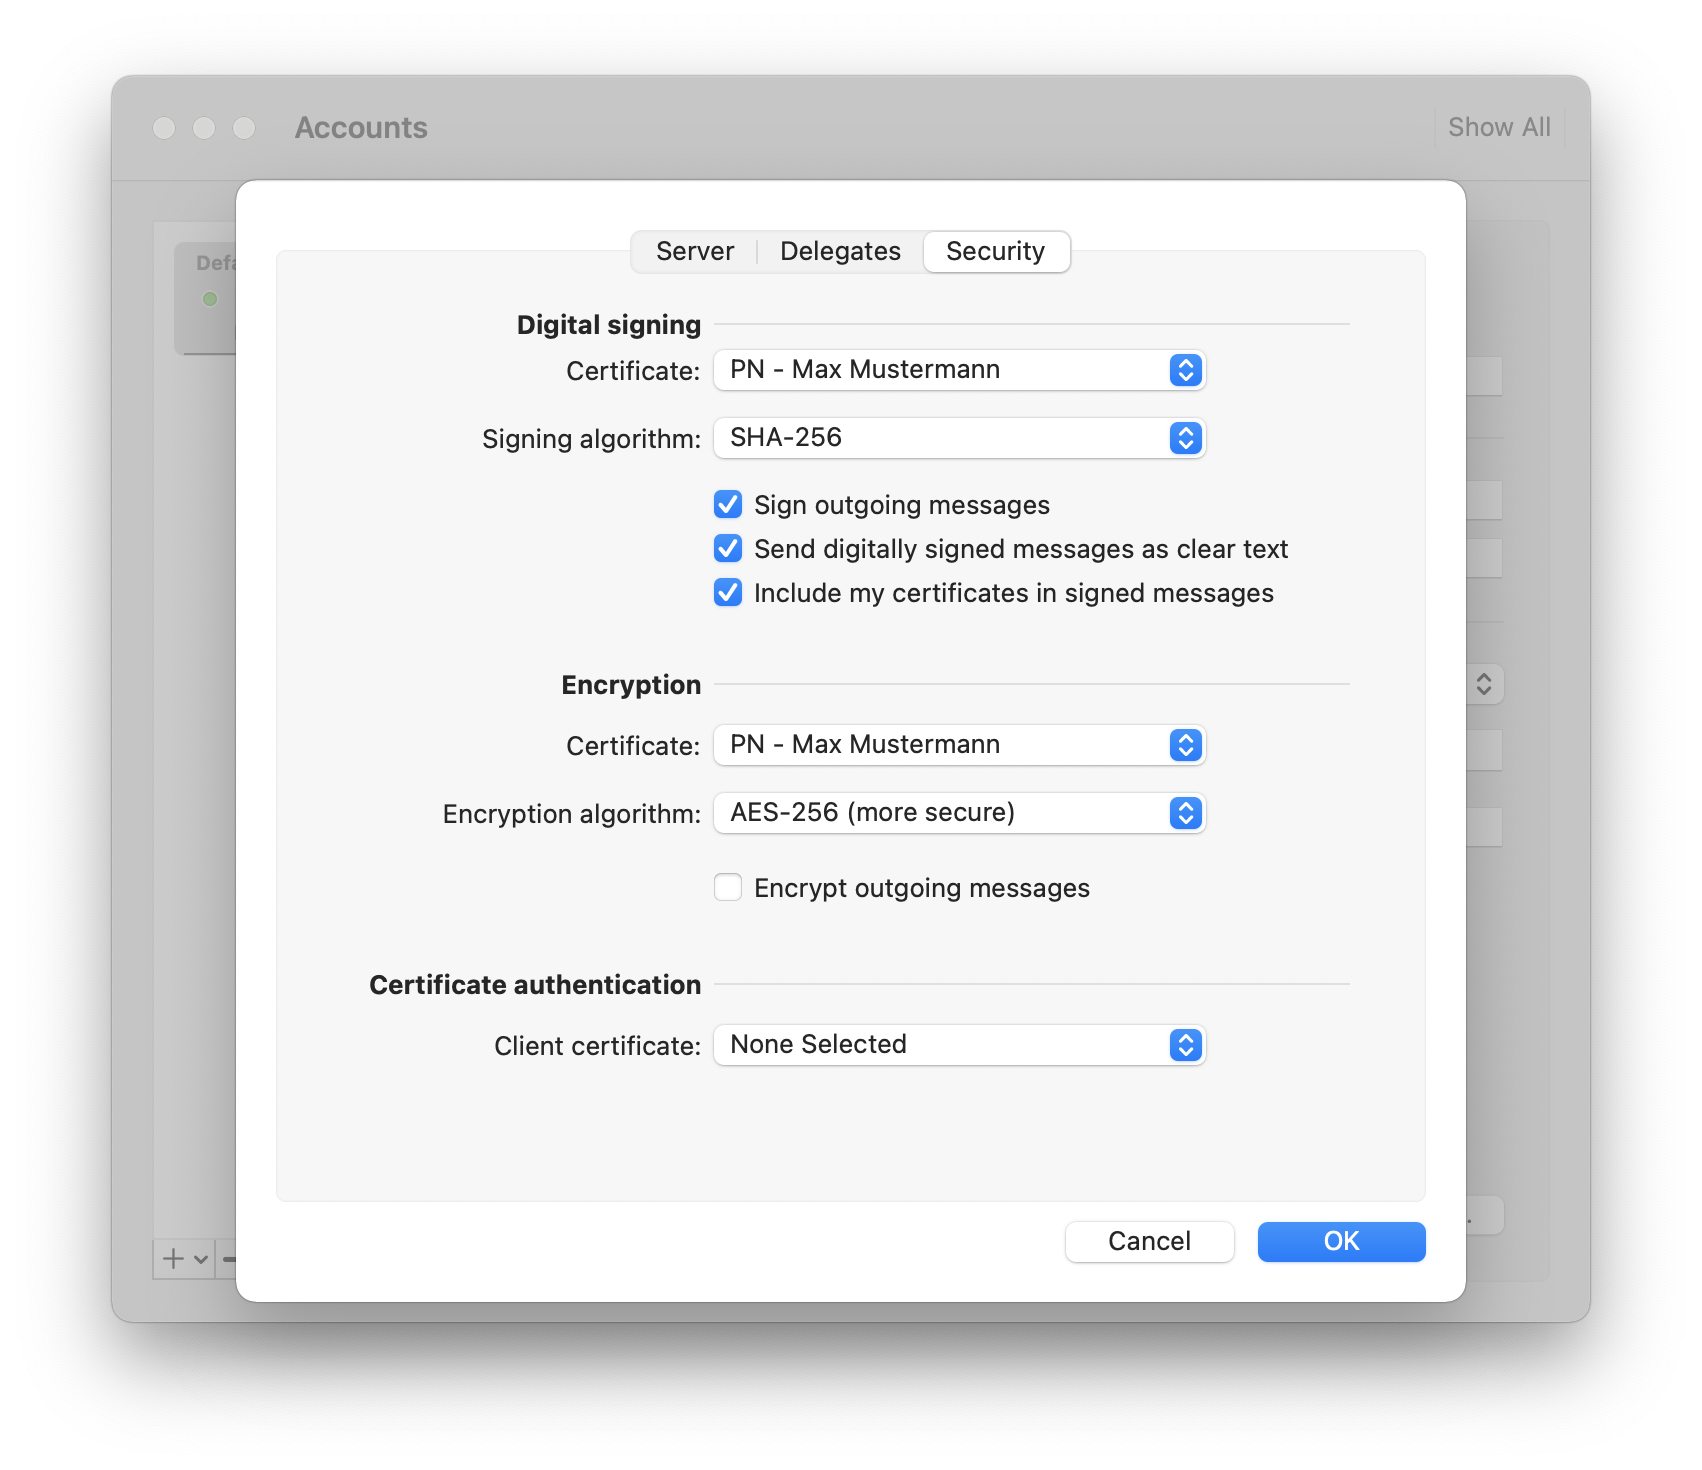
Select the account for which you requested the certificate and for which you want to add the digital signature. Click "Advanced" and select the Security tab.
Under the "Digital signing → Certificate" item, select the certificate you want to use. If you want to ensure that recipients who do not use an S/MIME email application can also read the email, select the "Send digitally signed messages as clear text" item. Select the "Include my certificates in signed messages" option to allow the recipient to send encrypted messages to you.
Close the Accounts window by clicking OK.
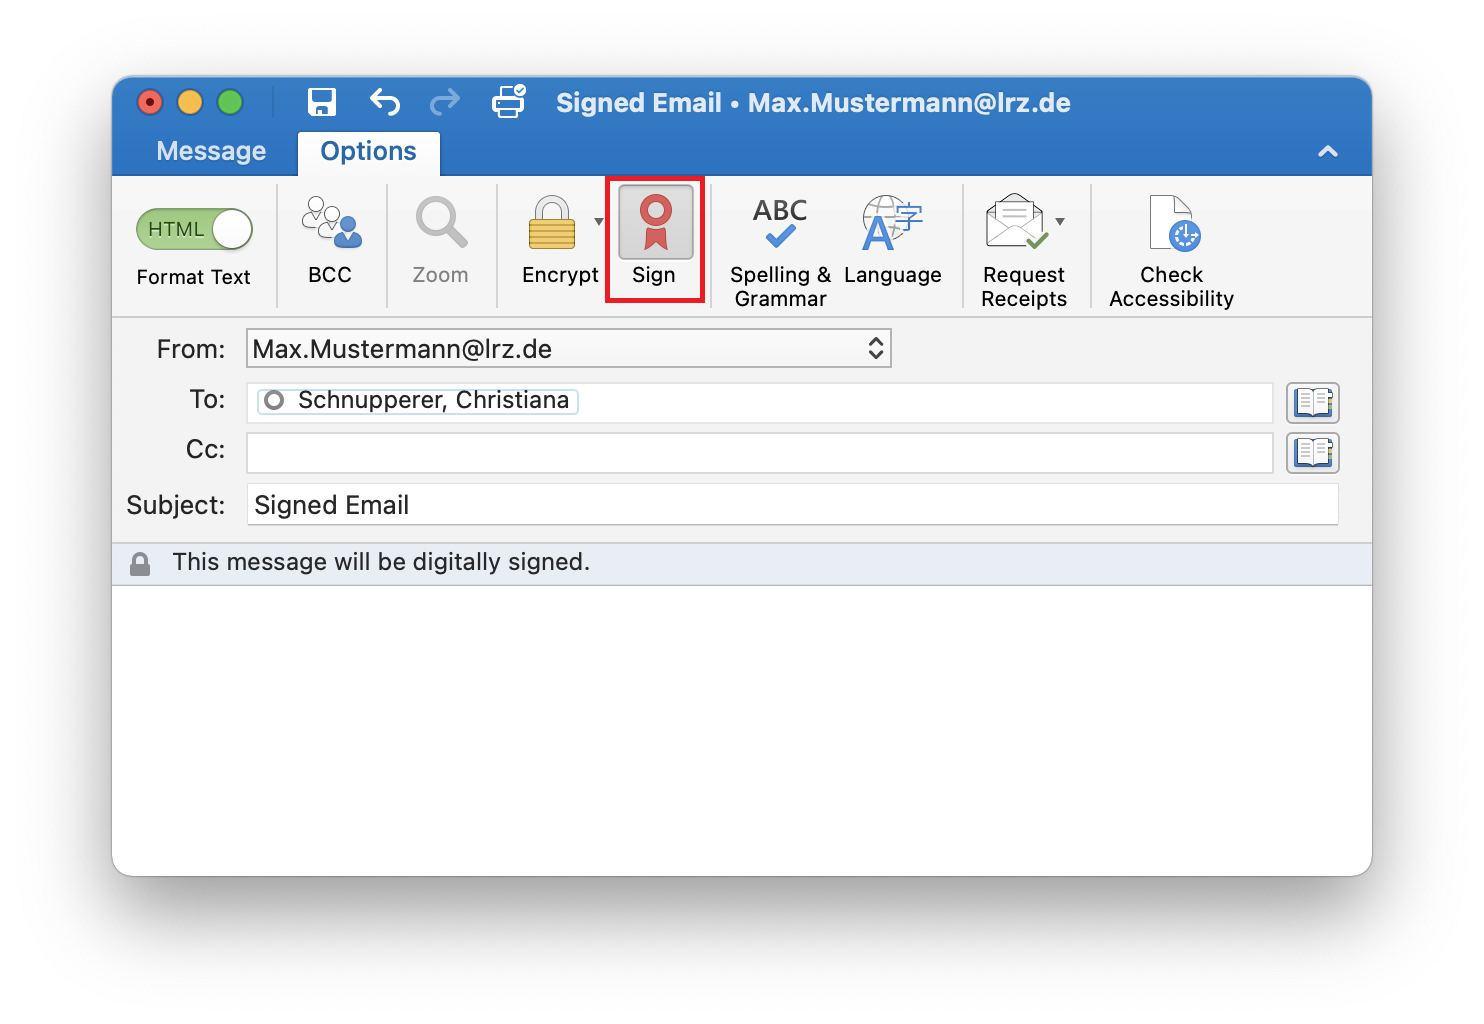
Sign emails digitally with S/MIME
To add a digital signature to an email under Outlook, switch to the "Options" tab before sending and click on "Sign" there.
If you want to automatically sign every e-mail, you can configure this in the security settings.
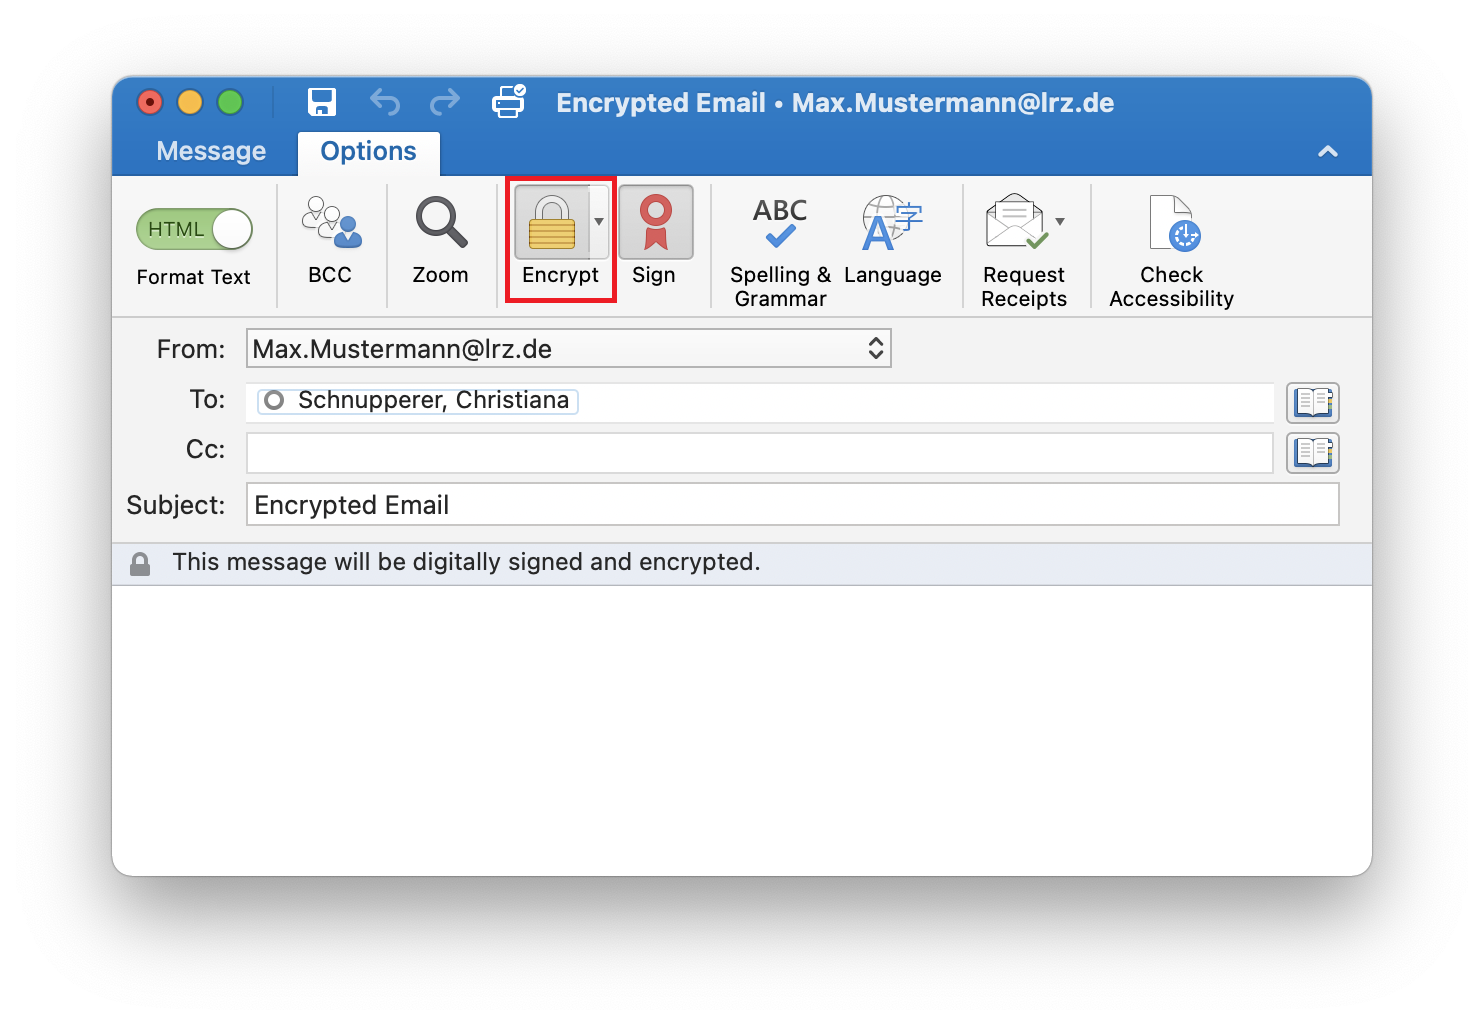
Encrypt emails with S/MIME
If you want to encrypt an email, proceed in the same way as for signing an email. To do this, select the "Encrypt" option. In contrast to signing, you not only need your own certificate, but also the certificate (or more precisely, the public key) of the mail recipient
How do I get the public certificate of a recipient?
To send encrypted emails, you always need the certificate of the recipient. If you don't have it, there are several ways to find the certificate:
A digitally signed or encrypted email from the recipient.
If you have already received a digitally signed or encrypted email from the recipient, the public certificate was also sent to you in this email. As soon as you have opened this email, Outlook for Mac saves the certificate in its own keychain and you can send encrypted emails to this recipient.
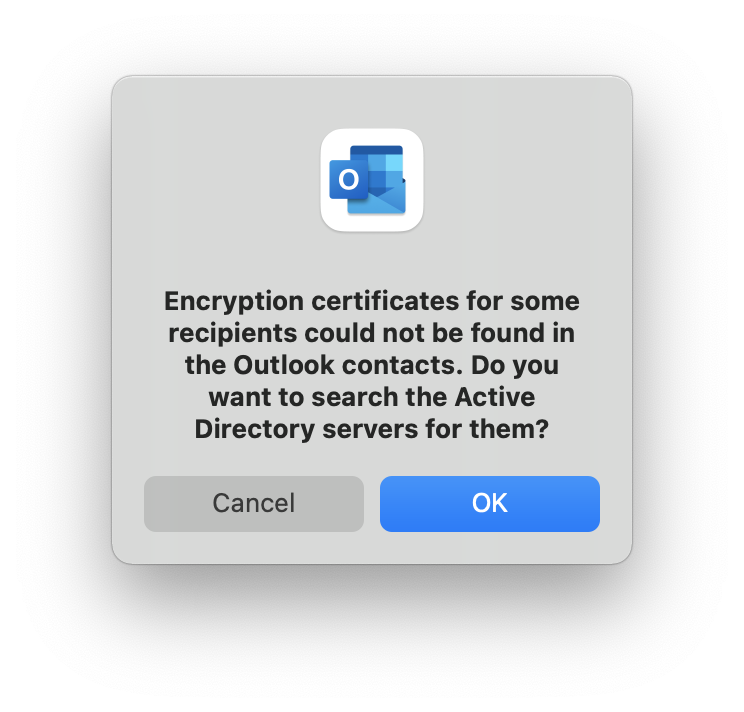
Global address list of the Exchange Server
If the recipient has published their certificate in the GAL (Global Address List), you can simply select him/her from the address book and encrypt the message. If you do not already have the recipient's public certificate in your key ring, you will be asked when sending the email whether you want to search for it in the Global Address List. If you confirm with "OK", the certificate will be searched for there. If one is found, it will be used for sending and additionally stored in a separate key ring for Outlook.
Where can I see which certificates I have saved?
Outlook stores the certificates in its own keychain. This is located in your user directory in the folder "~/Library/Keychains". You can open this keychain by opening the keychain management and selecting "Add Keychain..." in the menu bar at the top under the menu item File. Then navigate to the Keychains folder and select the file "Microsoft_Entity_Certificates-db". In addition, Outlook also looks in your normal keychain, and uses certificates from there as well. If you click on "Login" on the left side, you can see which certificates are stored there.
