Apple Mail (Exchange)


Barrier-free

This page contains alternative texts for images/graphics.

Setup

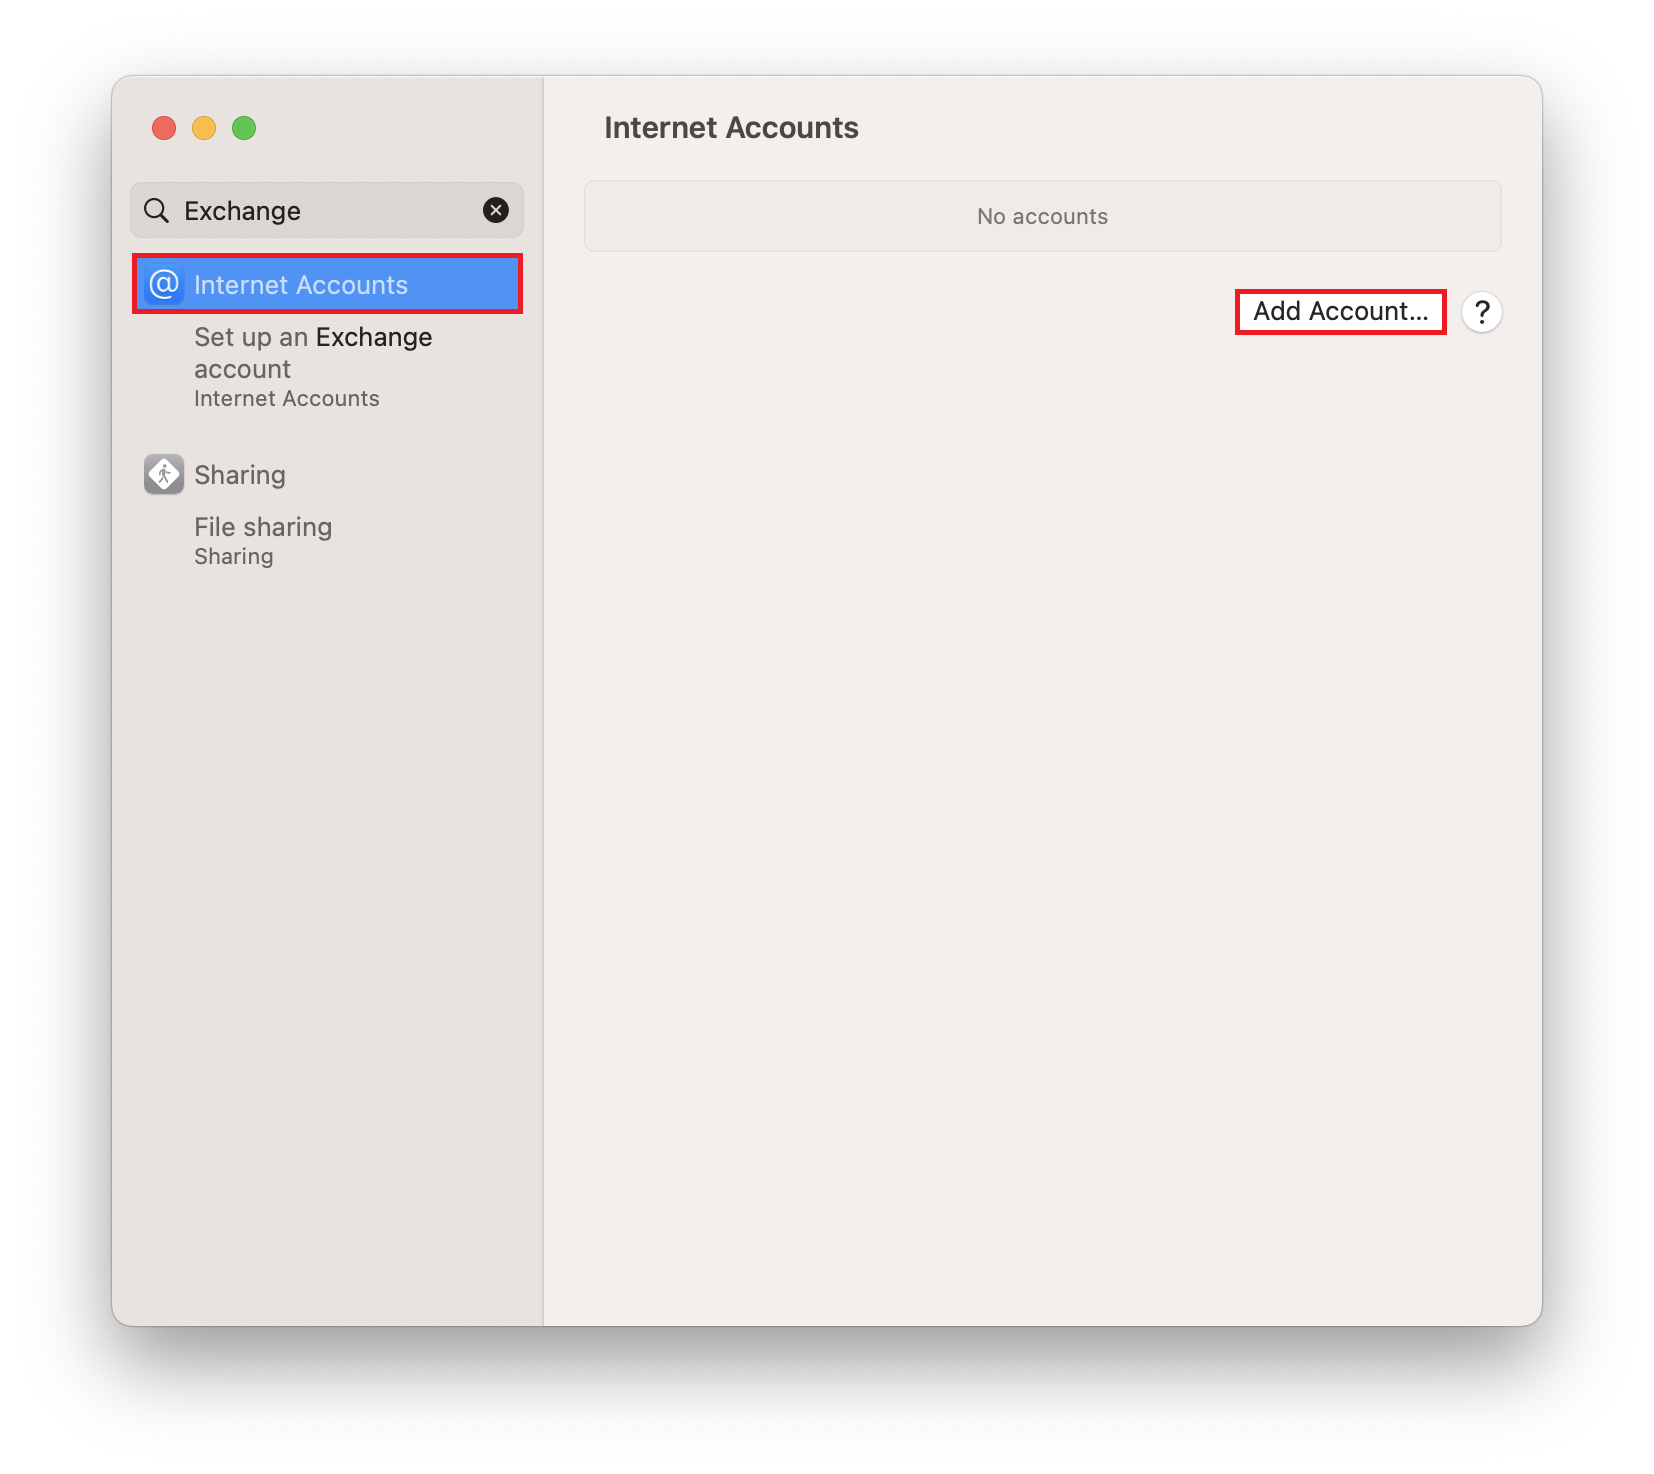
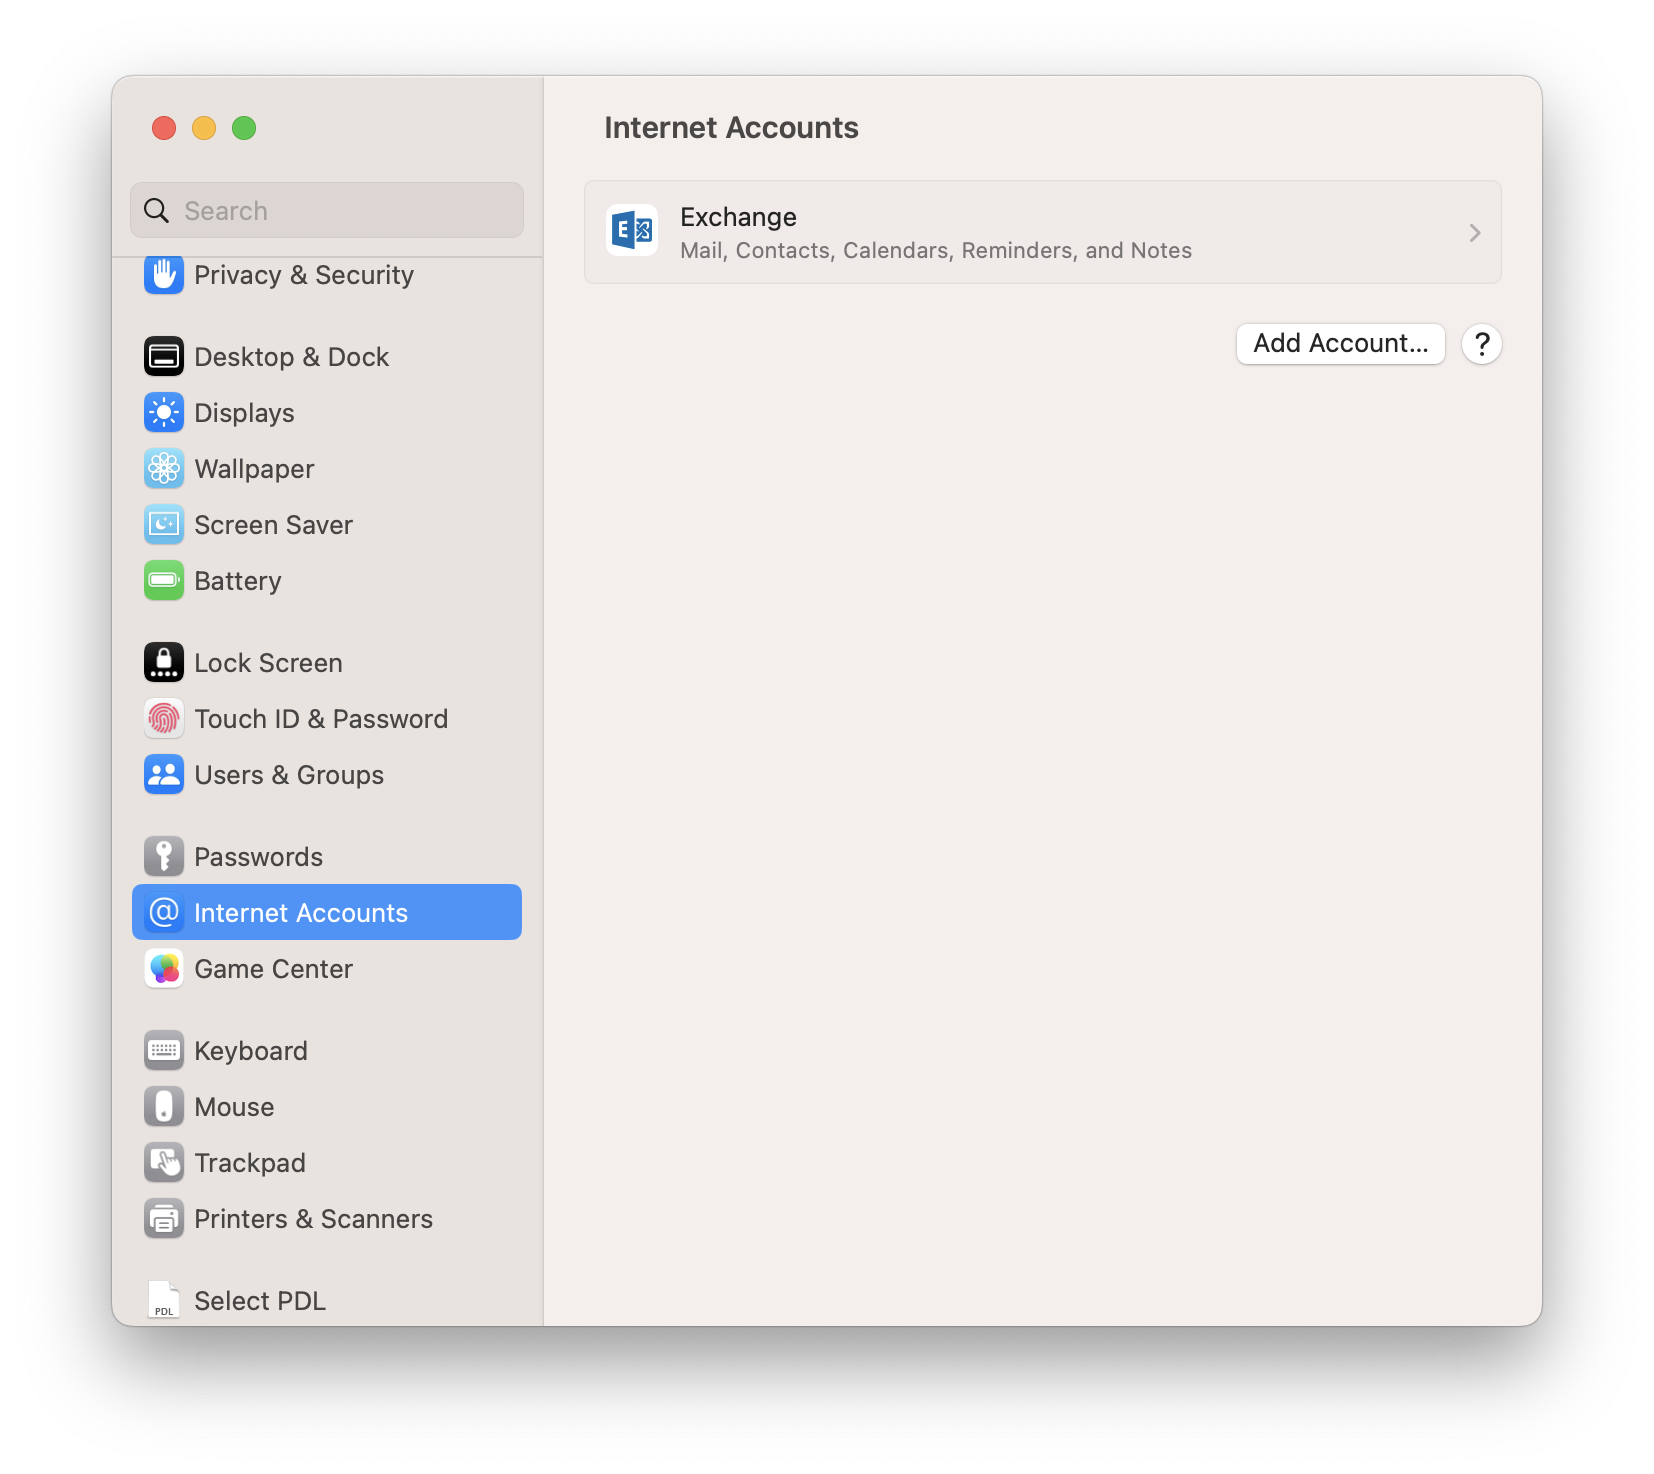
Open the System Preferences and select "Internet Accounts". When you type or start typing Exchange at the top left of Search, it will be highlighted.

Window Internet Accounts. Left column, search field Excha, below marked Internet Accounts, Configure Exchange Account Internet Accounts. On the right in the main field, No accounts. Marked button, Add Account..., Behind it a question mark button in a circle to get to help.

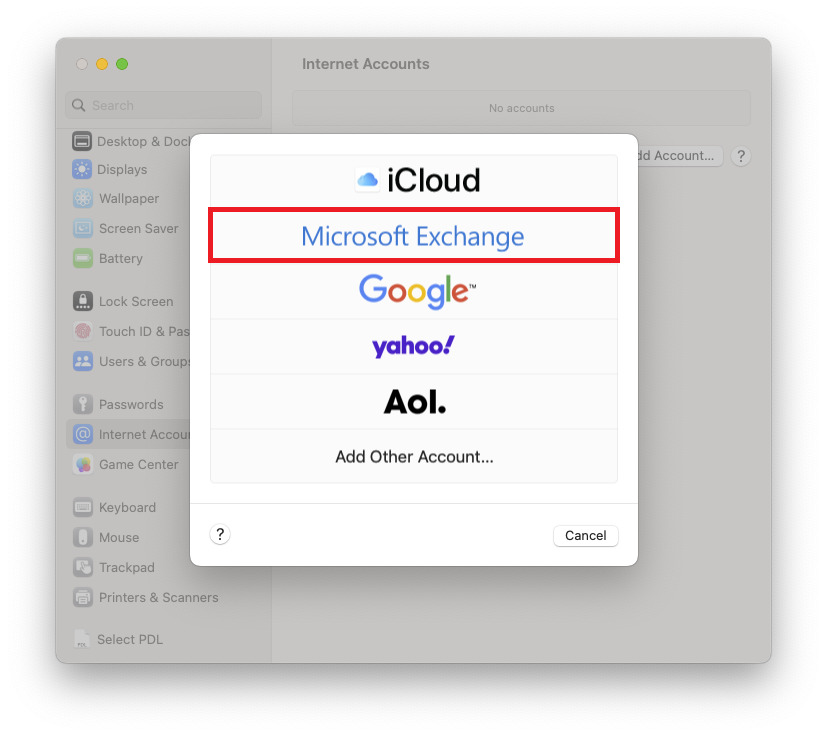
Select Microsoft Exchange from the list.

The previous window is overlaid by the smaller window. underneath 5 logos, iCloud, marked Exchange, Google, yahoo exclamation mark, Aol point as well as Add Other Account..., below on the left, question mark in a circle, on the right Cancel button.

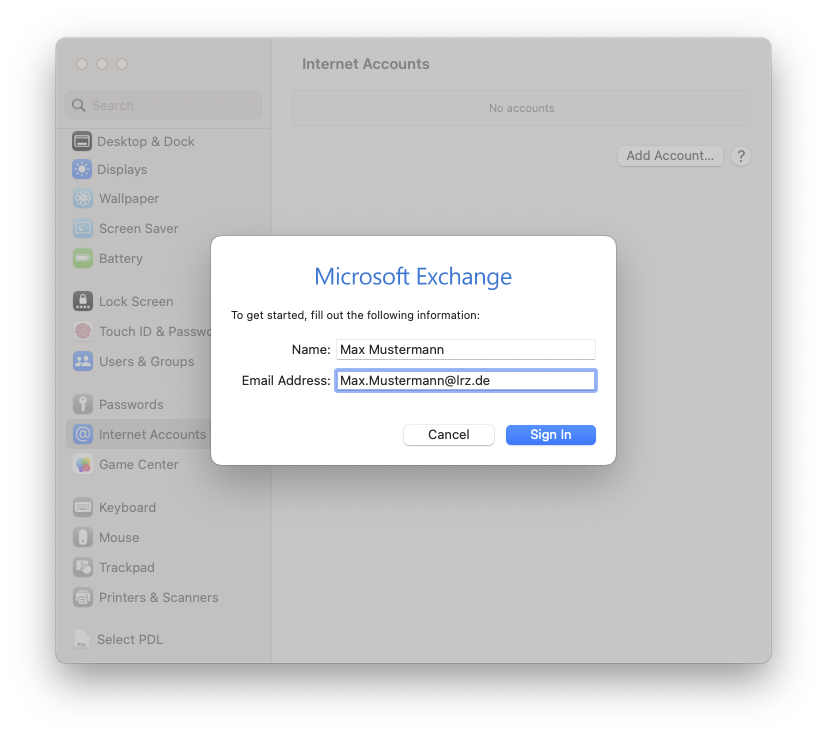
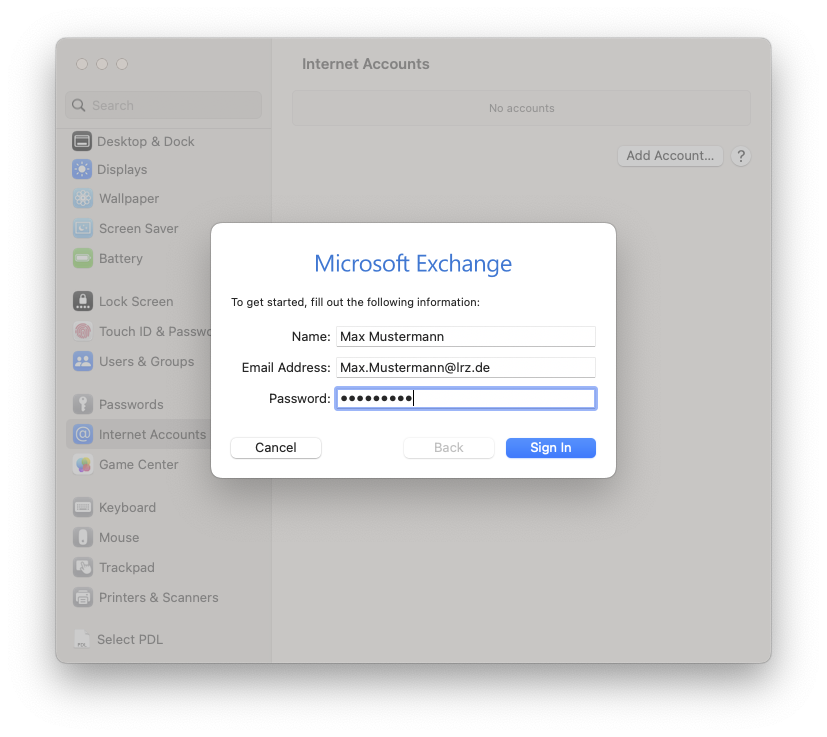
In the next step, enter your name and Email Address.

The previous window is overlaid by the smaller Microsoft Exchange window. To get started, fill out the following information, colon. Name, input field Mustermann, Max. Email Address, marked input field Max.Mustermann At lrz.de. At the bottom right buttons Cancel, Sign in.

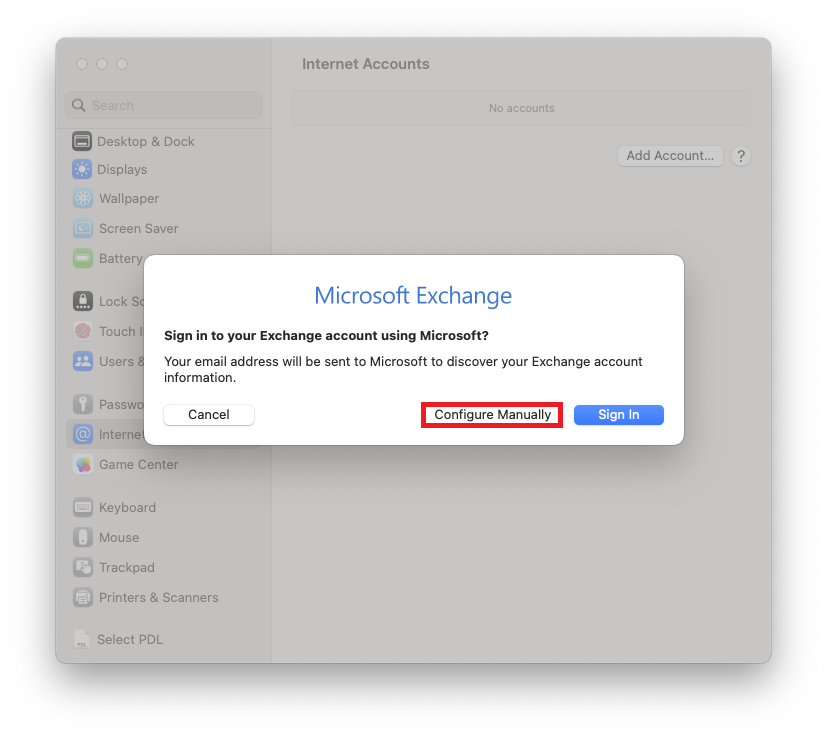
After you click Log In, you will be asked if you want your email to be sent to Microsoft to find your account information. This is not necessary because the account information cannot be found there.

Instead, click on "Configure manually".

Again the overlaid, smaller Microsoft Exchange Window. Sign in to your Exchange account using Microsoft, question mark. Your email address will be sent to Microsoft to discover your Exchange account information. Bottom left, Cancel button, right marked button Configure Manually, Sign in.

Now enter your password. The dialogue should look like this:

The previous window is overlapped by the smaller Microsoft Exchange window. To get started, fill out the following information, colon. Name, input field Mustermann, Max. Email Address, input field max.mustermann At lrz.de. Password, marked input field Required. Bottom left, Cancel button, grayed out right button Back, Sign in.

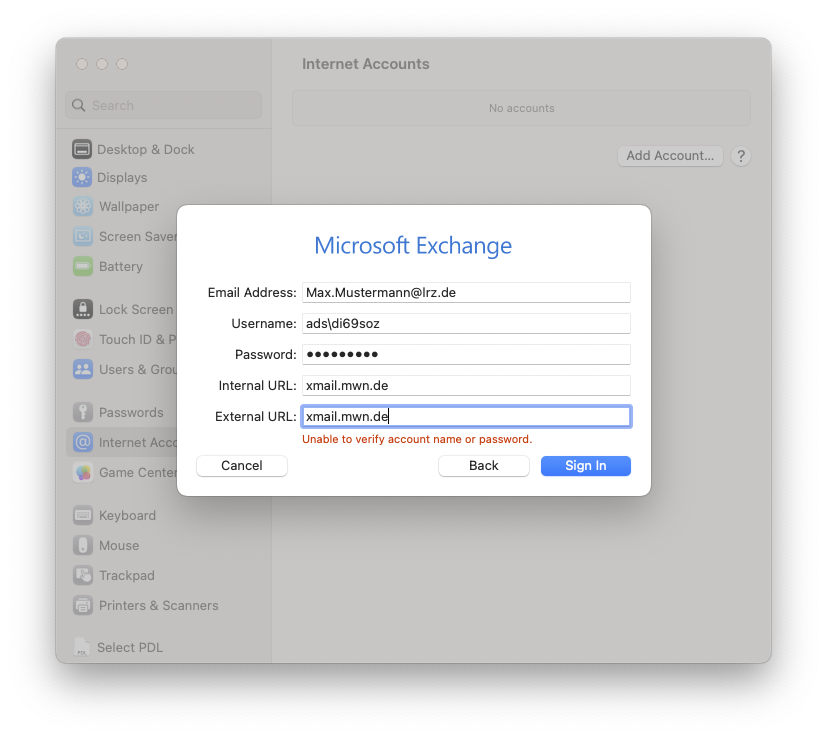
Enter your user name together with the domain "ads" in the form "ads\account", in the example of Max Mustermann "ads\di69soz".

You must also enter "xmail.mwn.de" as the Internal and External URL.

Again the previous window is overlapped by the smaller Window. Microsoft Exchange. Email Address, colon, input field max.mustermann At lrz.de. Username, colon, input field ads backslash di69soz. Password, colon, input field Password, Internal URL, colon, input field xmail.mwn.de, External URL, colon, input field, xmail.mwn.de. Below in red font, Unable to verify account name or password. Buttons Cancel, Back and Sign in.

Shared Mailbox 

Shared mailboxes offer the possibility to collaboratively edit a mailbox. Application scenarios include function addresses (such as info@domain.de), shared chair calendars (e.g. for vacation planning), or shared contacts of the chair that everyone is allowed to read or that several people manage together.

Email

The problem with Apple Mail when configuring the shared mailbox is that you cannot specify the correct outgoing mail server right away, because Apple Mail tries to log on to the outgoing mail server with the specified user name. However, in the form that must be used for shared mailboxes, it is impossible to log on to "postout.lrz.de". For this reason, you must first specify a different server and later change to the correct server ("postout.lrz.de").


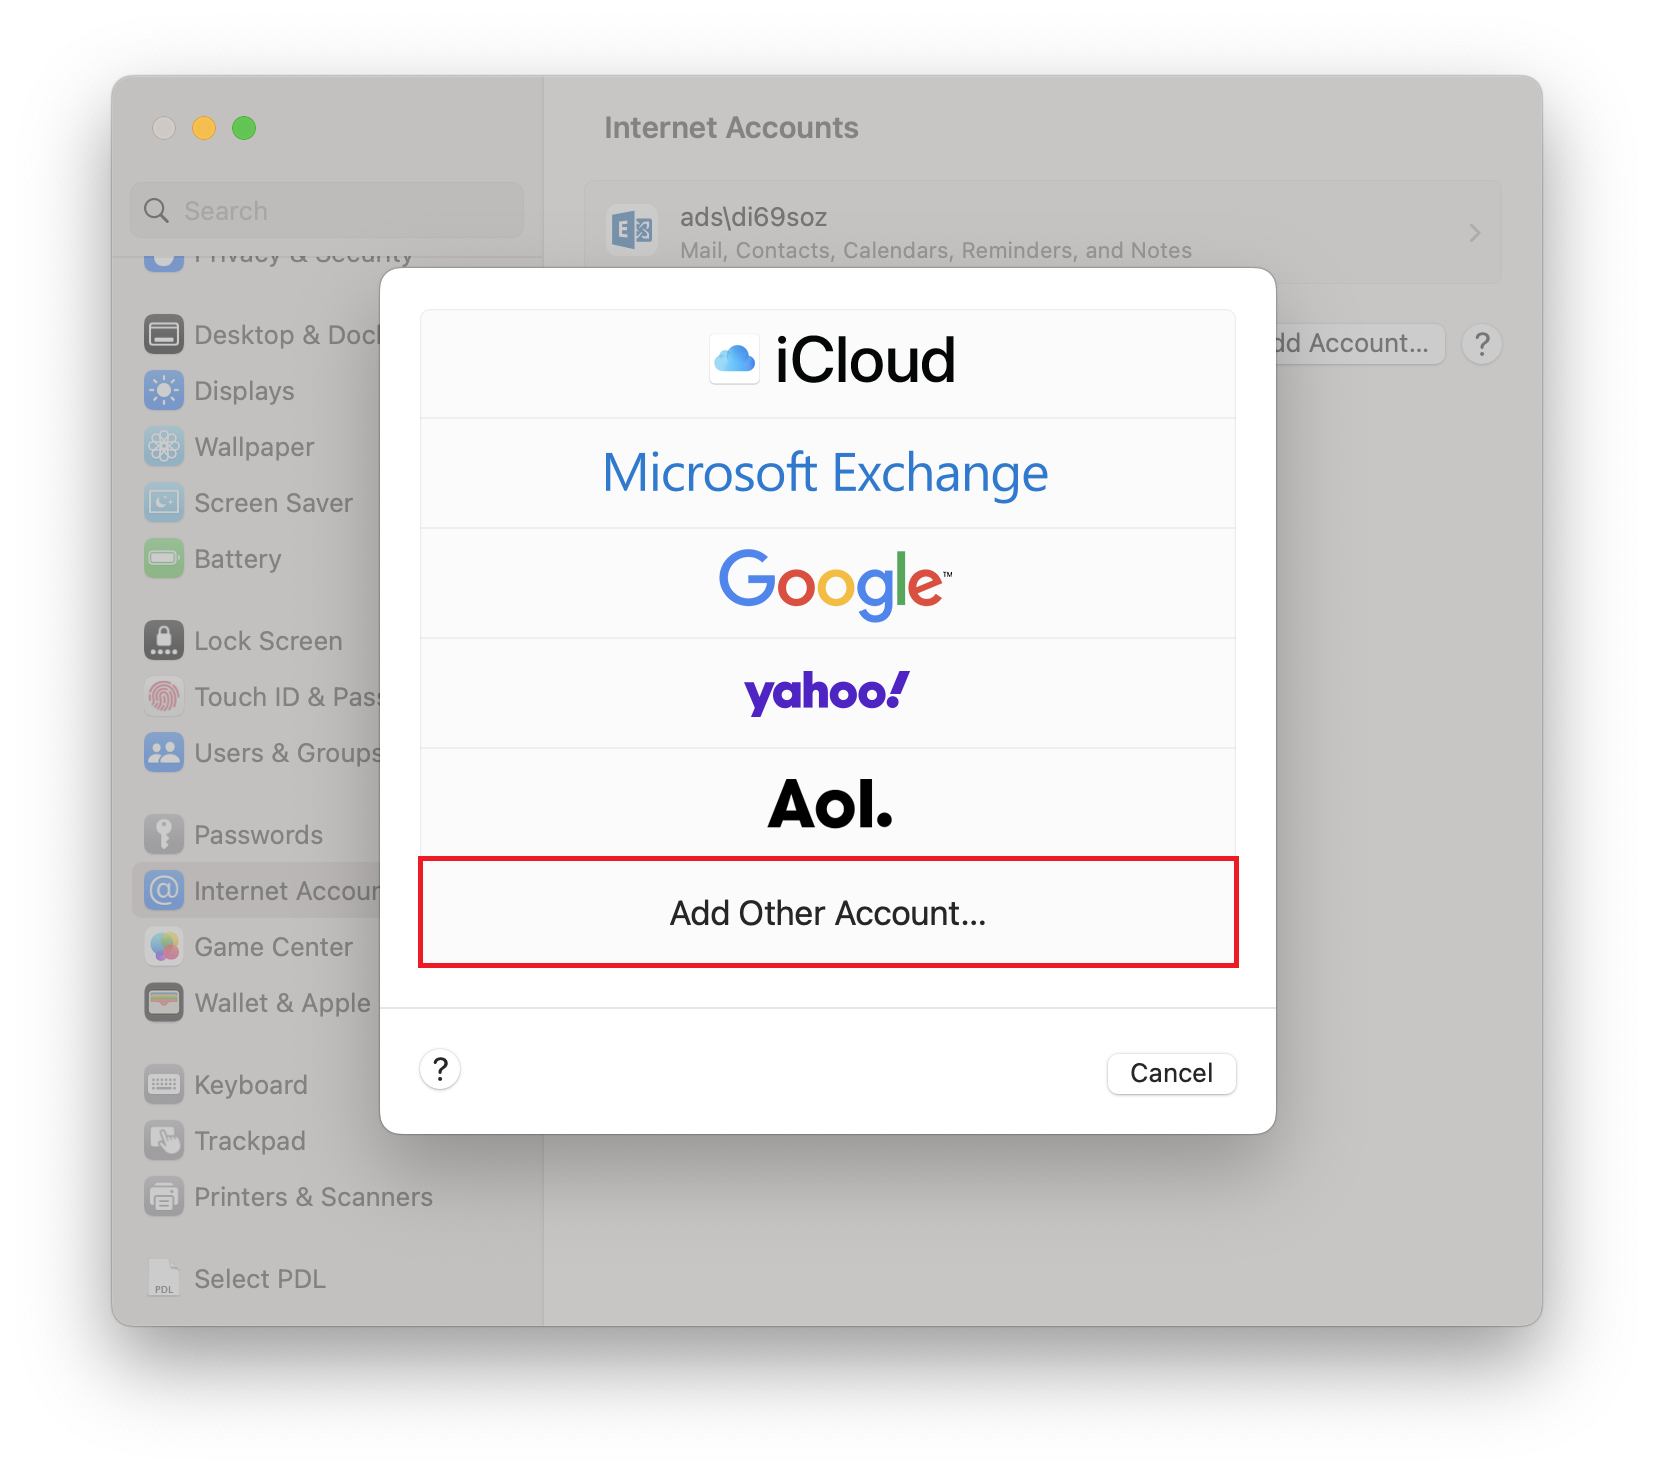
Open the System Preferences and select Internet Accounts. To add an account, click on "Add Account...".

Window System Preferences, Internet Accounts. Left column, empty input field Search, below 17 categories with icons for settings. Selected category Internet Accounts. On the right in the main field, Exchange icon, next to it Exchange, Mail, Contacts, Calendar, Reminders and Notes. On the right, button Add Account..., behind it a question mark button in a circle to go to Help.

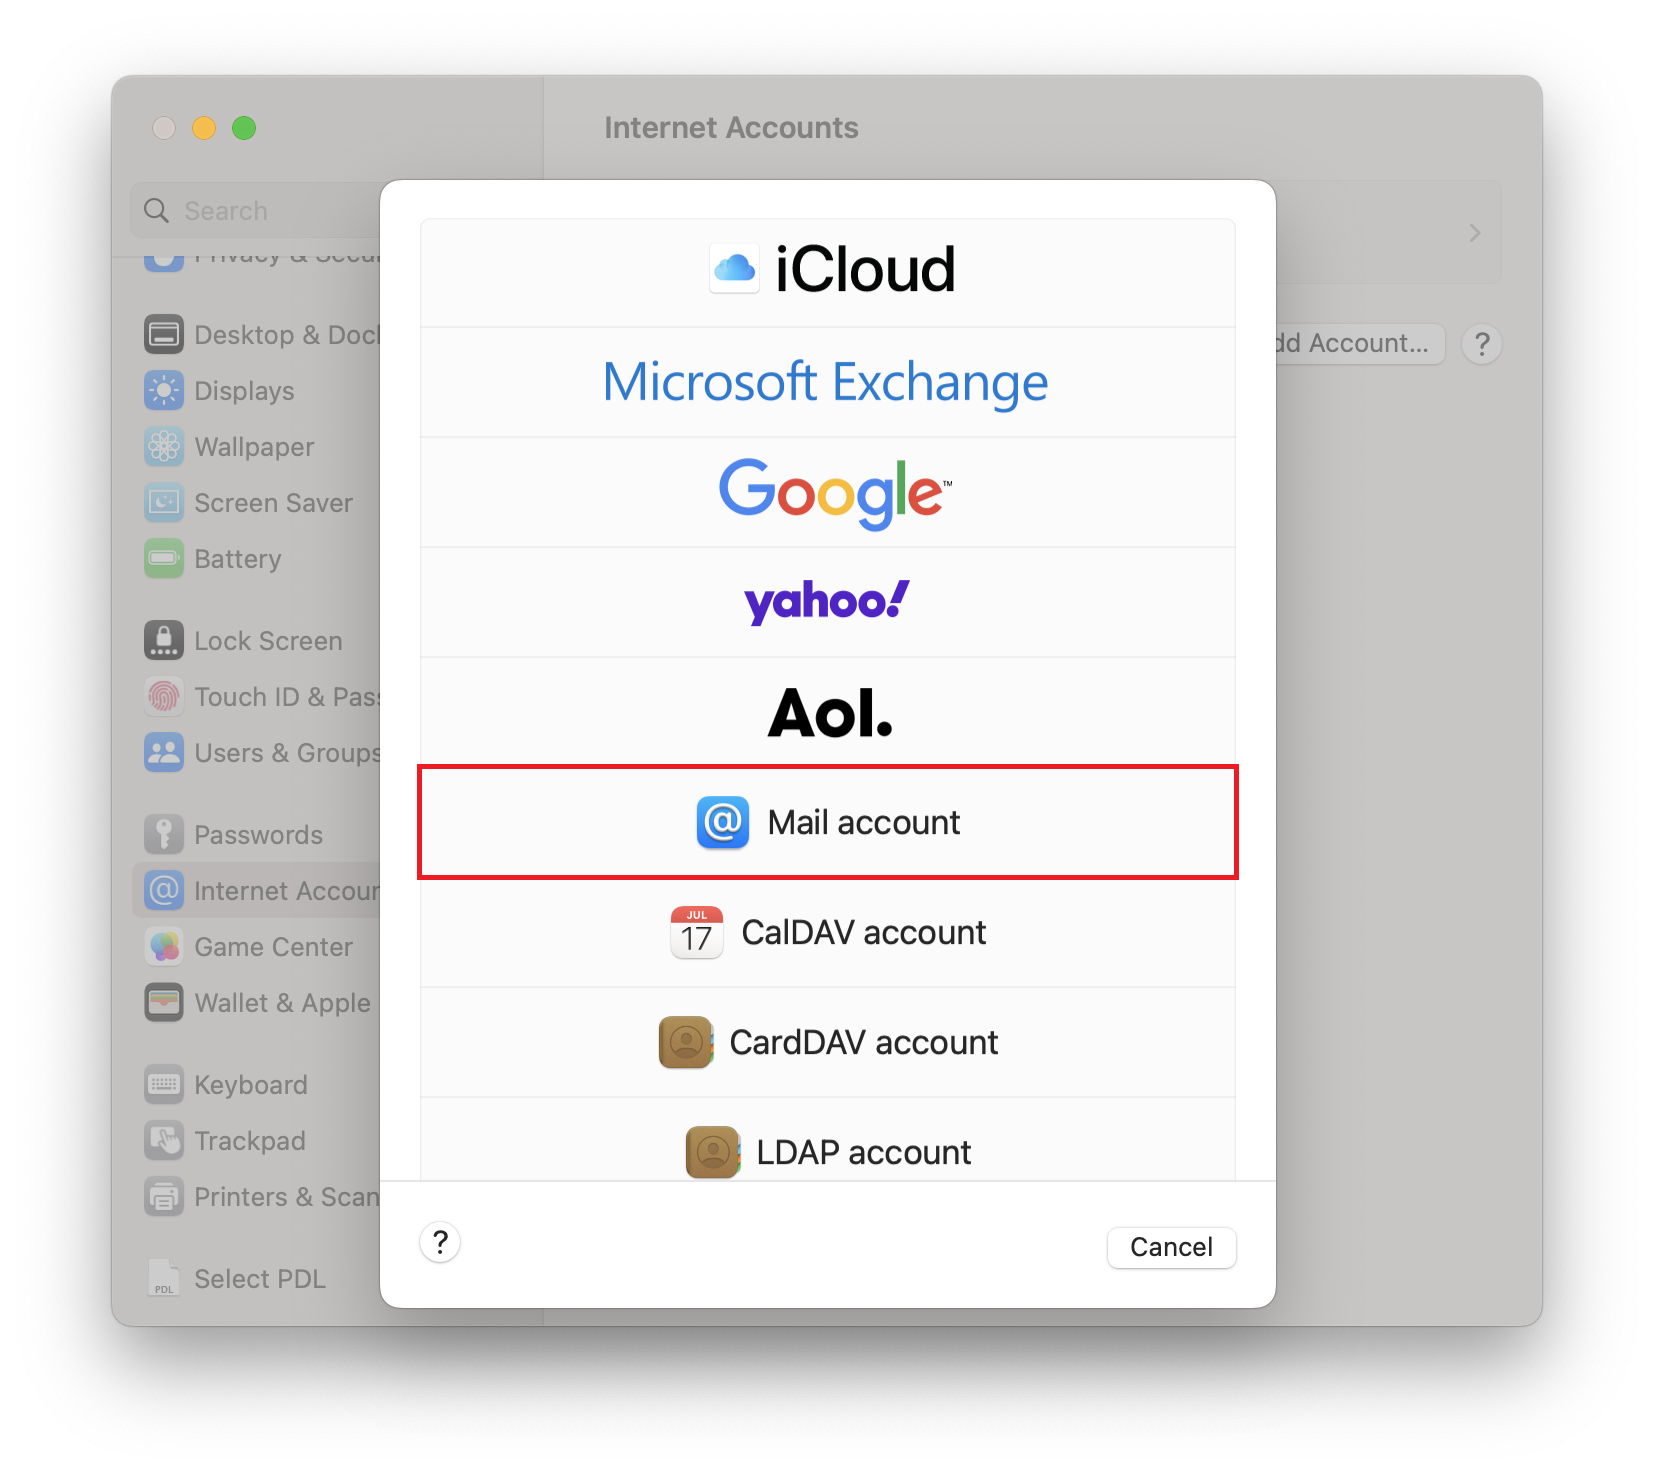
Since the shared mailbox in Apple Mail cannot be included like a normal Exchange mailbox due to the form in which the user name must be specified, you must expand the selection via "Add other account ..." and then select "Mail account".

Window Internet Accounts. Above a new window, with 5 logos below, iCloud, Exchange, Google, yahoo exclamation mark, Aol point as well as marked Add other account..., below left, question mark in circle, right Cancel button.Internet accounts window. Above a new window, one below the other 9 logos, iCloud, Exchange, Google, yahoo exclamation mark, Aol dot, marked Mail account, CalDAV account, CardDAV account, LDAP account, below left, question mark in circle, right Cancel button.

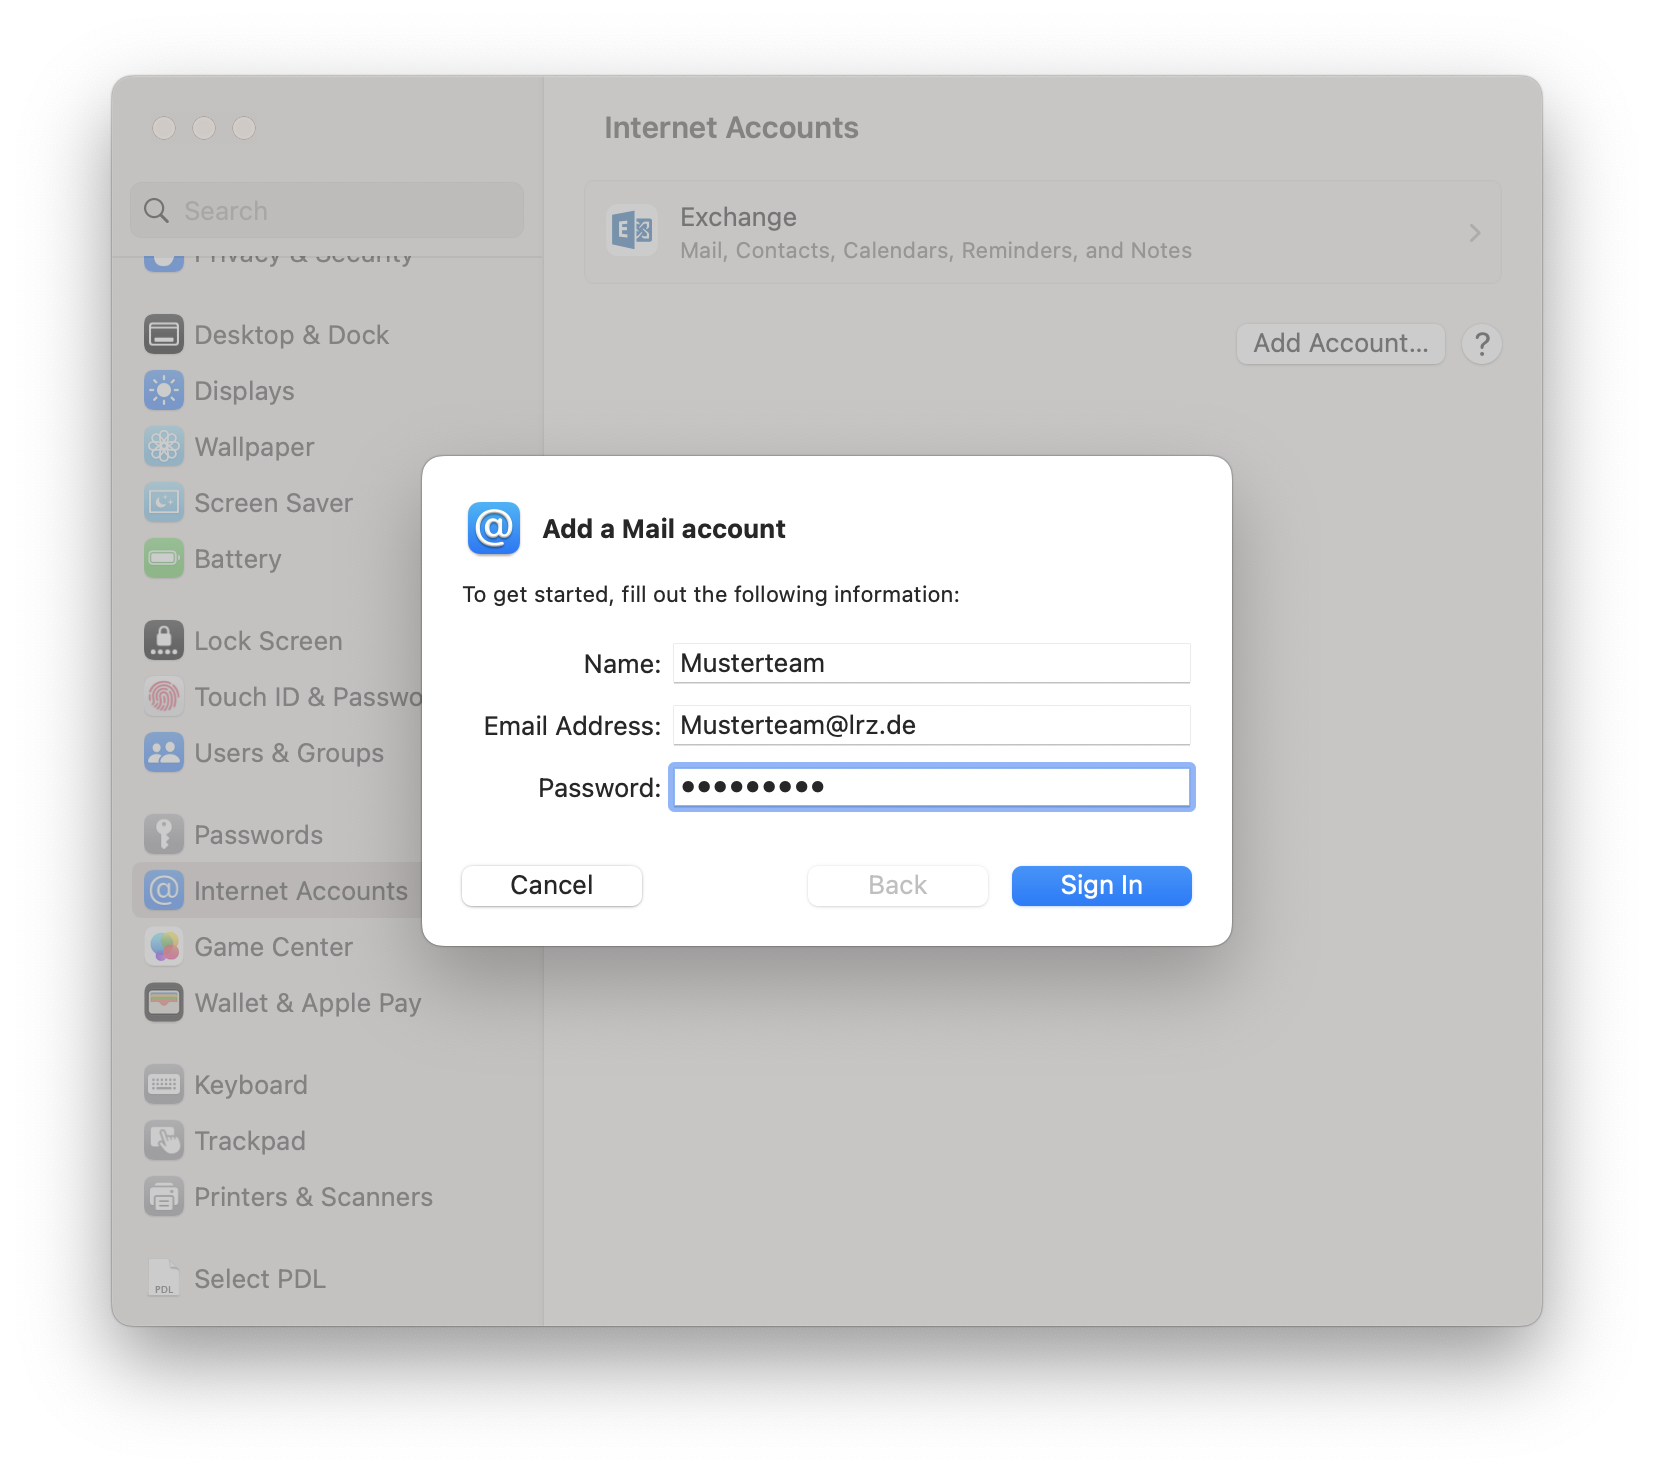
In the next step you will be asked for the email address and password. Enter the shared mailbox email address and your own password. The attempt to retrieve the settings automatically will fail. Only the second time you will be asked for the username. The username must be entered in the following form:

ads\<your account>\<account of the Shared Mailbox>

Example: Your account is "di69soz" and the shared mailbox account is "di69kim". The correct username is then "ads\di69soz\di69kim".

The previous window is overlapped by the smaller Add a Mail account window. To get started, fill out the following information, colon. Name, input field Musterteam. Email Address, input field musterteam At lrz.de. Password, Thick dots input field. Bottom left, Cancel button, right buttons dimmed Back, Sign In.Again, a overlaid, smaller window. Email Address, input field Musterteam At lrz.de. Username, input field ads backslash di69soz backslash di69kim. Password, input field Thick dots. Hyphen. Account type, selection field IMAP. Incoming Mail Server, entry field xmail.mwn.de. Outgoing Mail Server, input field mailout.lrz.de, below in red, Unable to verify account name or password. Bottom left, Cancel button, right buttons Back, Sign in.

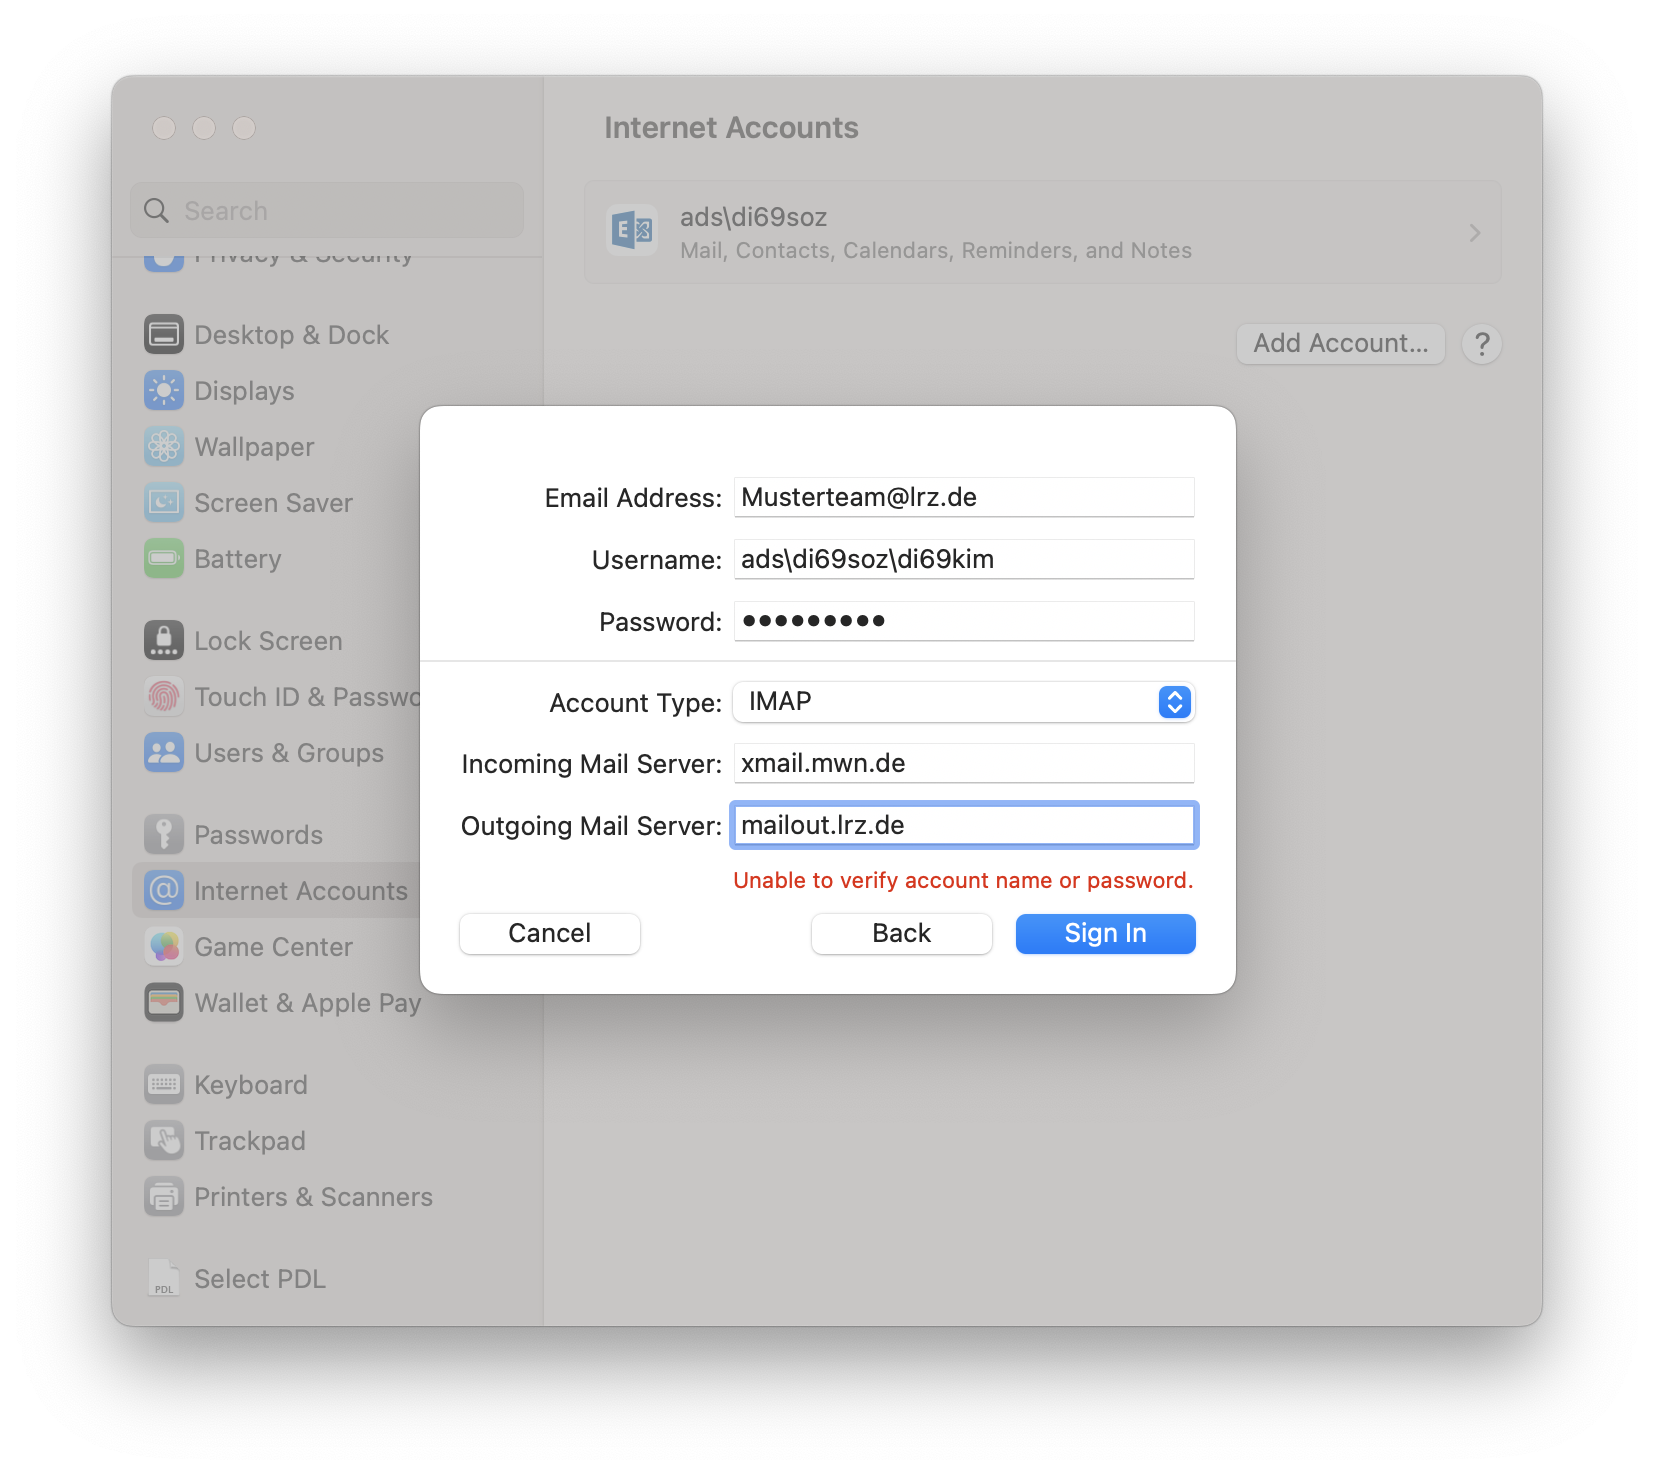
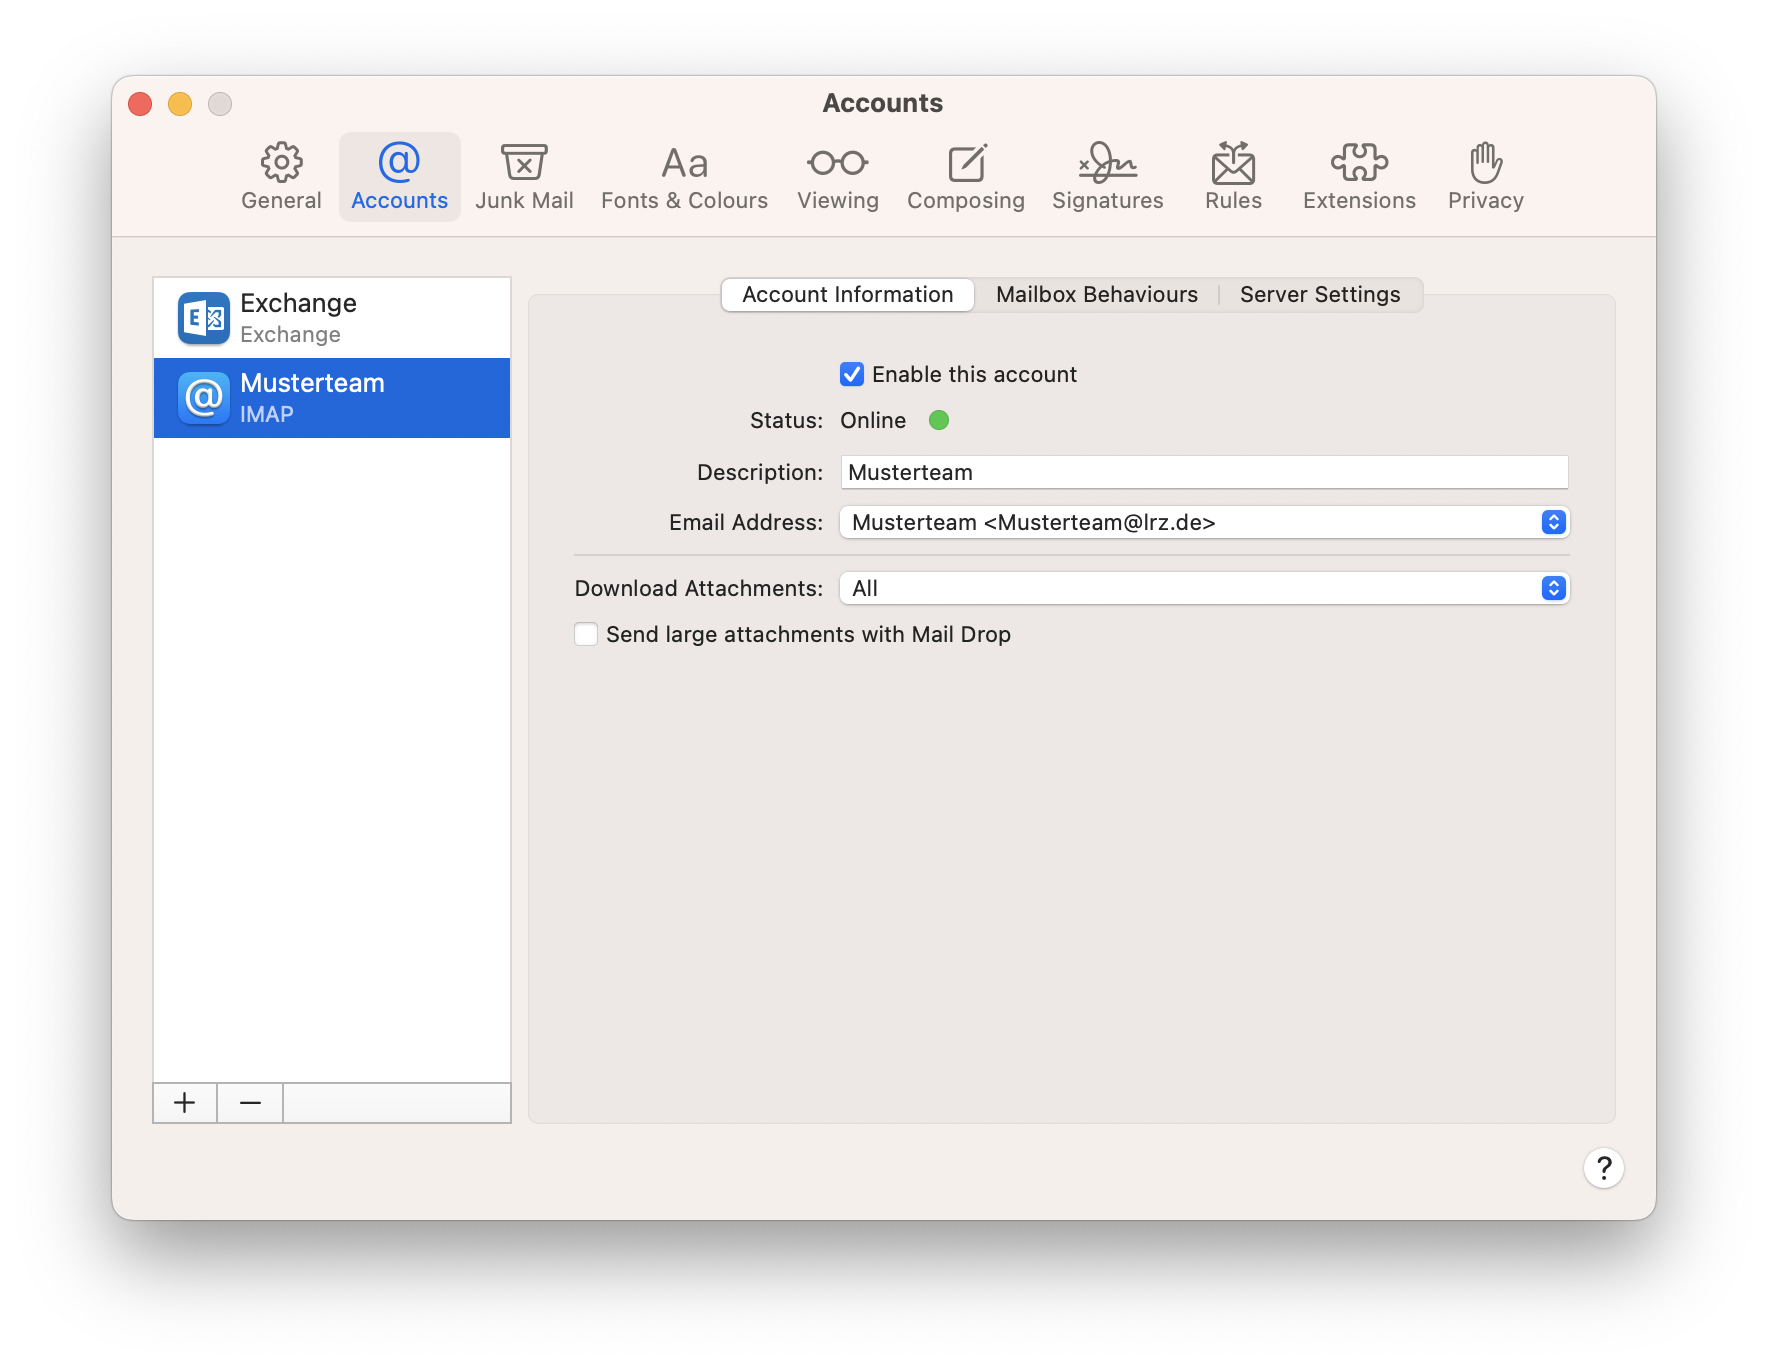
When the setup has worked, you can select whether you want to have only the emails or also your notes synchronized. If the mailbox is set up to receive emails, you need to change the outgoing mail server.

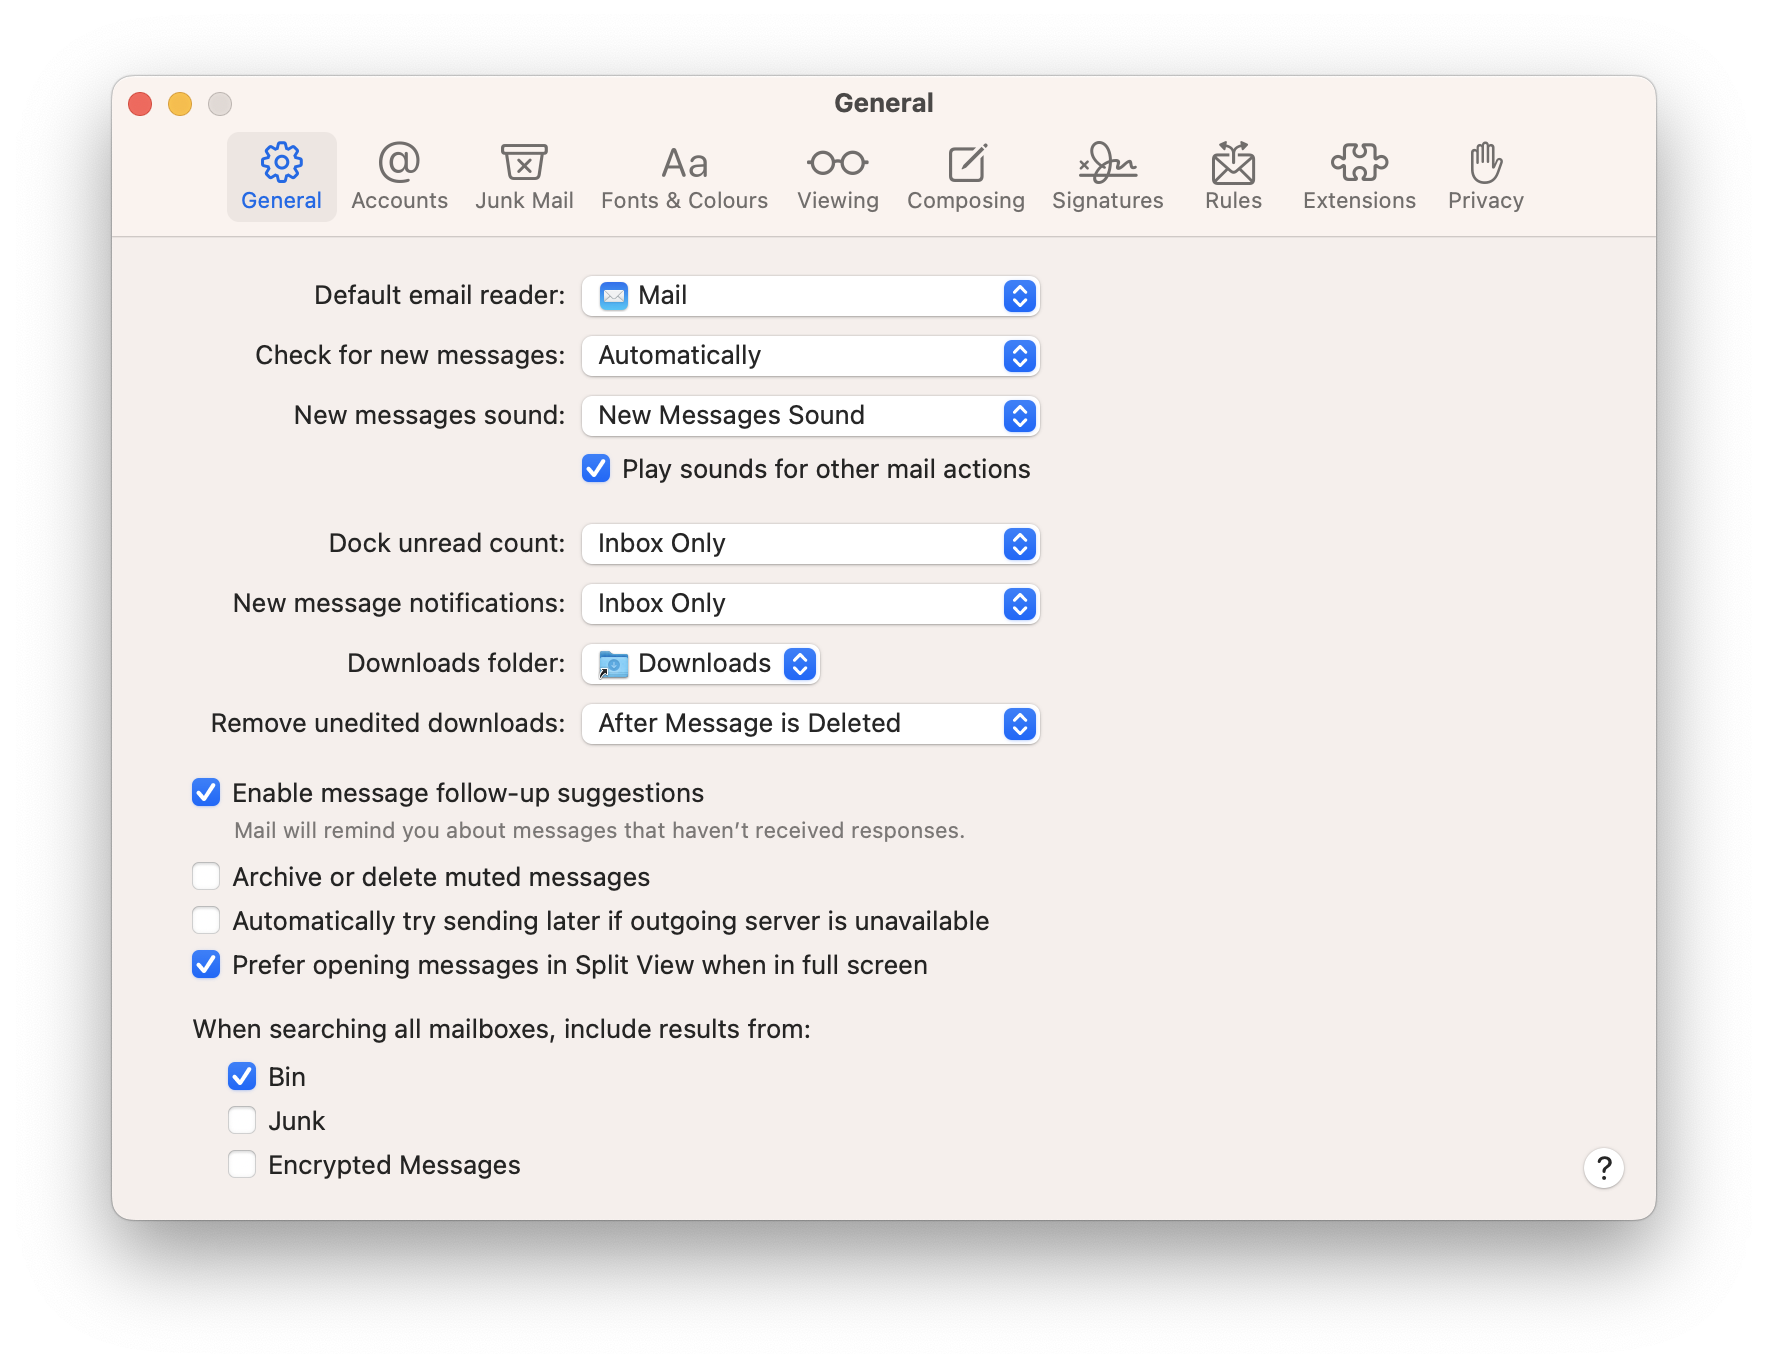
To do this, you need to go to the Mail App settings and switch to Accounts. Now click on the IMAP account you just set up and then switch to the Server settings tab.

Window General. 10 icons, each with an entry below it. The 10 items are selected General, Accounts, Junk Mail, Fonts and Colours, Viewing, Composing, Signatures, Rules, Extensions, Privacy. Default email reader, selection box Mail. Check for new messages, selection box Automatically. New messages sound, selection box  New Messages Aound, below box with tick, Play sounds for other mail actions. Dock unread count, selection box Inbox Only. New messages notifications, selection box Inbox Only. Downloads folder, selection box Downloads. Remove unedited downloads, selection box After Message is Deleted. Tick box, Enable message follow-up suggestions. Mail will remind you about messages that haven't received responses. Empty box, Archive or delete muted messages. Empty box, Automatically try sending later if outgoing server is unavailable. Tick box, Prefer opening messages in Split View when in full screen. When searching all messages, inclue results from, colon. Box with tick, Bin. Empty box, Junk. Empty box, Encrypted messages.Window Accounts.10 icons, each with an entry below it. The 10 items are General, selected Accounts, Junk Mail, Fonts and Colours, Viewing, Composing, Signatures, Rules, Extensions, Privacy. Left column contains 2 fields. Exchange, Exchange. Selected Musterteam, IMAP. Blank space. Below 2 buttons plus sign, minus sign. On the right in the main field 3 tabs, selected Account Information, Mailbox Behaviours, Server Settings. Box with check mark, Enable this account. Status, Online, Green Circle. Description, input field Musterteam. Email Address, selection box musterteam Smaller character musterteam At lrz.de Larger character. Download Attachments, selection box All. Empty box, Send large attachments with Mail Drop. Bottom right, question mark in circle.Window Accounts.10 icons, each with an entry below it. The 10 items are General, selected Accounts, Junk Mail, Fonts and Colours, Viewing, Composing, Signatures, Rules, Extensions, Privacy. Left column contains 2 fields. Exchange, Exchange. Selected Musterteam, IMAP. Blank space. Below 2 buttons plus sign, minus sign. On the right in the main field 3 tabs, selected Account Information, Mailbox Behaviours, Server Settings. Incoming Mail Server (IMAP). Username, input field ads backslash di69soz backslash di69kim. Password, input field thick dots. Host Name, input field xmail.mwn.de, below box with check mark, Automatically manage connection settings, below button Advanced IMAP Settings. Outgoing Mail Server (SMTP). Account selection field Lrz. Username, input field ads backslash di69soz backslash di69kim. Password, input field thick dots. Host Name, input field mailout.lrz.de, below box with check mark, Automatically manage connection settings. At the very bottom right, question mark in a circle.

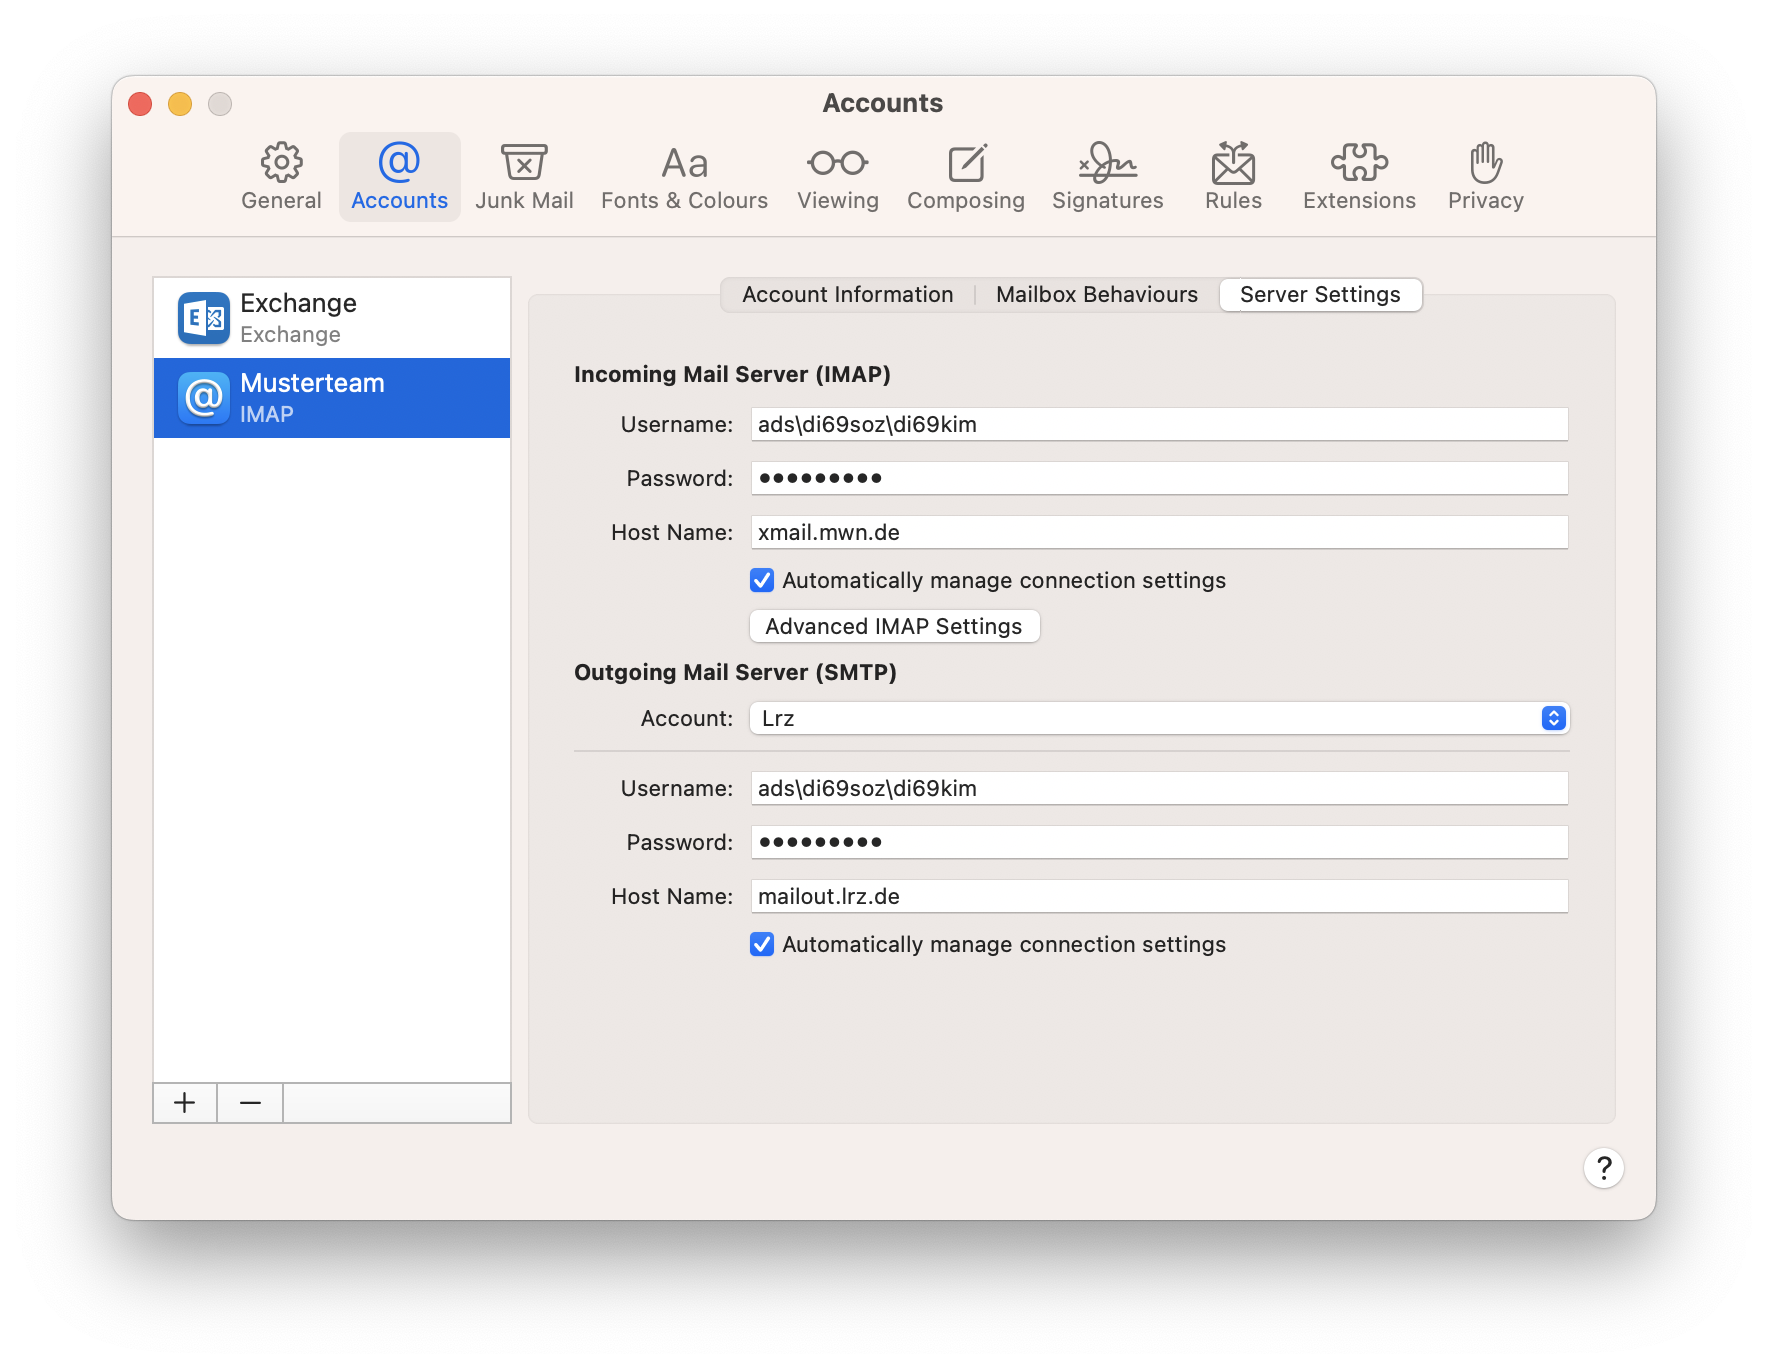
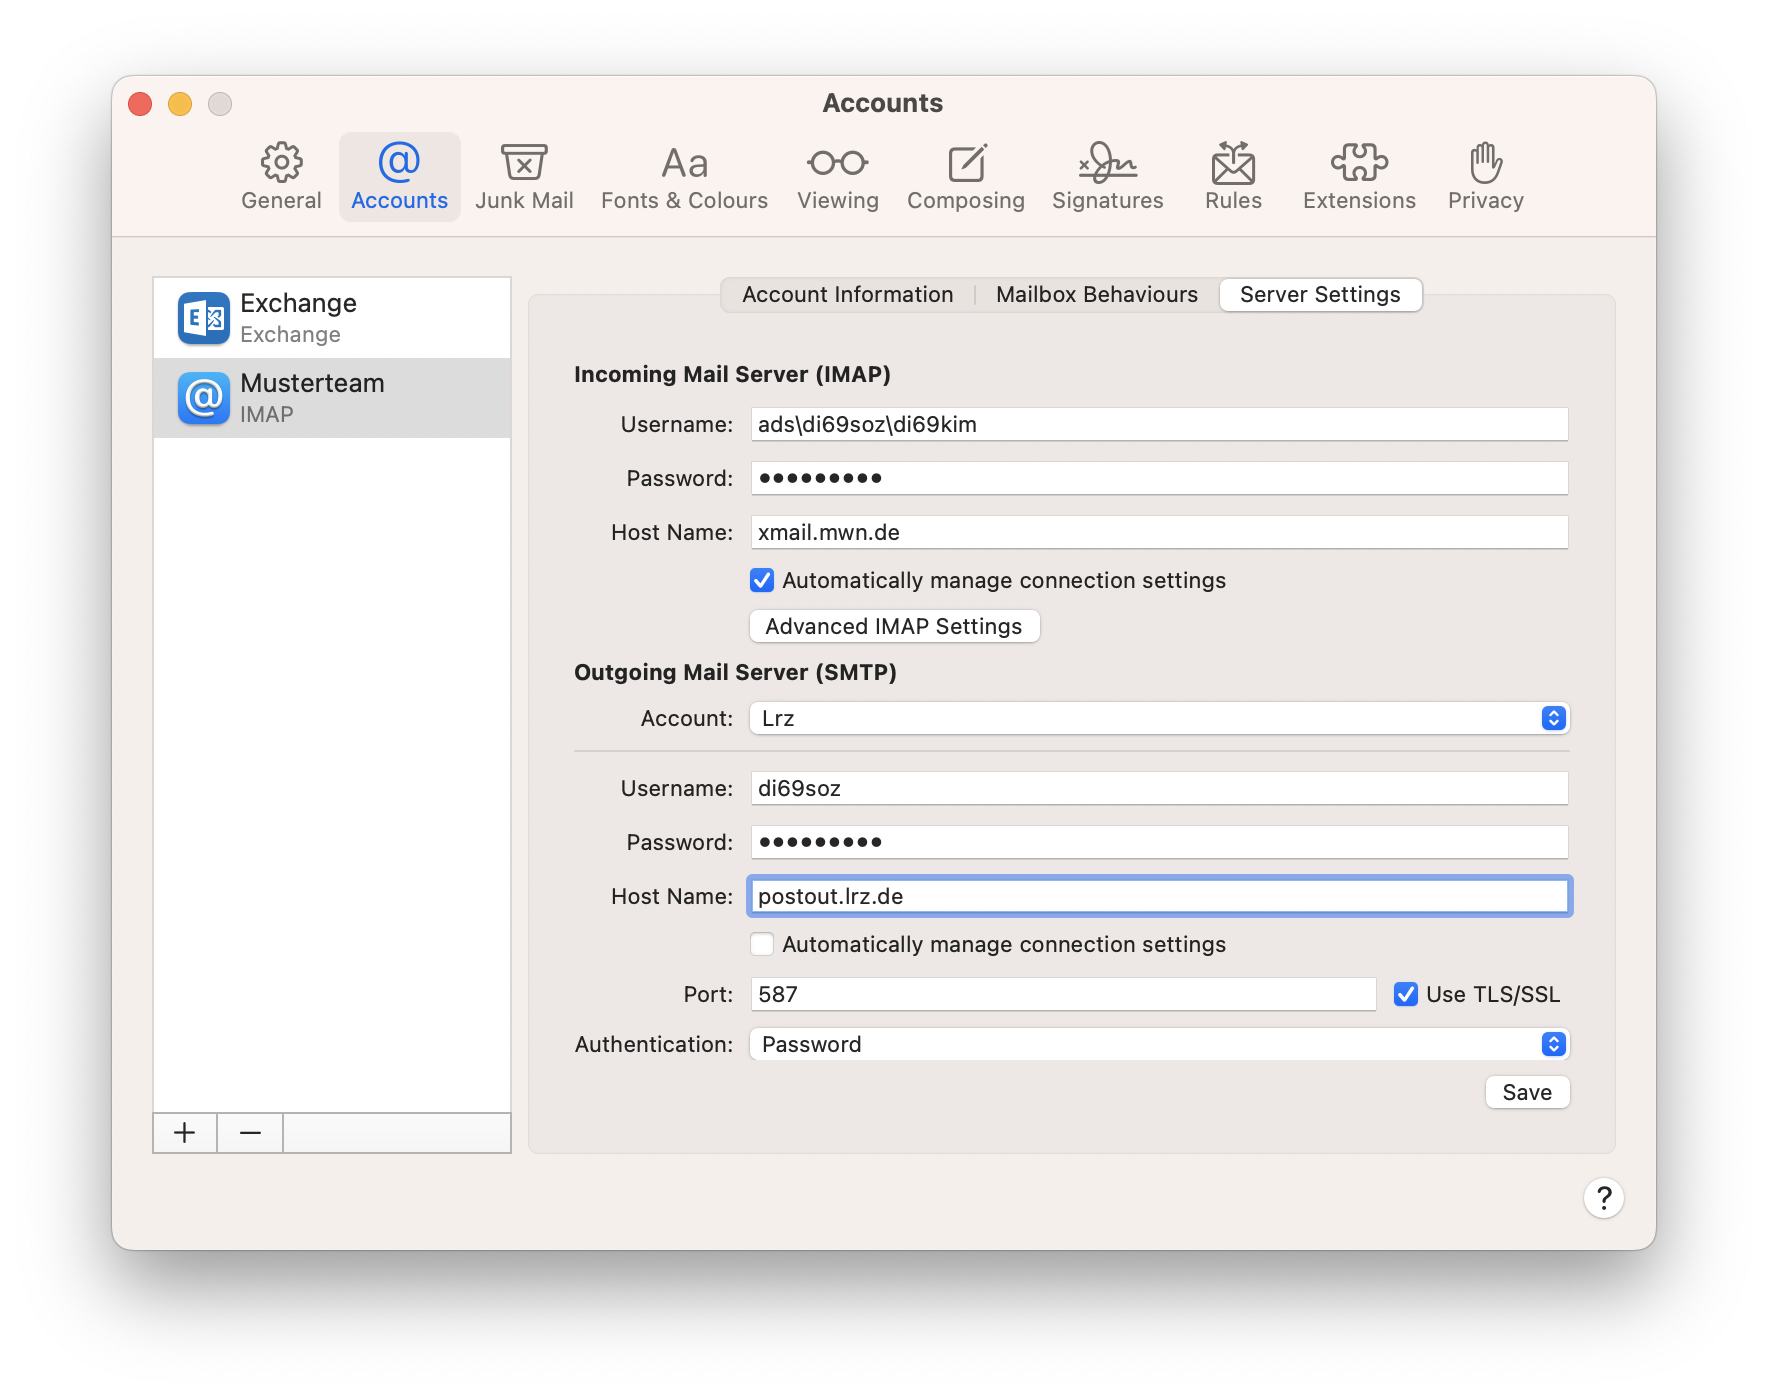
Here you have to change the hostname at Outgoing Mail Server to "postout.lrz.de" as well as the Username from "ads\<your account>\<shared mailbox acount>" to your account. In addition, uncheck "Automatically manage connection settings" and select "Password" as the method for authentication.

Window Accounts.10 icons, each with an entry below it. The 10 items are General, selected Accounts, Junk Mail, Fonts and Colours, Viewing, Composing, Signatures, Rules, Extensions, Privacy. Left column contains 2 fields. Exchange, Exchange. Selected Musterteam, IMAP. Blank space. Below 2 buttons plus sign, minus sign. On the right in the main field 3 tabs, selected Account Information, Mailbox Behaviours, Server Settings. Incoming Mail Server (IMAP). Username, input field di69soz. Password, input field thick dots. Host Name, input field postout.lrz.de, empty box, Automatically manage connection settings. Port, input field 587, check box, Use TLS slash SSL. Authentication, selection box Password. Below right, Save button. At the very bottom right, question mark in a circle.


Calendar

If you want to add a calendar of a shared Mailbox or a shared calendar to the Calendar app or share your own calendar with others, open the Calendar settings.

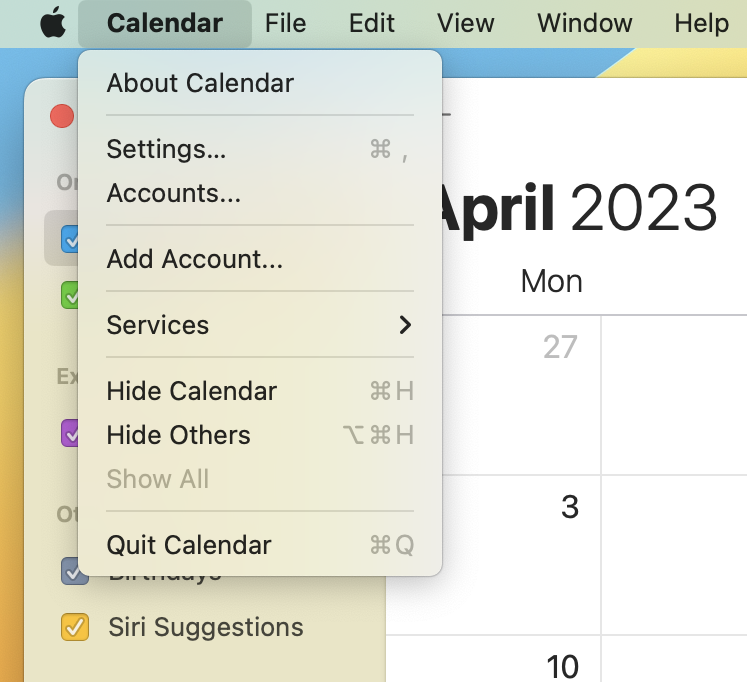
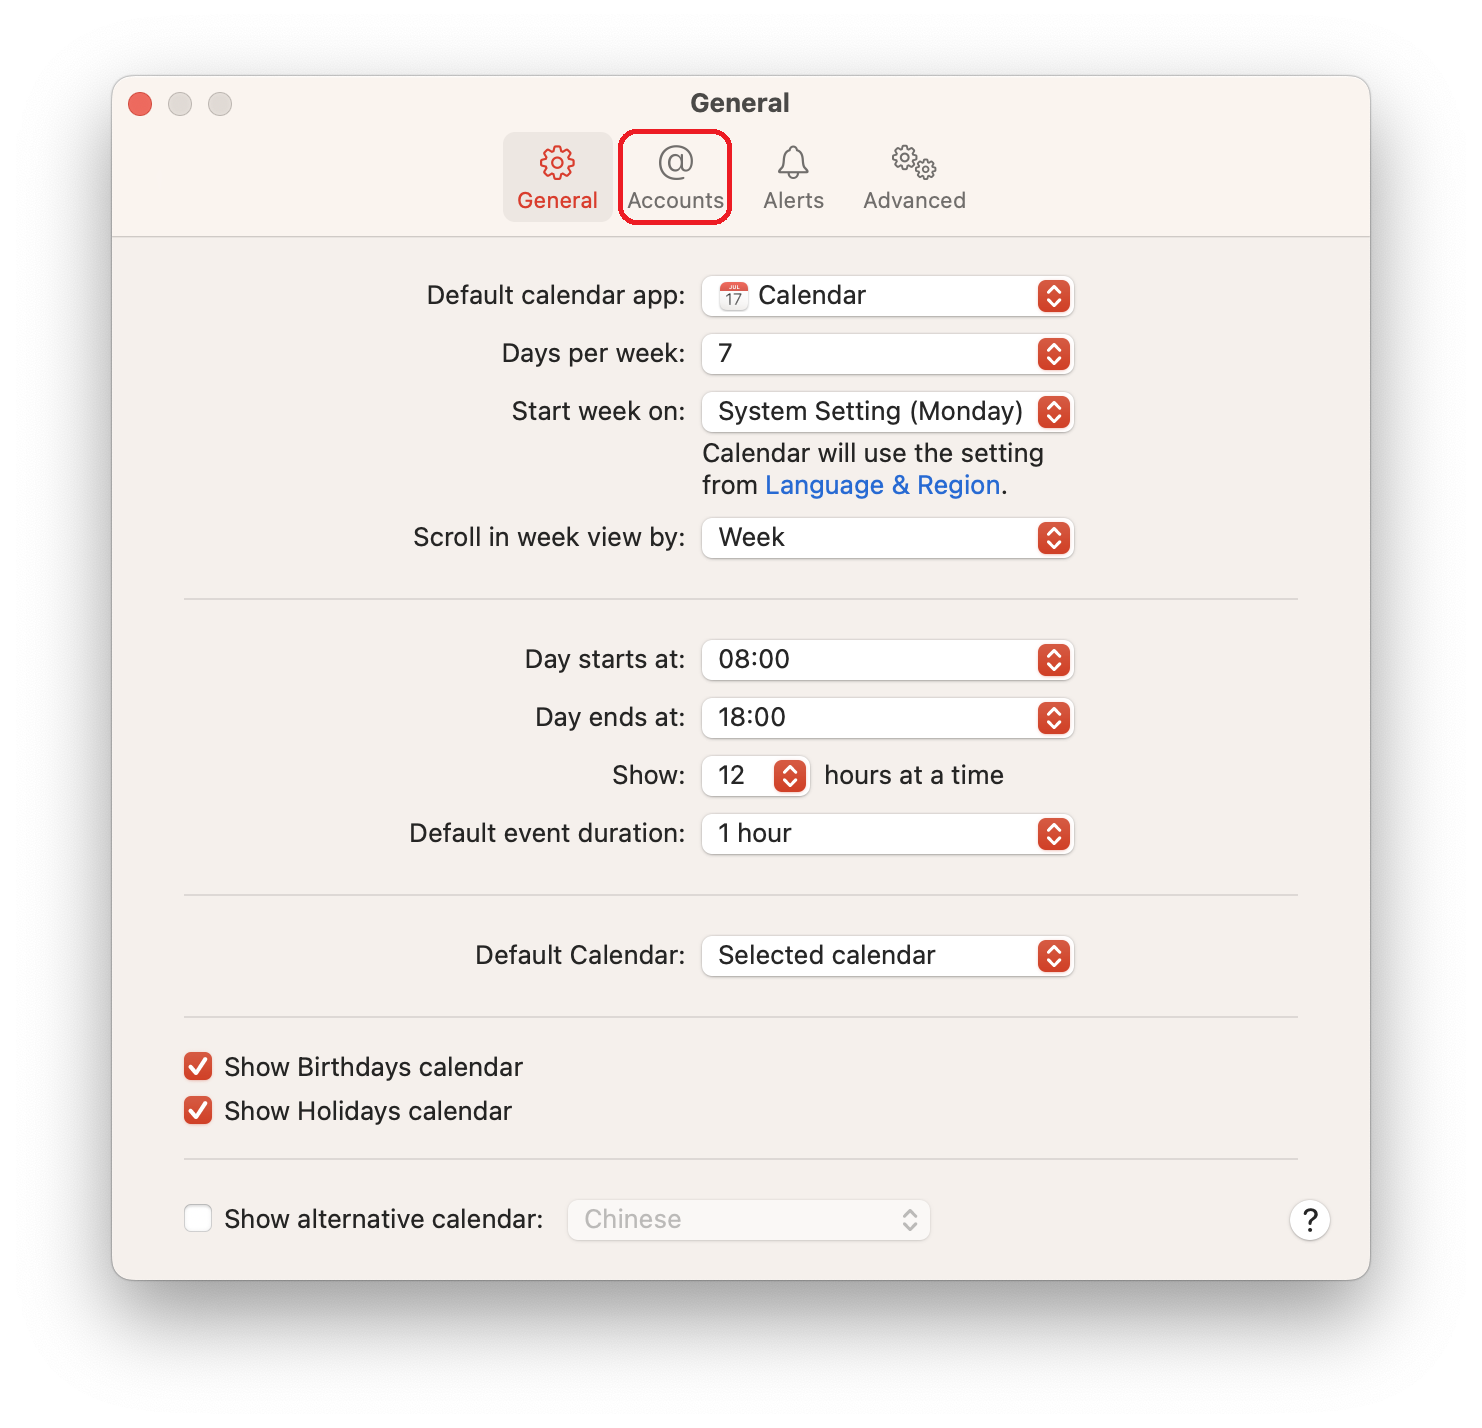
Go to Calendar in the menu bar and then select "Preferences...". The keyboard shortcut is Command-Comma.

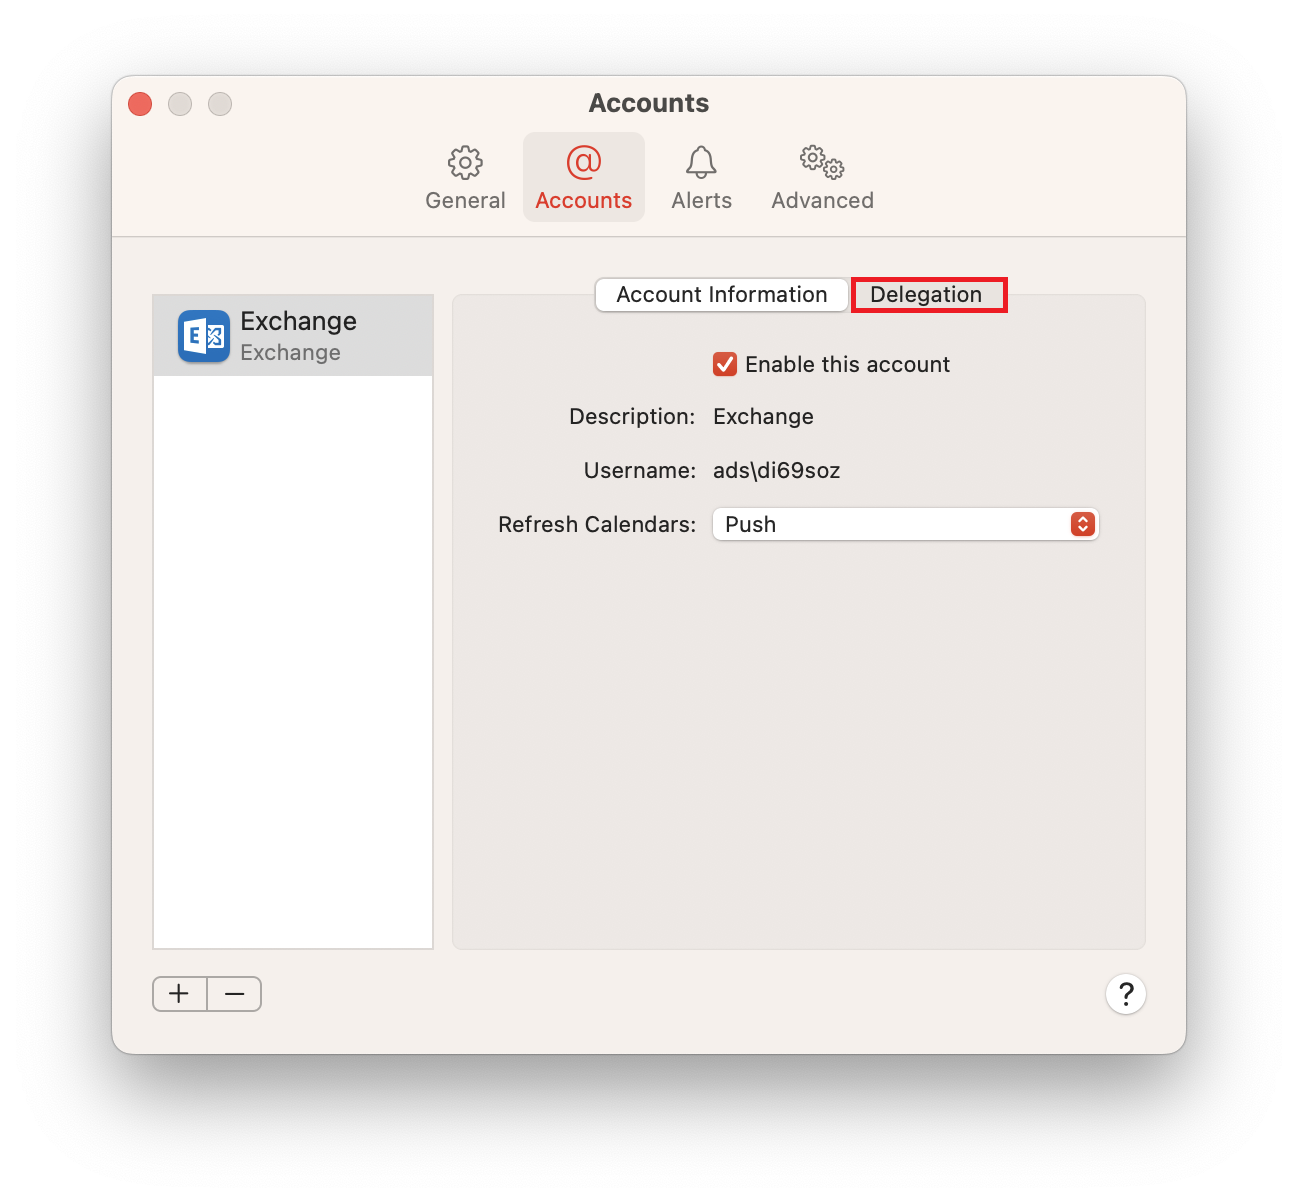
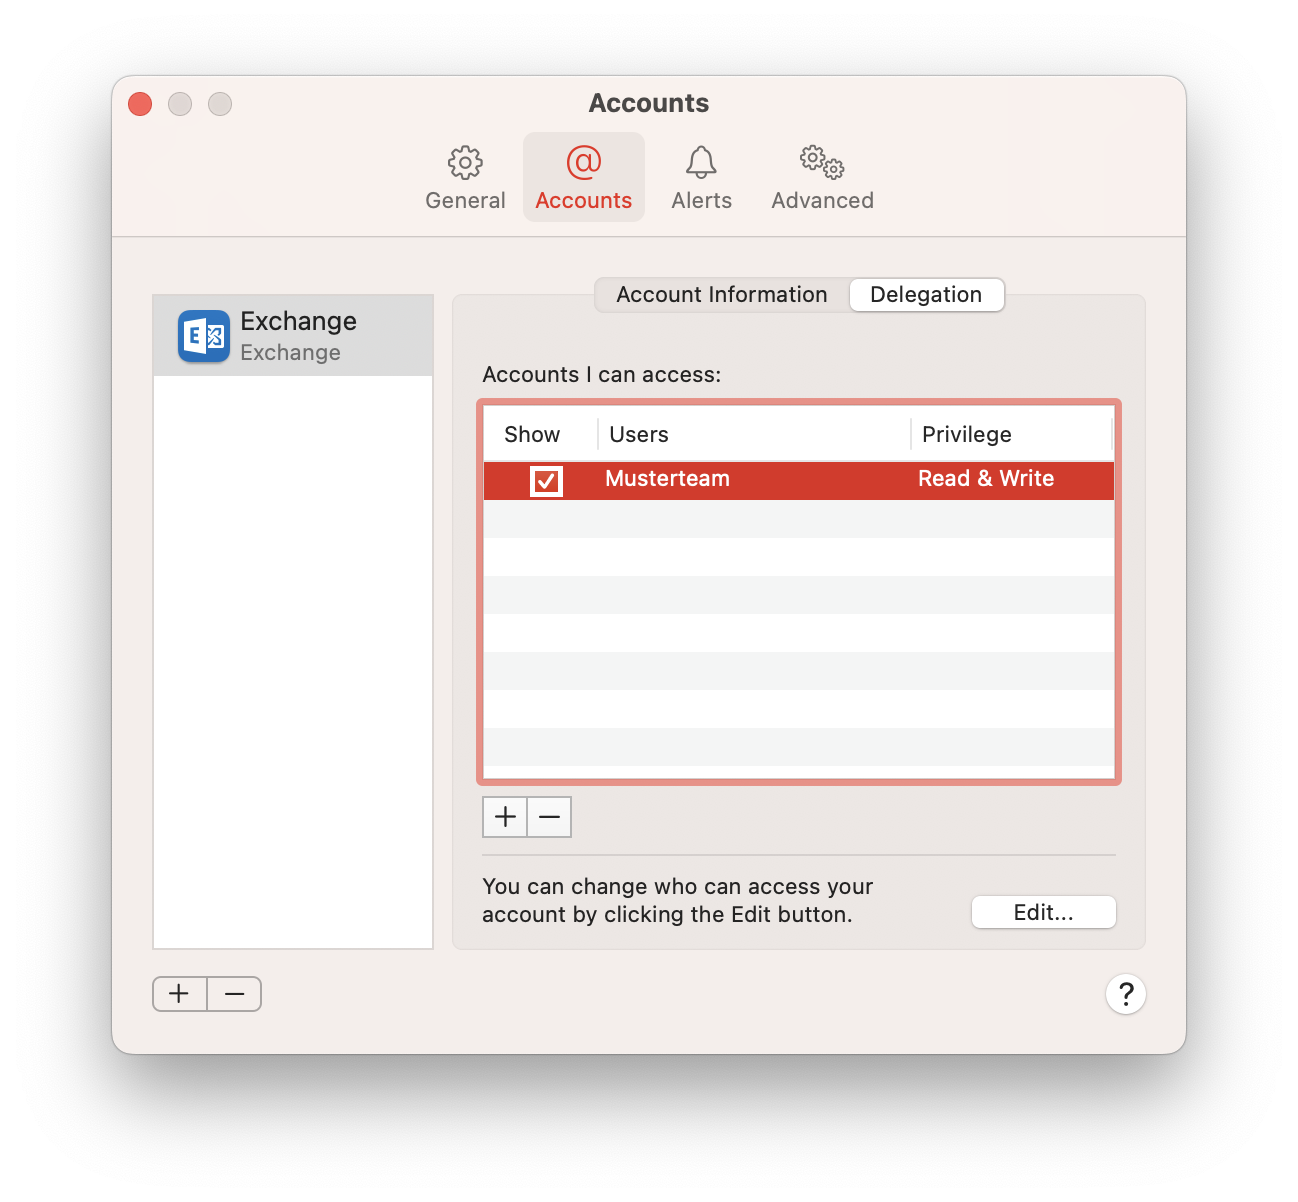
From the "General" tab, switch to "Accounts" and then from "Account information" to "Delegation".

Screen capture in the upper left corner. Apple icon, Calendar expanded. Item 2 is highlighted and selected, Preferences..., right command icon comma.Window Accounts. 4 tabs, General, selected Accounts, Alerts, Advanced. Left column one field Exchange, Exchange. Blank space. Below 2 buttons plus sign, minus sign. On the right in the main field 2 tabs Account Information, selected Delegation. Accounts I can access, colon. Table with 3 columns and no entry. Columns, Show, Users, Privilege. Below 2 buttons plus sign, dimmed minus sign. Horizontal line. You can change who can access your account by clicking the Edit button. rignt button Edit... in the bottom right corner, question mark in a circle.

In the Apple Calendar app on the Mac, it is possible to include the calendar of a shared mailbox or shared calendars. However, to do this, you must first set up the delegate permission.

Share calendars

To share your calendar, click on "Edit..." at the bottom right of the Delegation in the calendar preferences.

A window will open. Click there on the small plus and then search in the appeared line for the person who should receive the access.

The previous window is overlaid by a smaller window. Manage Account Access. Table with 2 columns and one incomplete entry. Column Name, entry field Schnupper, below Christiana Schnupperer (Christiana.Schnupperer At Lrz.de). Columns Calendars, each selection field Read only with red background. Below the table, 2 buttons dimmed plus sign, minus sign, wheel icon for processing running, Searching for users..., right button Done.

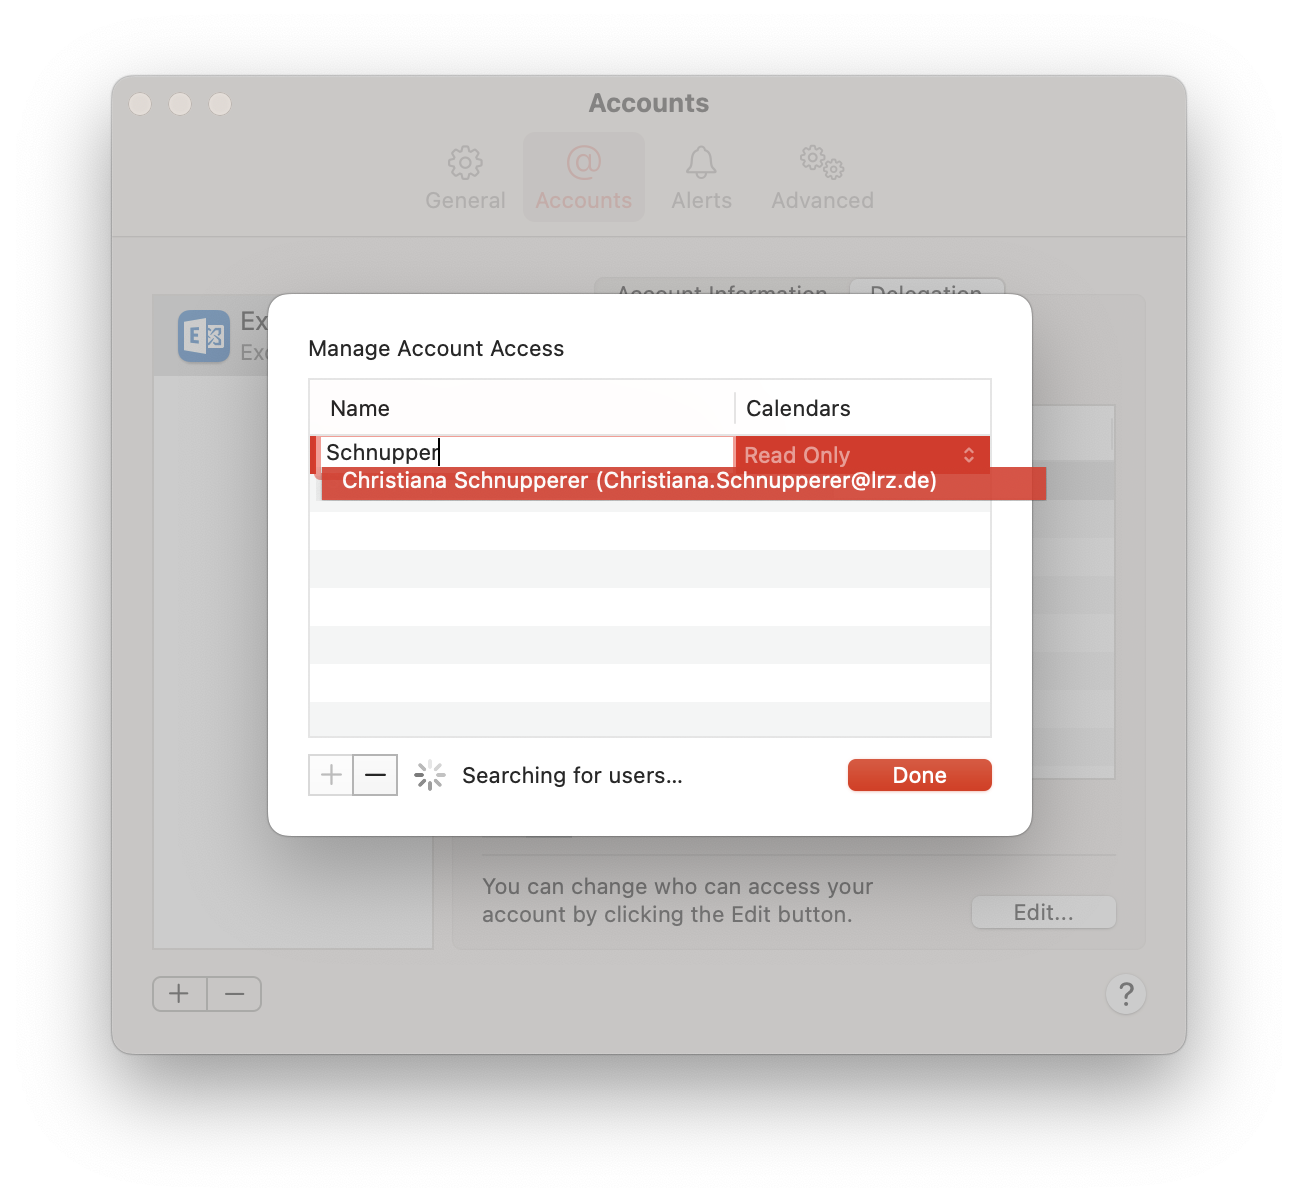
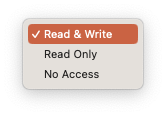
Once you have selected the user, you can still adjust the permissions. To do this, click on "Read only" in the Calendar column. The following menu opens, from which you select the permission level to be assigned.

Selected Check mark, Read and Write. Read and Create. No Access.

Like the picture before last, only now in the table the entry is complete. Name column, Schnupperer, Christiana. Column Calendars, Read Only. Below the table, 2 buttons plus sign, minus sign, wheel icon for processing running, Updating privileges..., right button Done.

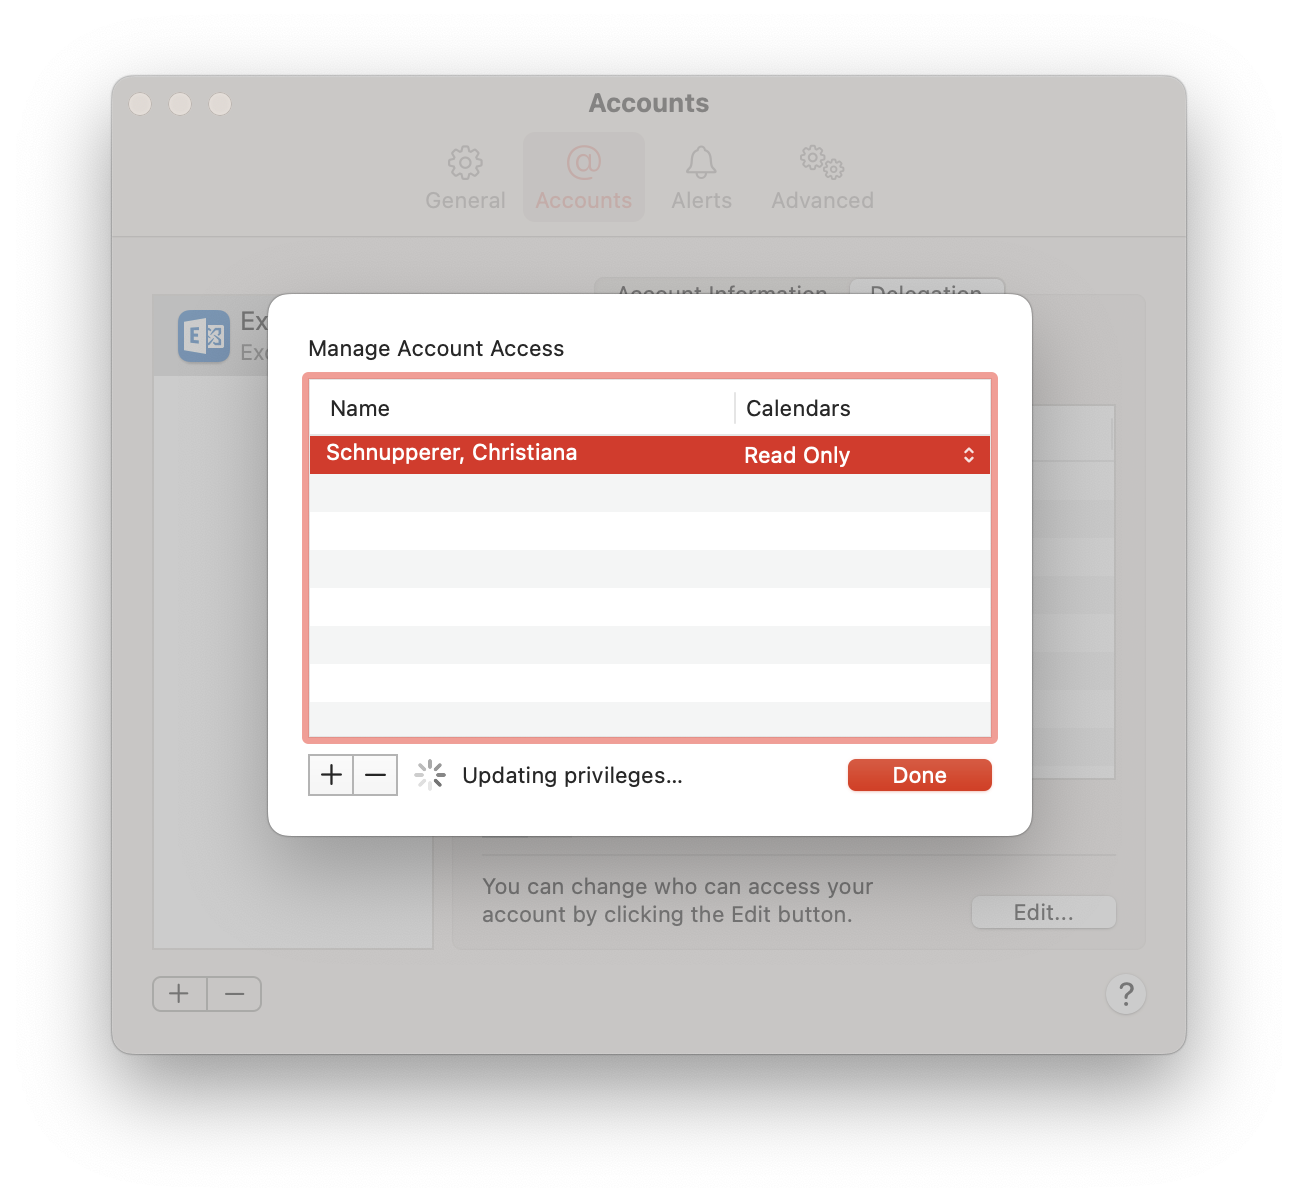
Click "Done" to complete the sharing process.

Open shared calendar

Unfortunately, it is not possible to display the free/busy times of other calendars in the Apple calendar. To open a foreign calendar, you need at least read permissions.

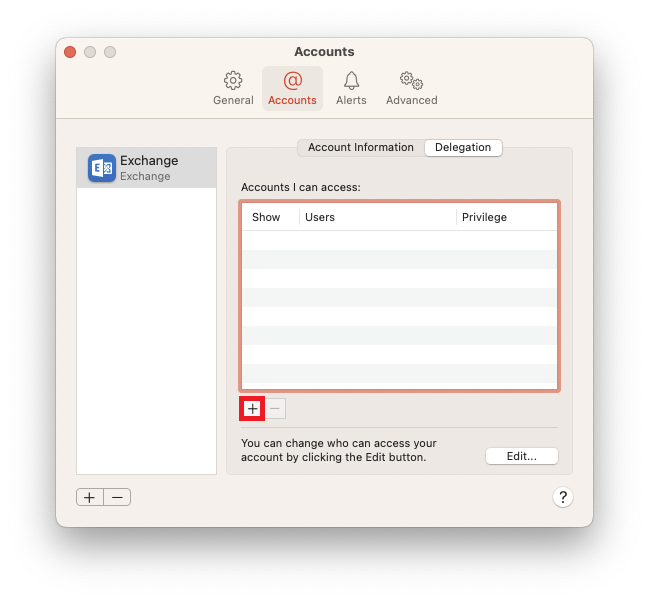
Once you've set up this permission, to set up the calendar, open the Calendar app's Preferences. There, switch to Accounts and then select the "Delegation" tab.

Window General. 4 tabs, selected General, marked Accounts, Alerts, Advanced. Default calendar app, colon, selection box Calendar. Days per week, colon, selection box 7. Start week on, colon, selection box System Settings (Monday). Calendar will use the setting from clickable Language and Region. Scroll in week view by, colon, selection box Week. Horizontal line. Day starts at, colon, selection box 08 colon 00. Day ends at, colon, selection box 18 colon 00. Show, colon, selection box 12 hours at a time. Default event duration, colon, selection box 1 hour. Horizontal line. Default Calendar, colon, selection box Selected calendar. Horizontal line.  Box with check mark, Show Birthdays calendar. Box with check mark, Show Holidays calendar. Horizontal line. Empty box, Show alternative calendar, colon, dimmed selection box Chinese.Window Accounts. 4 tabs, General, selected Accounts, Alerts, Advanced. Left column one field Exchange, Exchange. Blank space. Below 2 buttons plus sign, minus sign. On the right in the main field 2 tabs selected Account Information, marked Delegation. Box with check mark, Enable this account. Description, colon Exchange. Username, colon, ads backslash di69soz. Refresh Calendars, colon, selection box Push. In the bottom right corner, question mark in a circle.

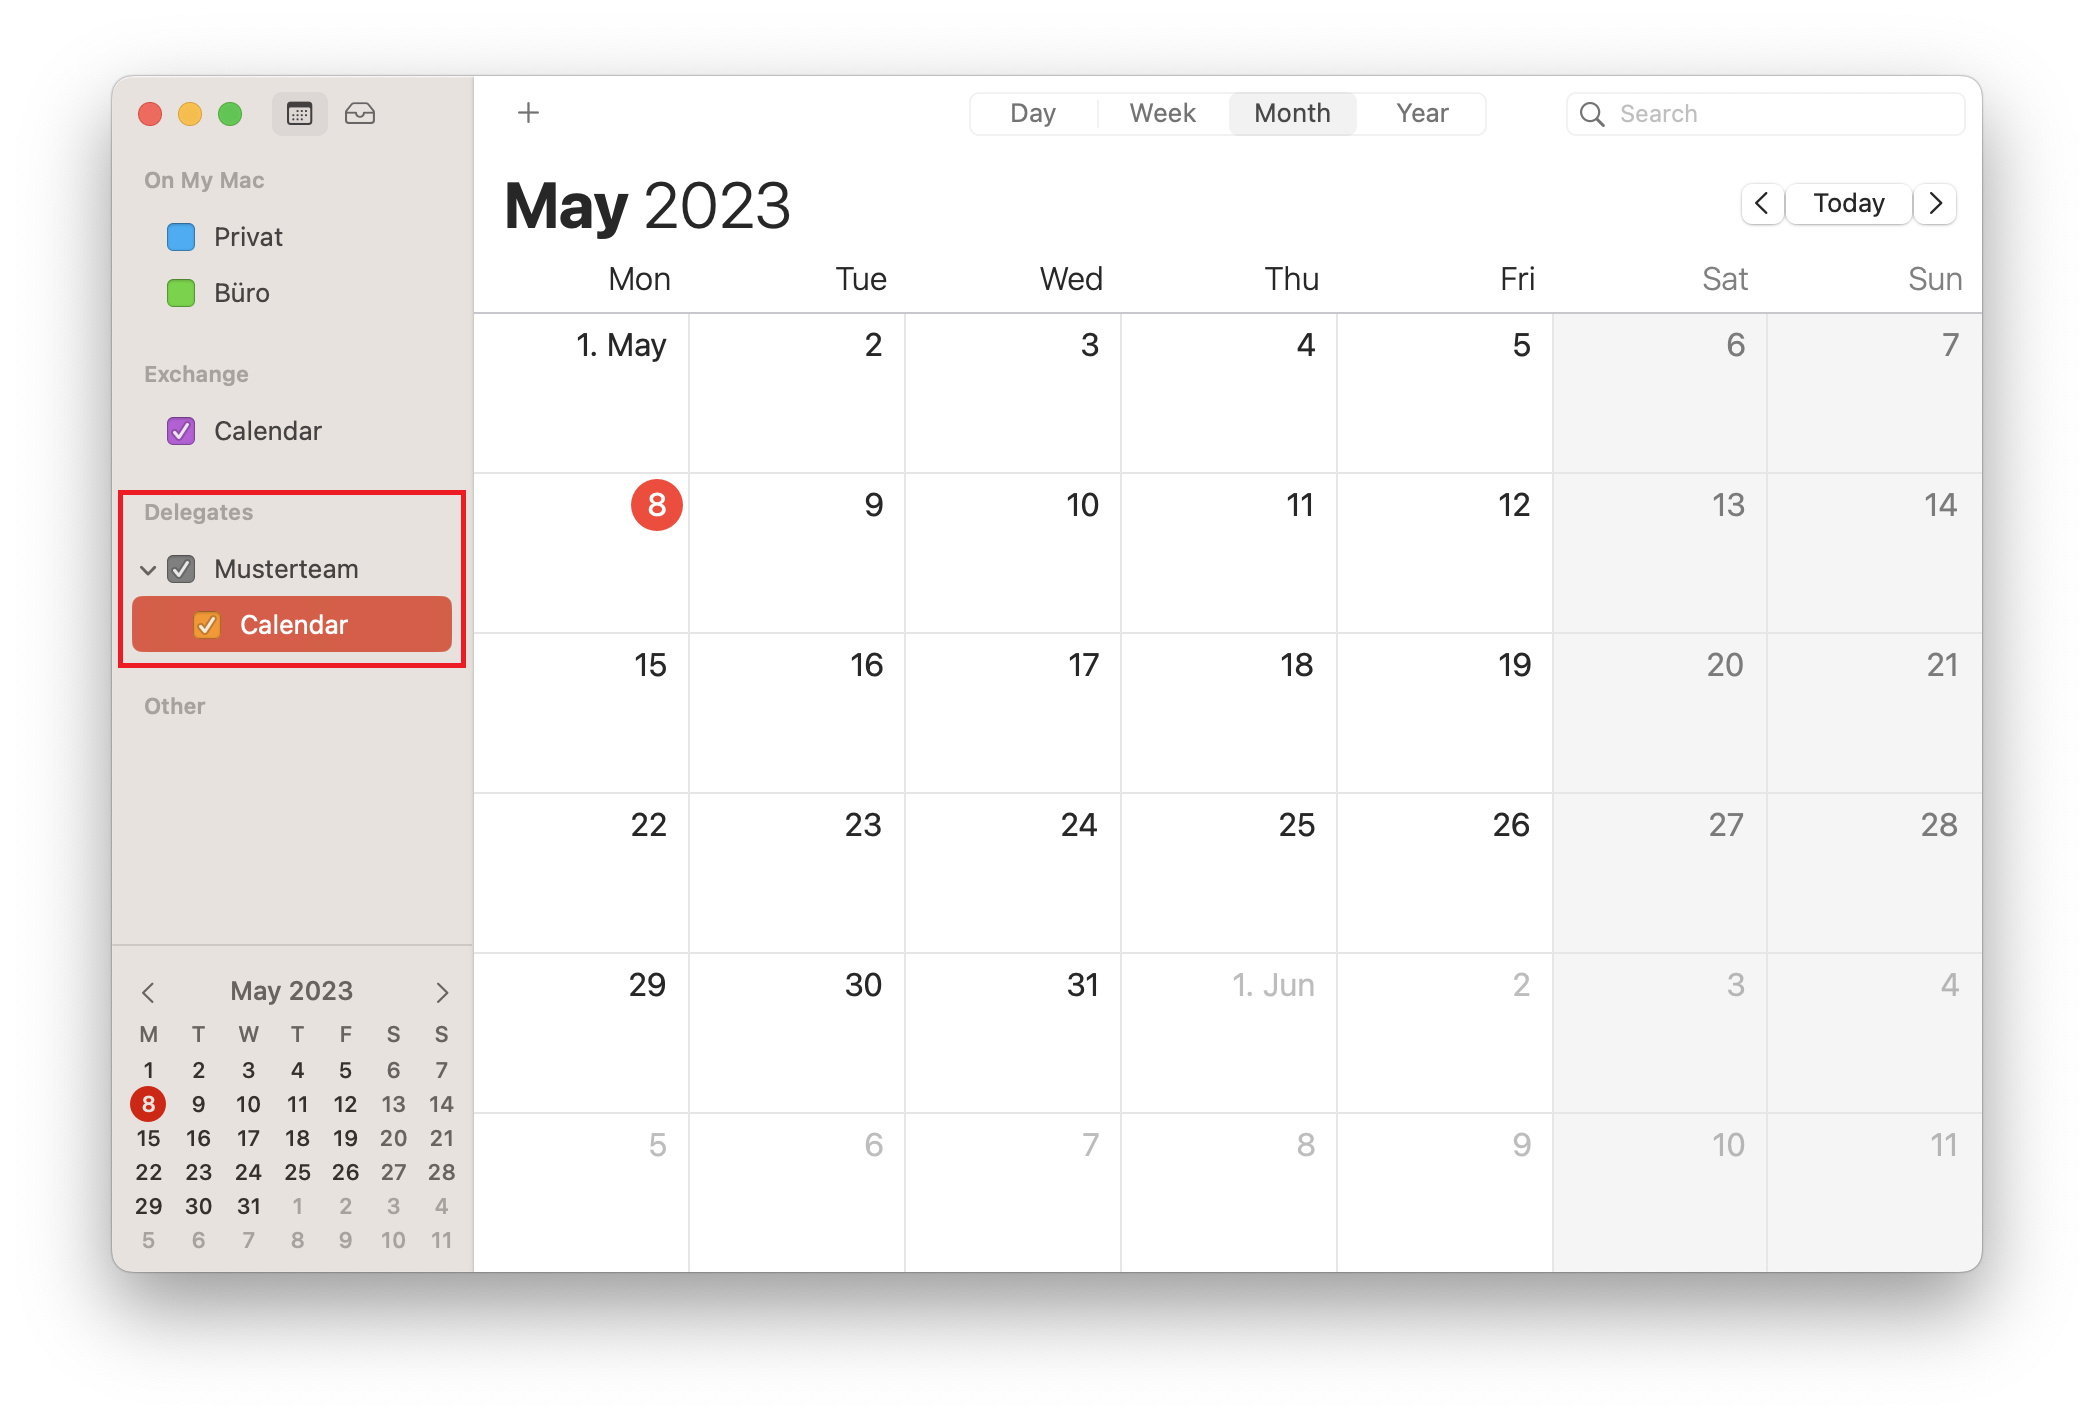
To add it, click the plus. Then, when you start entering the account or the email, you will see suggestions. Select the desired mailbox from them, otherwise it will not work.

Window Accounts. 4 tabs, General, selected Accounts, Alerts, Advanced. Left column one field Exchange, Exchange. Blank space. Below 2 buttons plus sign, minus sign. On the right in the main field 2 tabs Account Information, selected Delegation. Accounts I can access, colon. Table with 3 columns and no entry. Columns, Show, Users, Privilege. Below 2 buttons marked plus sign, dimmed minus sign. Horizontal line. You can change who can access your account by clicking the Edit button. rignt button Edit... in the bottom right corner, question mark in a circle.Window Accounts. 4 tabs, General, selected Accounts, Alerts, Advanced. Left column one field Exchange, Exchange. Blank space. Below 2 buttons plus sign, minus sign. On the right in the main field 2 tabs Account Information, selected Delegation. Accounts I can access, colon. Table with 3 columns with one incomplete entry. Column, Show, entry empty box, column Users, entry Musterteam, below Musterteam, column Privilege, entry No access. Below 2 buttons dimmed plus sign, minus sign. Horizontal line. You can change who can access your account by clicking the Edit button. rignt button Edit... in the bottom right corner, question mark in a circle.

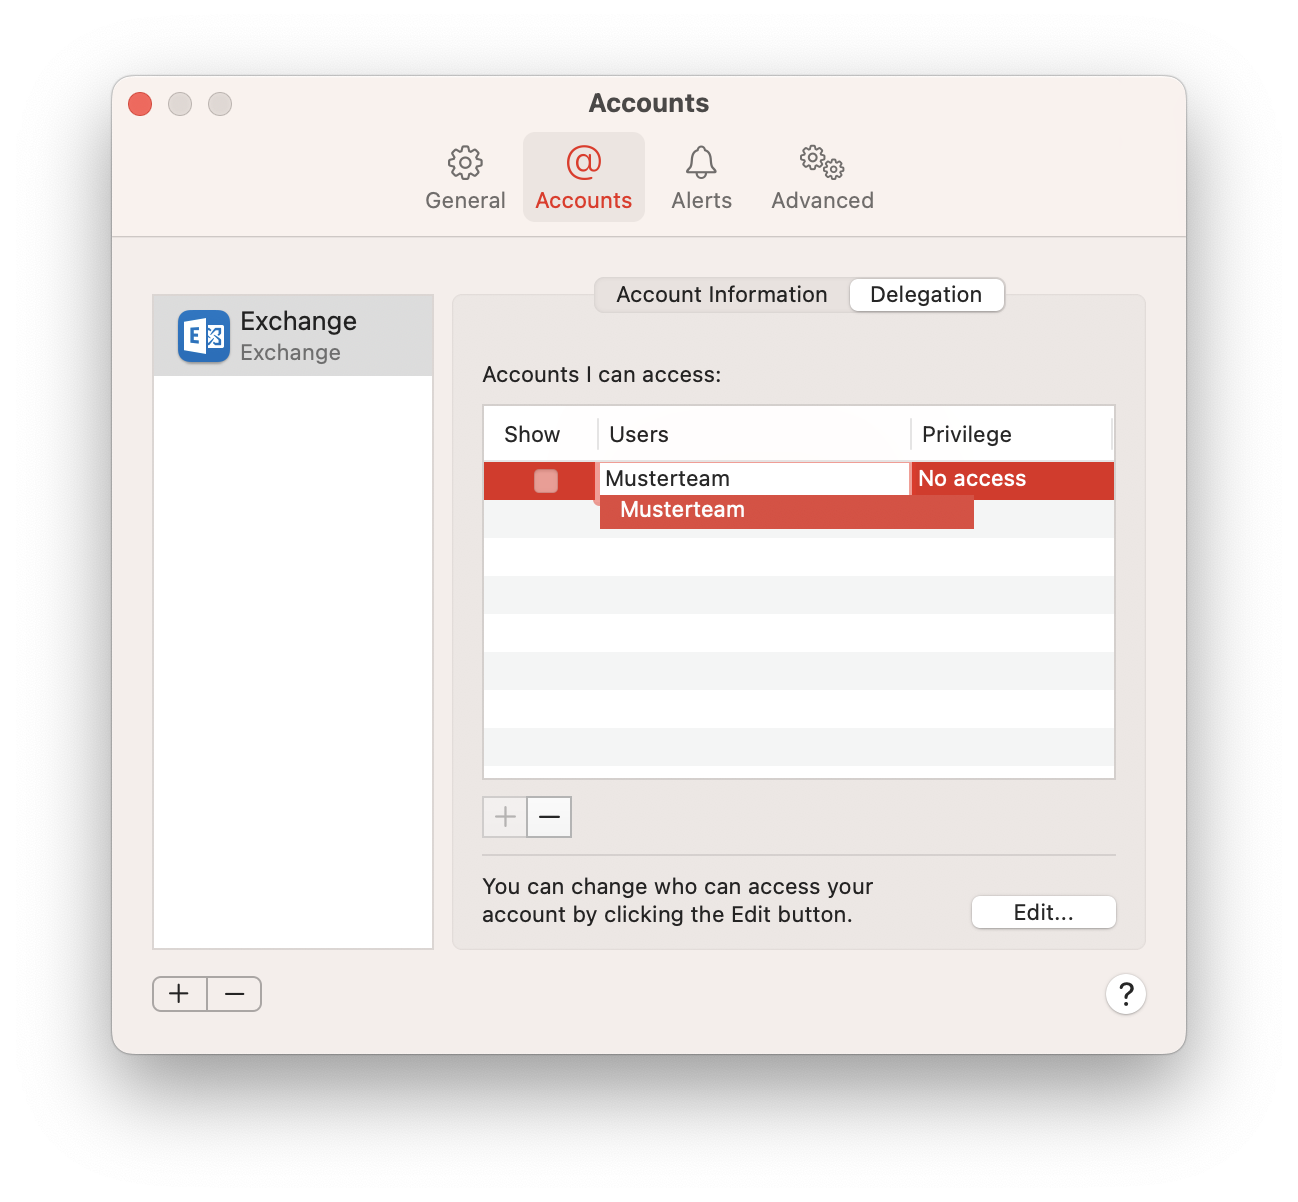
In order for the calendar to be displayed, the "Show" checkbox must be checked.

Window Accounts. 4 tabs, General, selected Accounts, Alerts, Advanced. Left column one field Exchange, Exchange. Blank space. Below 2 buttons plus sign, minus sign. On the right in the main field 2 tabs Account Information, selected Delegation. Accounts I can access, colon. Table with 3 columns with one entry. Column, Show, entry box with check mark, column Users, entry Musterteam, below Musterteam, column Privilege, entry Read and Write. Below 2 buttons plus sign, minus sign. Horizontal line. You can change who can access your account by clicking the Edit button. rignt button Edit... in the bottom right corner, question mark in a circle.Calendar window. 2 buttons Calendar, plus sign. In the center 4 connected buttons Day, Week, selected Month, Year. Right search field. Left column. On My Mac area with 2 subitems. Empty box, Privat. Empty box, BĂĽro. Exchange area with 1 subitem. Checked box, Calendar. Delegates area with 1 subitem. Checked box with tick, Musterteam, subitem Box with tick, Calendar. Other area without subitems. Below, Monthly overview May 2023. On the right in the main field, the large monthly overview May 2023 with day fields.

Notes

Filter rules

Filter rules that you create in Apple Mail are not transferred to the Exchange Server. We therefore recommend that you create filter rules in Outlook on the Web.

How do I set up an Out of Office message?

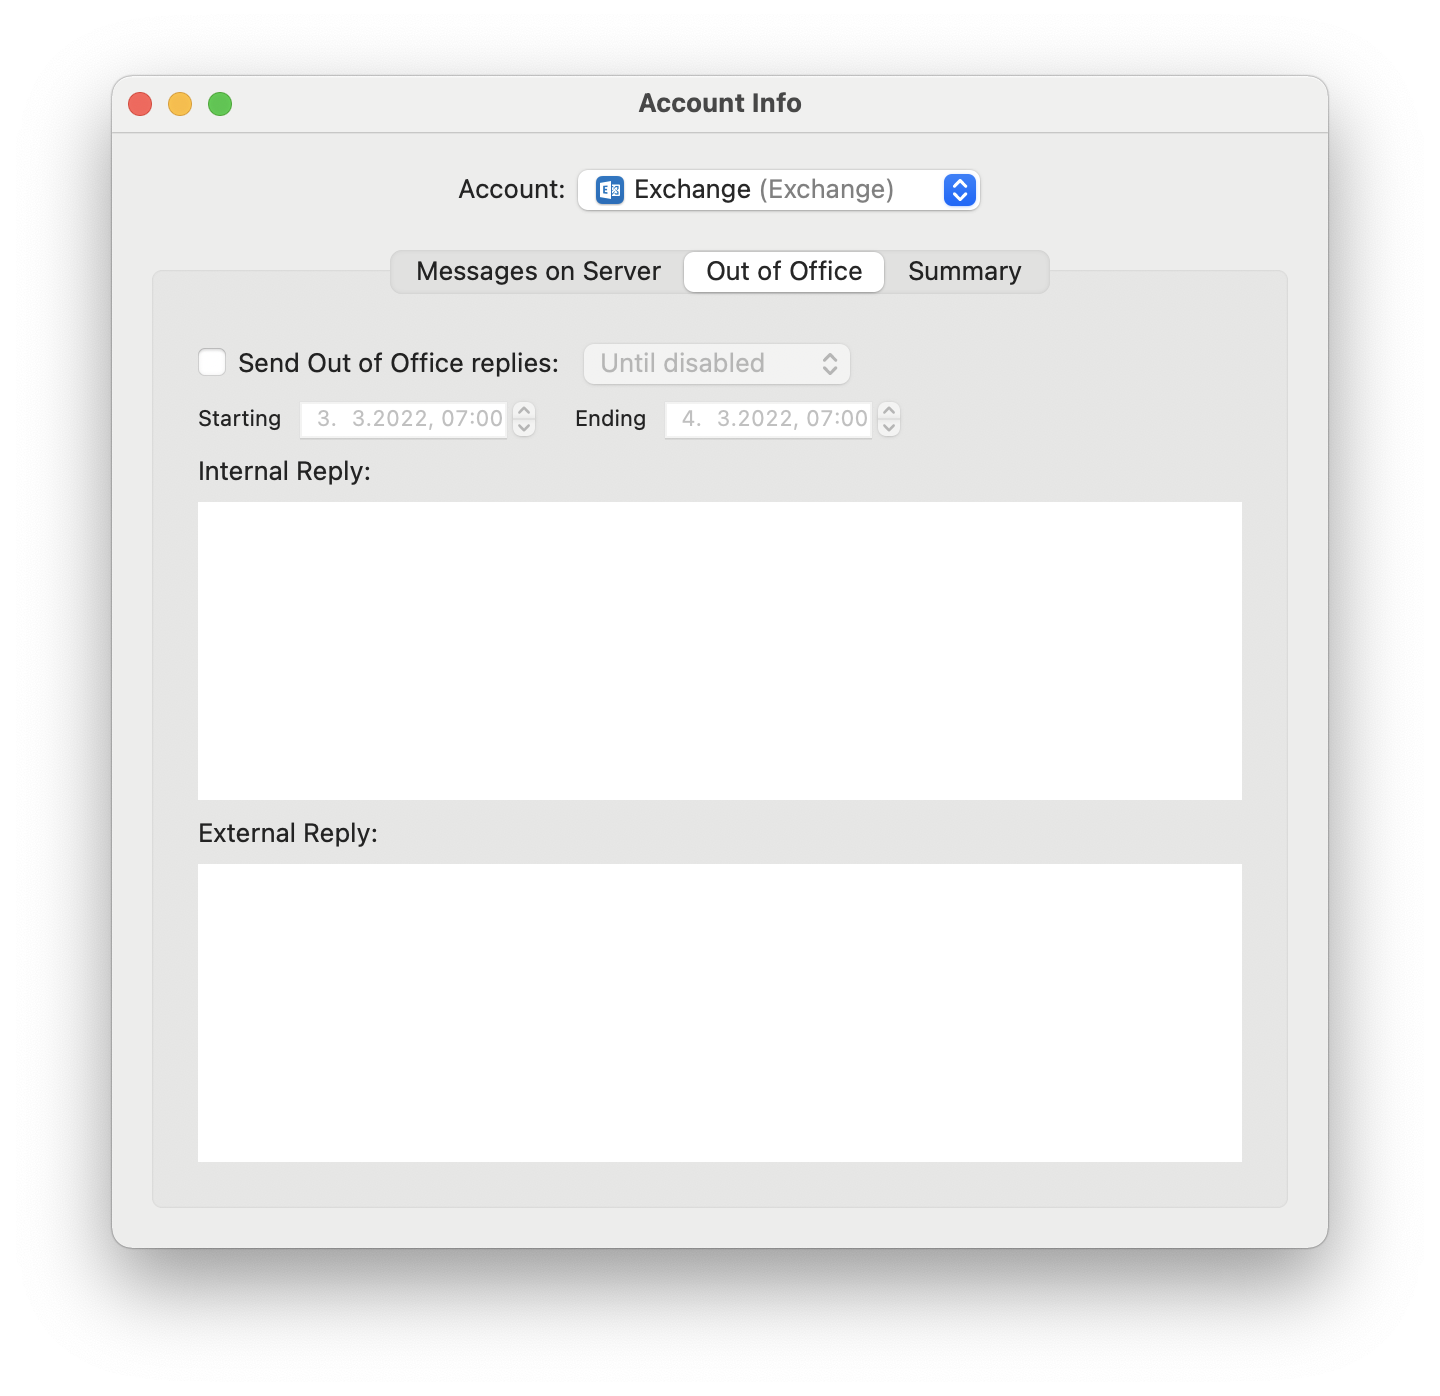
Make a right click on "Inbox". If you have multiple mailboxes, right-click on the email address below the Inbox. Then select "Account info". Now switch to "Out of Office".

You can configure different out of office messages for senders inside (all on the Exchange Server) and outside the setup.

Windwo Account info. Account, selected Exchange, round bracket open, Exchange, round bracket closed. 3 tabs, Messages on Server, selected Out of Office, Summary. Empty box, Send Out of Office replies, dimmed selection box Until disabled. Starting, dimmed select box 3. 3.2022 comma 07 colon 00, Ending, dimmed select box 4. 3.2022 comma 07 colon 00. Internal Reply, colon. Large blank field. External Reply, colon. Large empty field.

By the way, your out-of-office message will not be triggered by mail from mailing lists or mail marked as spam.

Typical error messages

Why can't I send emails anymore?


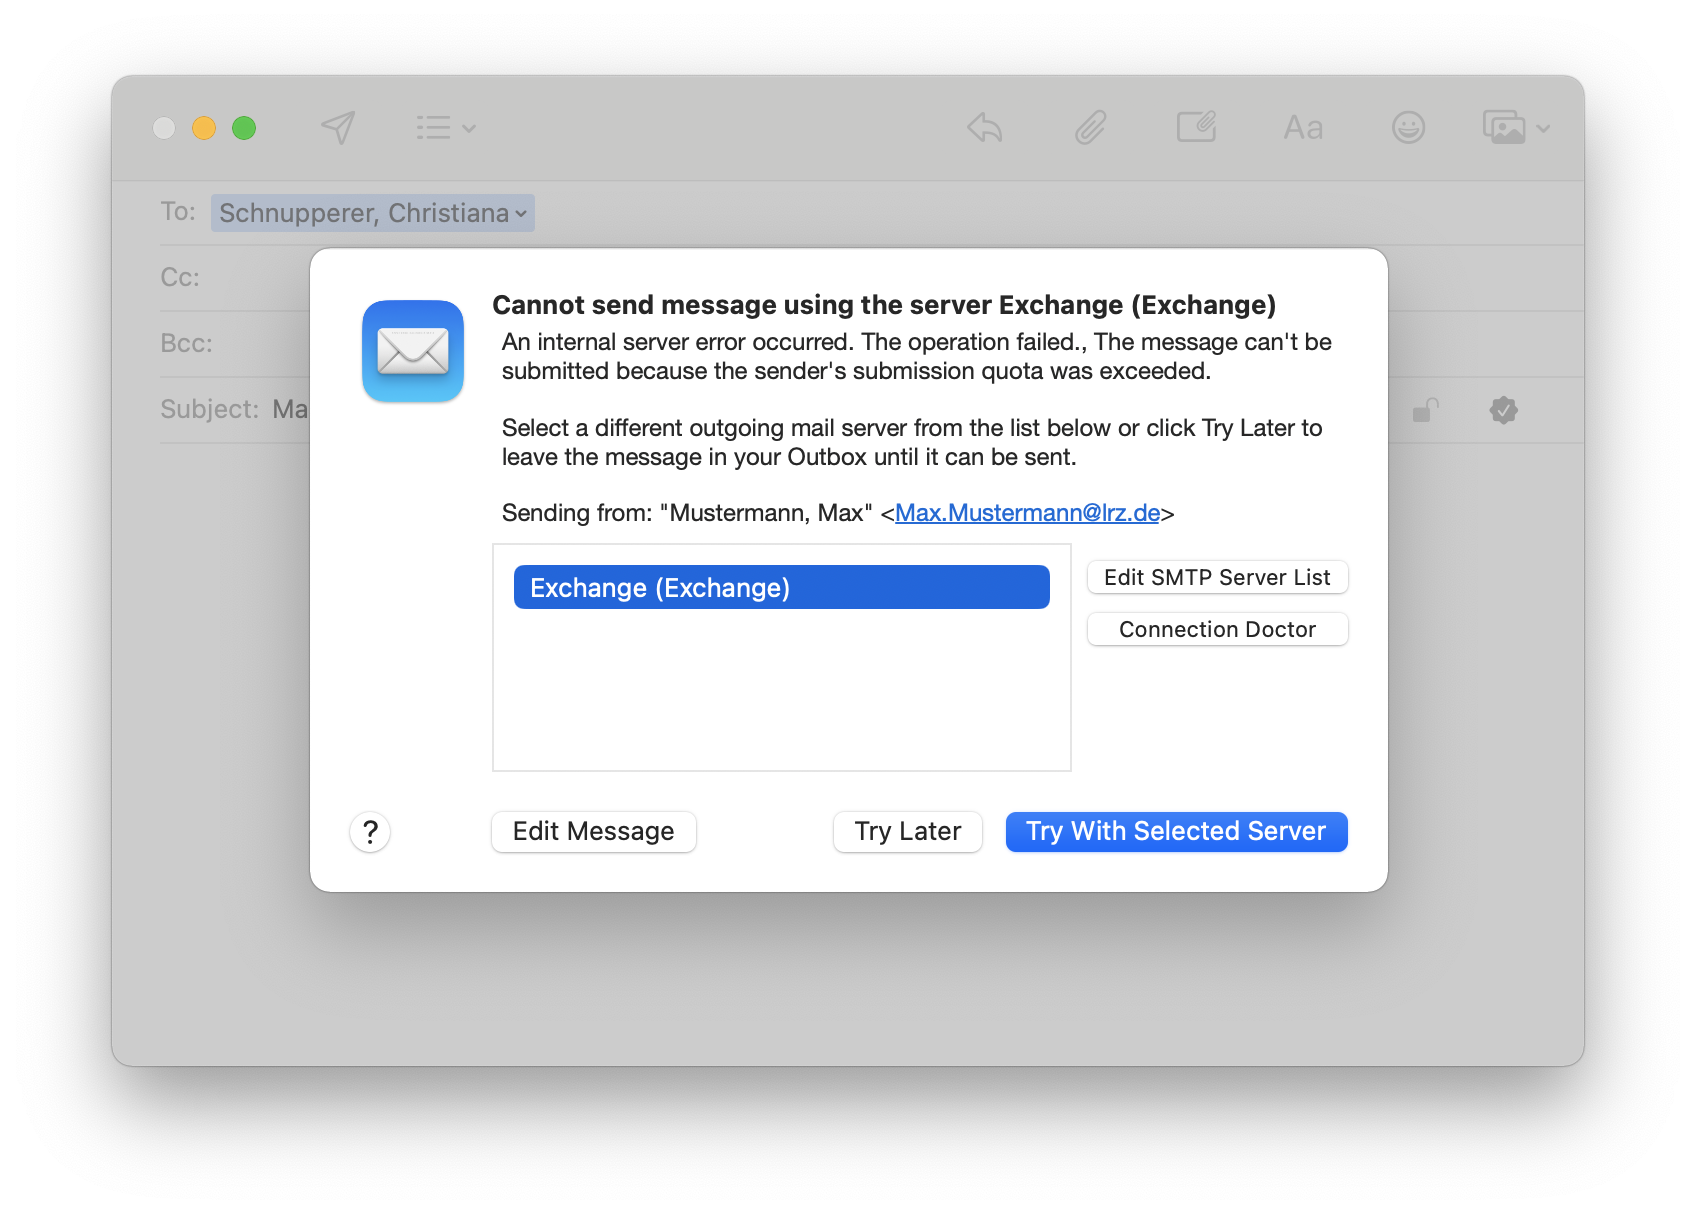
If you have sent a lot of emails or emails with a high number of recipients in one day, it is possible that you cannot send any more emails and when you try to send another email, the adjacent message pops up.


The reason is that you have exceeded the limit of 250 recipients within 24 hours. The limit resets automatically after 24 hours.

The purpose of the limit is to ensure that only a limited number of emails are sent, even via compromised accounts. This keeps the risk of LRZ mail servers getting onto so-called "denylists" as small as possible.


Window with email overlaid by a window. Cannot send message usion the server Exchange (Exchange). An internal server error occurred. The operation failed., The message can't be submitted because the sender's submission quota was exceeded. Select a different outgoning mail server from the list below or click Try Later to leave the message in your Outbox until it can be sent. Sending from, double apostrophe Mustermann, Max, double apostrophe, lowercase Max.Mustermann At lrz.de uppercase. Field for 5 lines with the selected line Exchange (Exchange), to the right of it 2 buttons one below the other, Edit SMTP Server List,  Connection Doctor. At the bottom 4 buttons, question mark, Edit Message, Try Later, selected Try Sith Selected Server.

Full mailbox

Your mailbox has a certain size (usually 3 GiB). If you exceed it, you will not be able to send or receive emails.


When you get to the limit, you will first receive a warning mail (From: Microsoft Outlook - quota-warning@ads.mwn.de). If the memory consumption continues to increase, you will no longer be able to send messages. If the quota is significantly exceeded, you will also no longer be able to receive messages.

Window Inbox Exchange (1 message). Toolbar. Filter, Get Mail, New Message, Archive, Delete, Junk. Search. Left column, basically a field with the text Microsoft Oulook, Your mailbox is almost full. On the right, the main field. quota-warning At ads.mwn.de, on the right, information about mailbox and time. Your mailbox is almost full. To, Max.Mustermann At lrz.de. Hyphen. Your mailbox is almost full. Mainly colored bar, 1005MB, to the right of it 1024MB. Please reduce your mailbos size. Delete any items you dont't need from your mailbox and empty the Deleted Items folder.

If you have reached the limit for sending, the following message will pop up when you try to send, indicating that you have exceeded the mailbox quota.

Window with email overlaid by a window. Cannot send message using the server Exchange (Exchange). Your mailbox quota on the Exchange server has been exceeded. If the problem persists, contact your Exchange Server administrator. Select a different outgoing mail server from the list below or click Try later to leave the message in your Outbox until it can be sent. Sending from, double apostrophe Mustermann, Max, double apostrophe, lowercase Max.Mustermann At lrz.de uppercase. Field for 5 lines with the selected line Exchange (Exchange), to the right 2 buttons one below the other, Edit SMTP Server List, Connection Doctor. At the bottom 4 buttons, question mark, Edit Message, Try Later, selected Try With Selected Server.

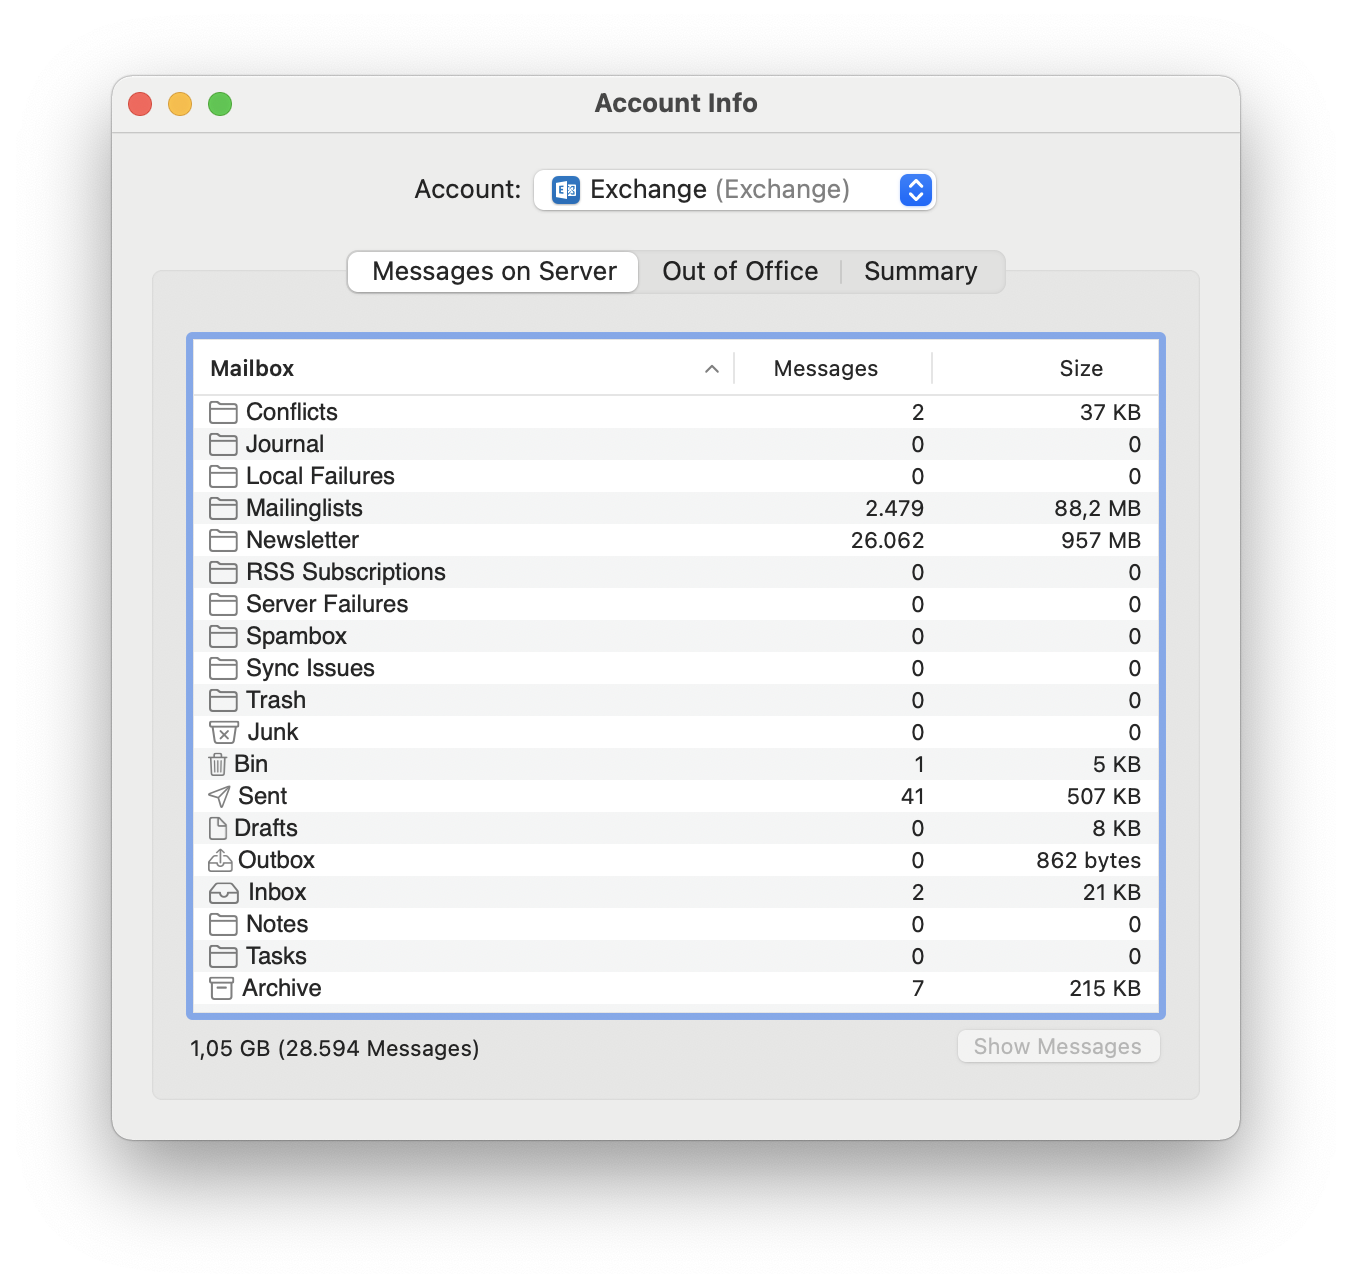
You can see the current size of your mailbox by right-clicking on "Inbox". If you have several mailboxes, right-click on the email address below the Inbox. Then select "Account Info". There you will also see the sizes of the individual folders. Unfortunately, you cannot see here what quota you have (how large your mailbox may become), nor what percentage of your mailbox is occupied. But you can check this in Outlook on the Web.

Window Account Info. Account, select Exchange, open round bracket, Exchange, close round bracket. 3 tabs, selected Messages on Server, Out of Office, Summary. Table with 3 columns, Mailbox, Messages, Size. 19 entries, in the column messages is the number of messages. Below the table 1.05 GB (28.594 Messages), right dimmed button Show Messages.


Encrypt and sign

In order to send e-mails signed or encrypted with S/MIME using Outlook, you need a personal user certificate.

As a member of TUM, you can find information on how to apply for a certificate at https://www.it.tum.de/en/it/certificates/. If you have any difficulties in doing so, please contact the IT support of TUM (it-support@tum.de).

For the other institutions of the MWN, we are currently not aware of any way to obtain a personal user certificate.

Please pay attention to the correct format when downloading your certificate. Unfortunately, some operating systems (e.g. Windows, MacOS) only support TripleDES-SHA1.

For further information, please visit https://doku.tid.dfn.de/de:dfnpki:tcs:usercert#auswahl_des_key_protection_algorithms_in_formularen_fuer_p12-dateien.

Please note that the encryption method with S/MIME described here is not compatible with the PGP method which is especially widespread under Unix/Linux. PGP is not supported by Outlook and Outlook on the Web.

Briefly, the essential properties of signed and encrypted e-mails:

  • Signing an e-mail ensures that it cannot be manipulated unnoticed on its way from the sender to the recipient. Whether the e-mail is transmitted in encrypted form depends on whether the mail systems involved support transport encryption.
  • By encrypting an e-mail, the content is already encrypted before it is sent and is therefore transmitted in encrypted form (and also stored in the mailbox in encrypted form) regardless of the properties of the mail systems involved. When working with encryption, it is essential to keep your own certificate (especially the private key) in a loss-proof manner, as otherwise encrypted e-mails can no longer be read - neither those you have encrypted yourself nor those you have received.

General preparations

Before you can sign or encrypt e-mails, you have to import your user certificate on your computer. If you want to send digitally signed or encrypted e-mails from multiple computers, you must import the certificate on each of these computers. This also applies if you want to read encrypted emails on multiple PCs.

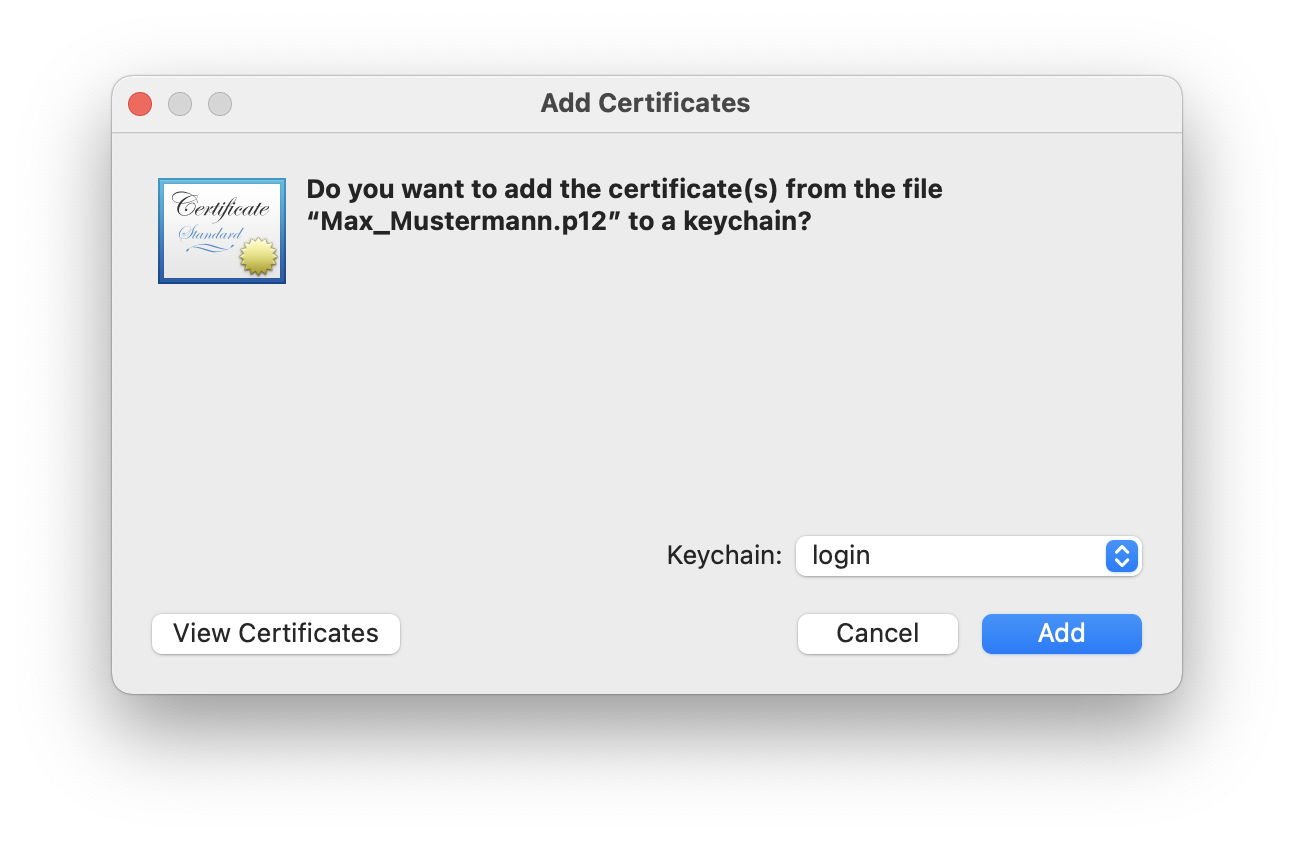
By double-clicking on your certificate file (file with extension ".p12" or ".pfx" ), a certificate import wizard opens. The keyring management opens automatically with the question whether the certificate should be added. There you select (if not already preselected) the item "login" from the drop-down list and click on "Add".

Window Add certificates. Certificate icon. Do you want to add the certificate(s) from the file 'Max_Mustermann.p12' to the keychain, question mark. Lots of empty space. Right-aligned keychain, checkbox login. At the bottom left, View Certificate button, right, Cancel, Add buttons.

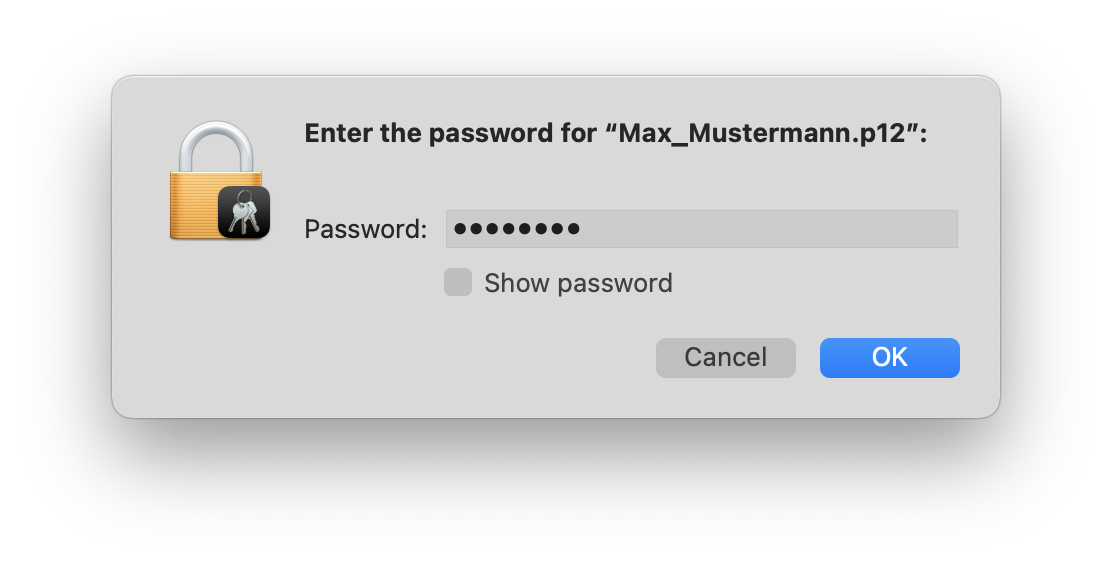
A new window opens asking you to enter a password. This password was set by you before you exported the certificate and its private key to the P12 file.

Small window without title. Icon lock. Enter the password for 'Max_Mustermann.p12', colon. Password, input field Thick dots. Empty box, show password. At the bottom right, Cancel, OK buttons.

Sign emails digitally with S/MIME

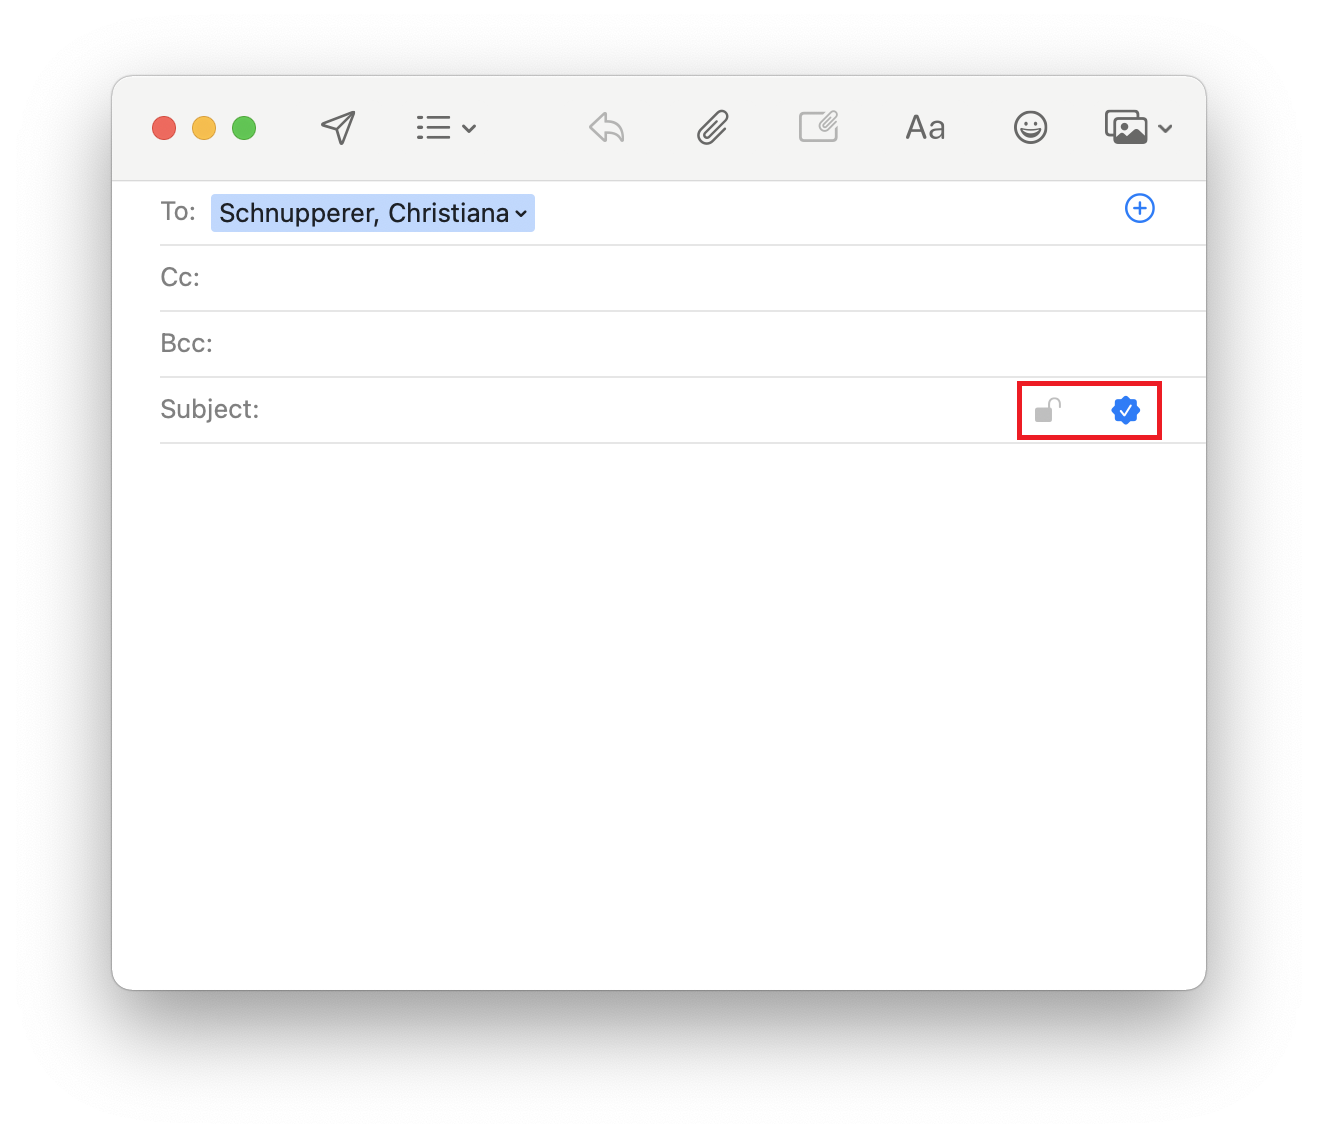
To add a digital signature to an email, you don't have to do anything else in Apple Mail after you add the certificate. Apple Mail itself looks in the keychain to see if a certificate is available for the email address. If a suitable one was found, all emails will be signed automatically.

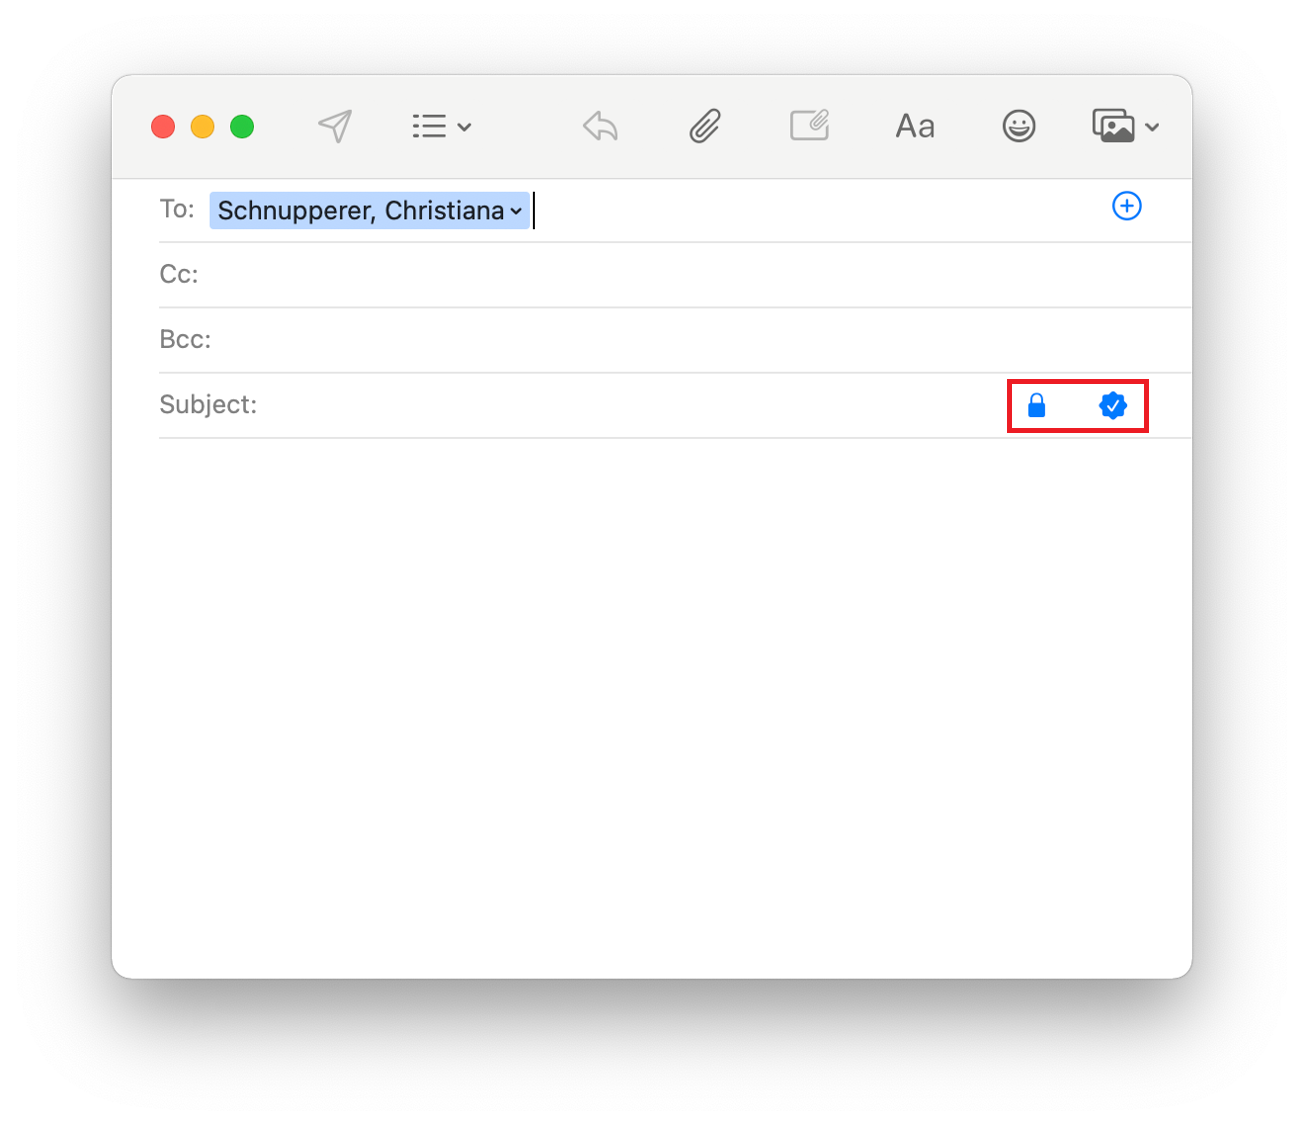
If you do not want the email to be signed, click on the blue button. If it is gray, the email will be sent unsigned.

Email Window. To, Schnupperer, Christiana, right plus sign in circle. Subject, Empty, right marked 2 icons, Open lock, hook in gear on blue background.

Encrypting emails with S/MIME

The same applies to encryption as to signing. The only difference to signing is, you need not only your own certificate, but also the certificate (more precisely: the public key) of the recipient. If you have both keys, the email will be automatically encrypted and signed. How to get a public key is described below.

Email Window. To, Schnupperer, Christiana, right plus sign in circle. Subject, Empty, right highlighted 2 icons, both on blue background, Closed lock, check mark in gear.

How do I get the public certificate of a recipient?

To send encrypted emails you always need the certificate of the recipient. If you don't have it, there are several ways you can possibly find the certificate:

A digitally signed or encrypted email from the recipient.

If you have already received a digitally signed or encrypted email from the recipient, the public certificate was also sent to you in this email. As soon as you have opened this email, Apple Mail saves the certificate in your keychain and you can send encrypted emails to this recipient. 

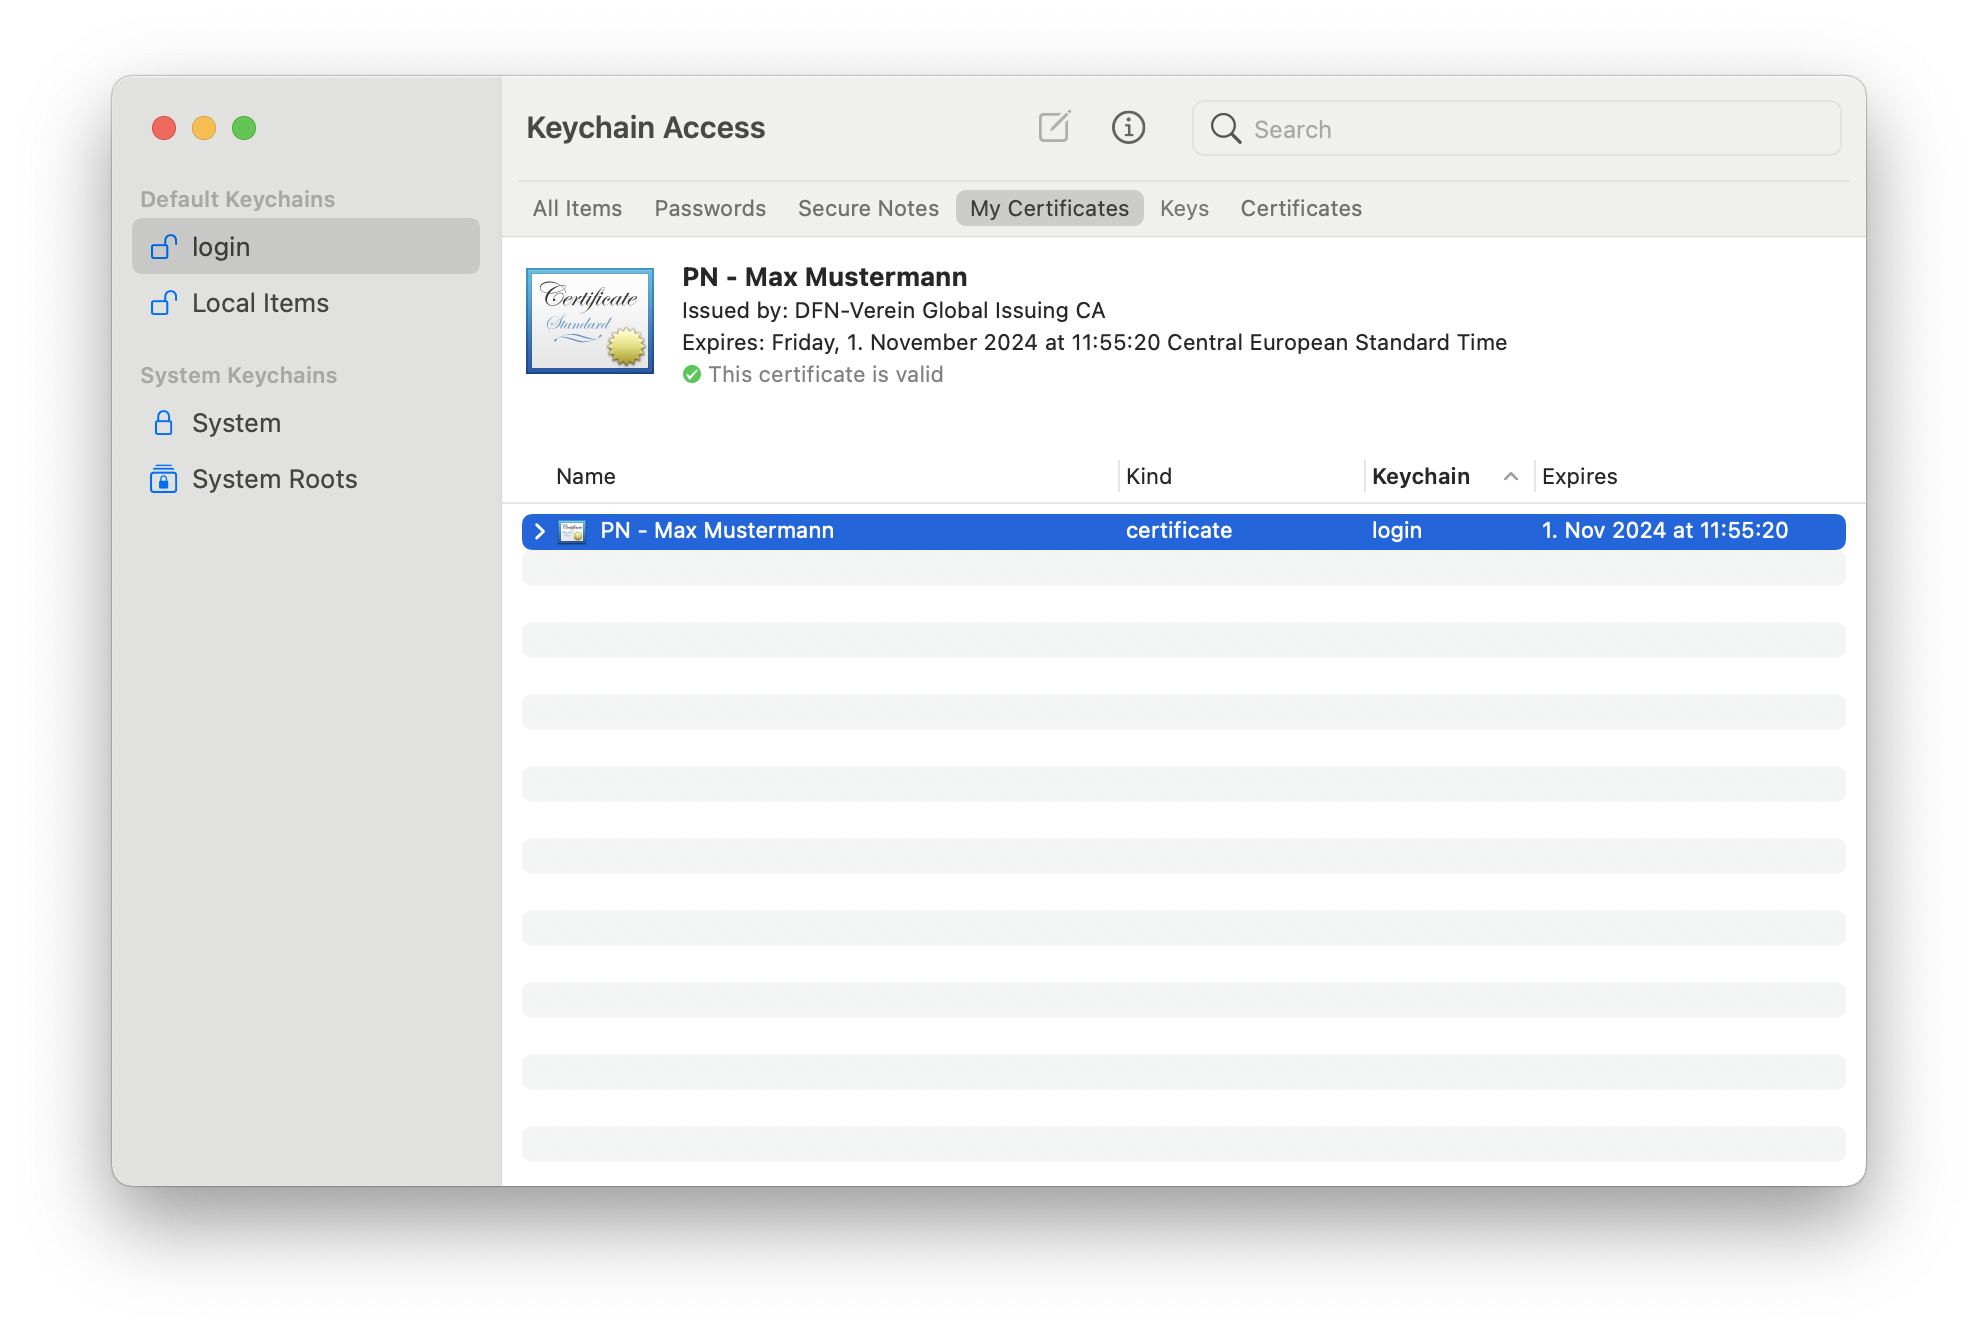
Where can I see which certificates I have stored? 

Open the keychain management and select the keychain "Login". In the field at the bottom left, you can then set the filter to "Certificates".