BC KB001 Permissions and Restrictions
Understanding confluence permission system
Space permission
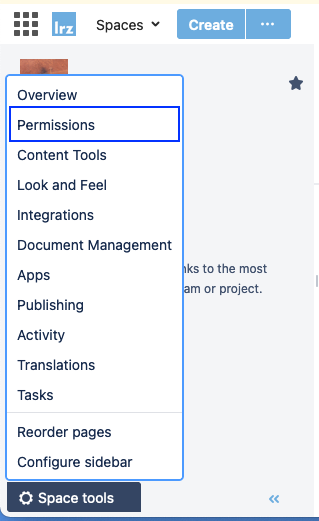
On space level you define the maximum permission for the whole space. So if you want to permit e.g. single person or groups on (few) sub-pages (viewing or editing) you have to enter these persons or groups on space level. This can be done as a space admin via the area tools at the bottom left (menu "permissions") in the side bar.
Page restrictions
To limit the editing or viewing of individual pages or page trees, you can set "restrictions". This can be done via the lock symbol on a page (on the top bar). As soon as editor or viewers are entered in the menu, the lock turns red. These permissions are inherited recursively downwards, but can be further restricted below if desired.
Caution: Pitfall
The “Viewing and editing” restriction is inherited recursively, the “Editing” restriction is NOT inherited recursively. The editing rights must be set per subpage.
How can I open my personal space for others?
By default, the personal space is only accessible to your own user. If you want to make pages accessible for others as described above, they must first be authorized in the space. As soon as this is done, the person has access to the entire pages in the space. If you want only some pages "public" available it is a good idea to create several page trees: e.g. a page tree "private" under which everything you want to keep secret hangs there and a "public" page tree for sharing. The private page tree has then to be restricted to yourself (edit and view) - this makes it invisible to others. In this way you can also created several page trees and make them accessible to different groups of people.
Assigning authorizations
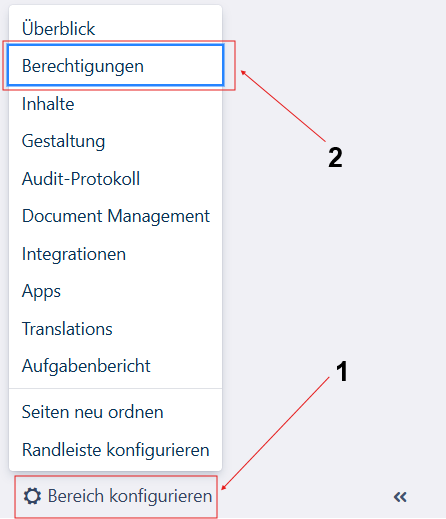
Visit the area for which you want to assign an authorization. Click on “Configure area” (1) and then “Authorizations” (2).
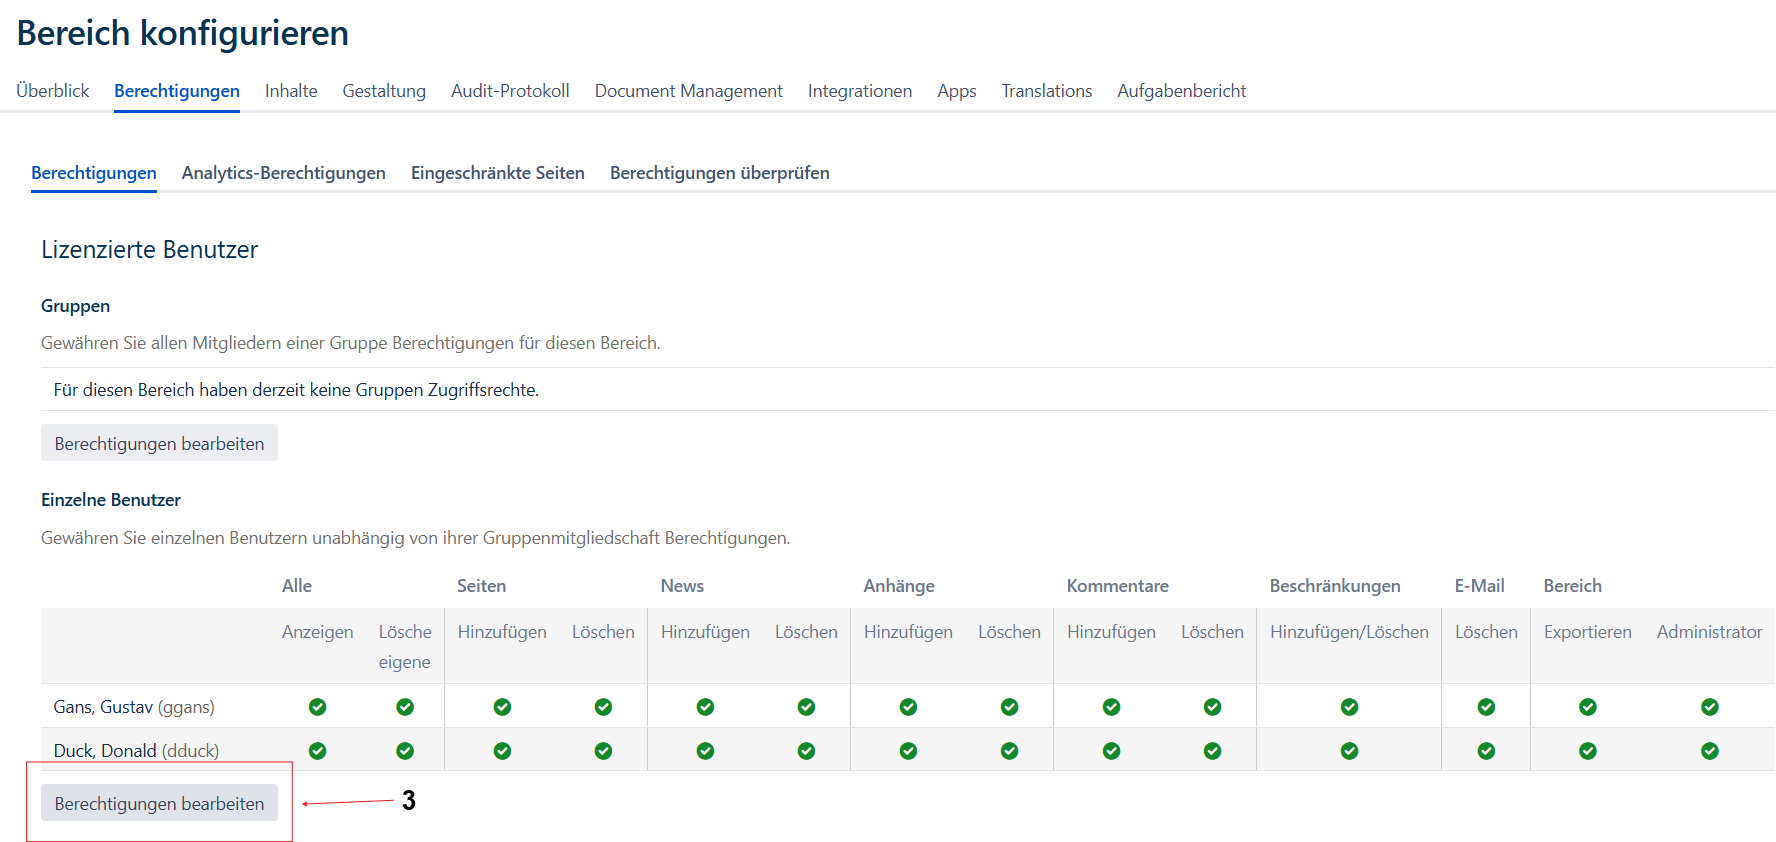
Then click on “Edit authorizations” (3). Please log in to WebSudo. You will find information on this page.
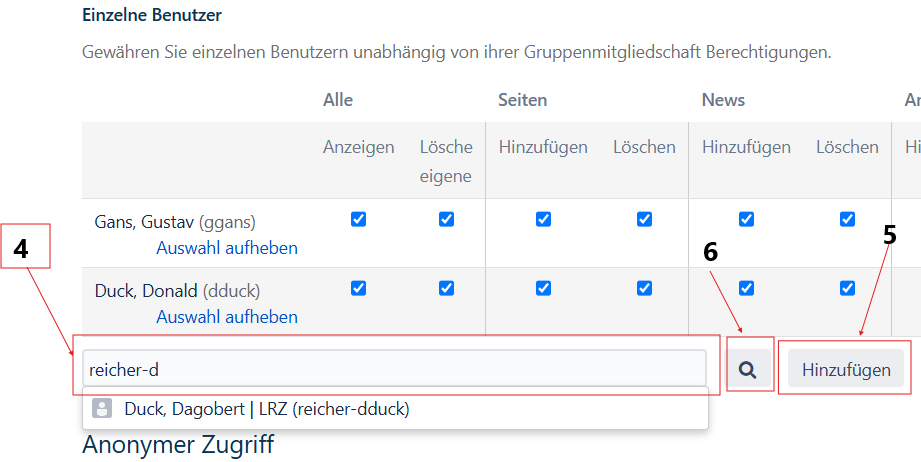
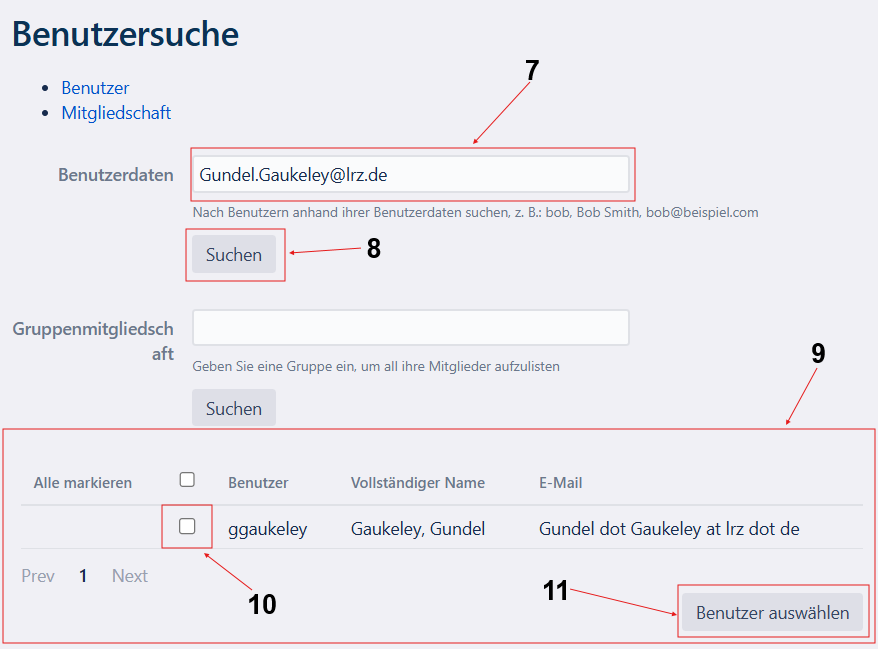
As soon as you are logged in, click on “Edit authorizations”. You can now search for an identifier in the text field (4). You can find out your identifier here. You can also enter several identifiers in text field 4 and then save them using the “Add” button (5). If you only have one e-mail address, you can search for the right user by clicking on the magnifying glass (6). This opens a new window in which you can search for an e-mail address. In the field (7) you can enter an e-mail address, a name or part of an identifier. After clicking on the “Search” button (8), you will either receive results in area (9) or a message that no person could be found. If you have found a person, you must select them using the checkbox (10) and add them to the text field using “Select user” (11). You must then press the “Add” button (5) again, set the appropriate permissions and click “Save all” at the bottom of the page.


