


Server-Zertifikate (außer GRID)
1. Server Certificates from GÉANT/HARICA
In the HARICA system, server certificates are generated according to the dual control principle, i.e. person A enters the request and person B (with a special authorization) then approves it.
Please note (1): As far as we know at present, HARICA, unlike Sectigo, does not automatically issue new certificates when the old ones are about to expire. However, there are reminder e-mails.
Please note concerning the domain tum.de: The TU has a FAQ page where it states that HARICA certificate applications will not be processed: Serverzertifikat beantragen
1.1. Step 1 - Create an Account
Create an account in the HARICA system. This is only possible if your institution is a HARICA customer. (HARICA determines this by the domain, in this case the domain part of the e-mail address).
Call this URL: https://cm.harica.gr/
and click Academic Login:
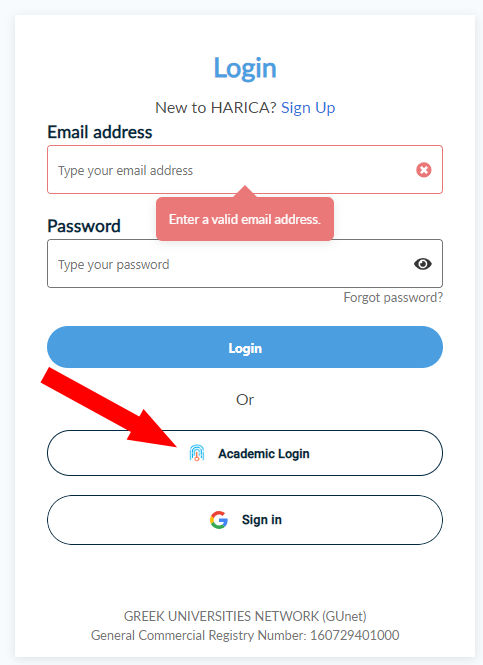
In case your institution is not configured for Academic Login, use the above input fields Email address and Password instead. As mentioned before, this only works if your institution is a HARICA customer.
If you have an LRZ SIM ID, search for the entry for the LRZ and log in with your SIM ID:
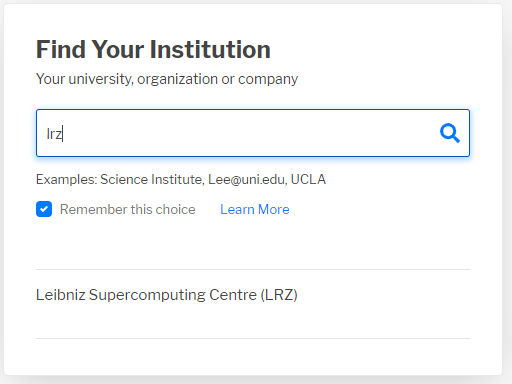
The first login automatically creates your acount.
1.2. Step 2 - Request a Certificate (manually)
After login, you get the following dashboard:
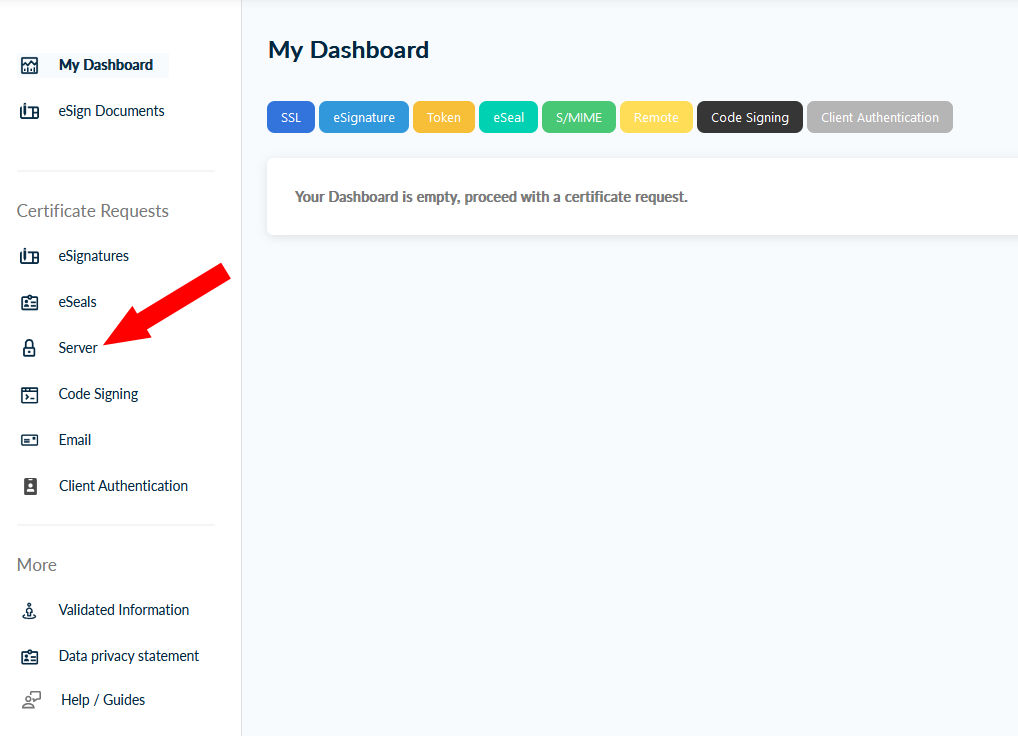
You can use the Server menu item to apply for your server certificate.
Please note: You can only request certificates from institutions that are customers of HARICA. HARICA routes the request according to the domain to the certificate admin of the responsible institution. This means that this menu is not restricted to LRZ certificates:
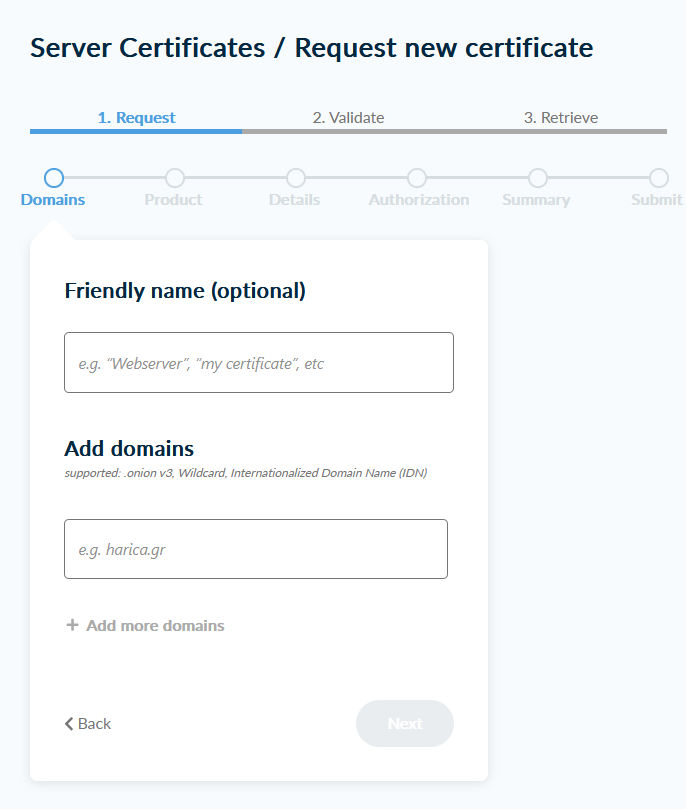
You can choose any name you like for the Friendly name. Up to 100 SANs can be specified for Add domains. * domains are possible.
Please note: SANs are imported from a PEM-formatted PKCS#10-CSR file with the file extension .csr. No FQDNs are imported from CN attributes. Wildcard names in the SaN in the CSR also cause problems.
In the next step, select Domain-Only (DV) or For enterprises or organizations (OV). DV certificates only contain the FQDN, OV certificates also contain the organization name:

This is followed by the summary:
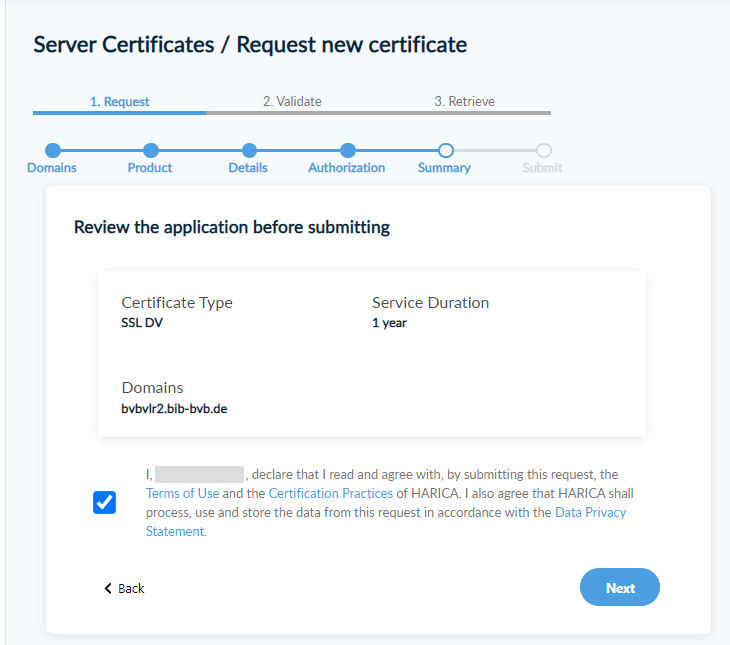
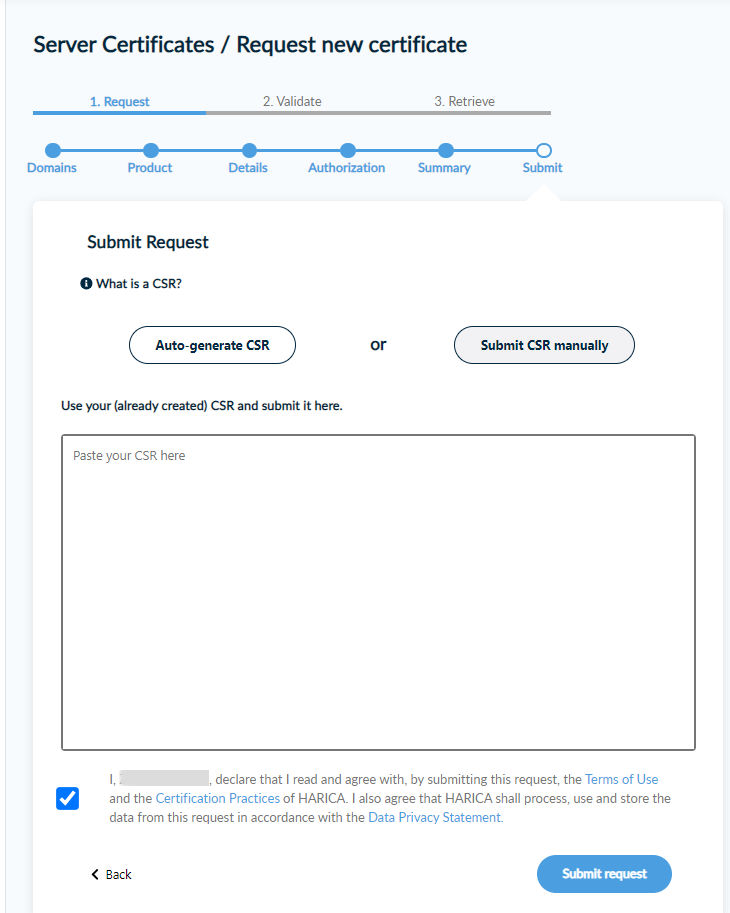
You can then either enter a prepared CSR or have the system generate one for you. In the following, the option Submit CSR manually is selected:
After the submission you see the request in your dashboard:
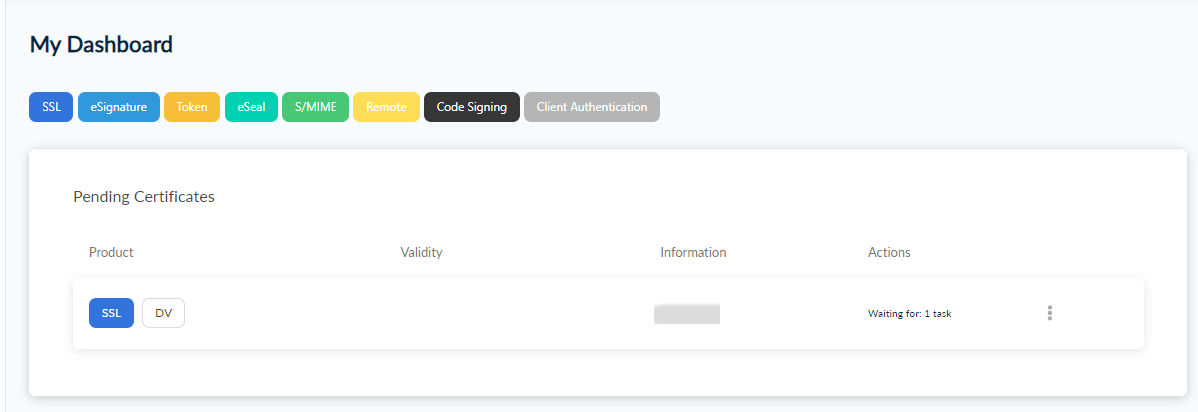
which then needs to be approved by a certificate administrator.
After approval, you get a mail similar to the following:
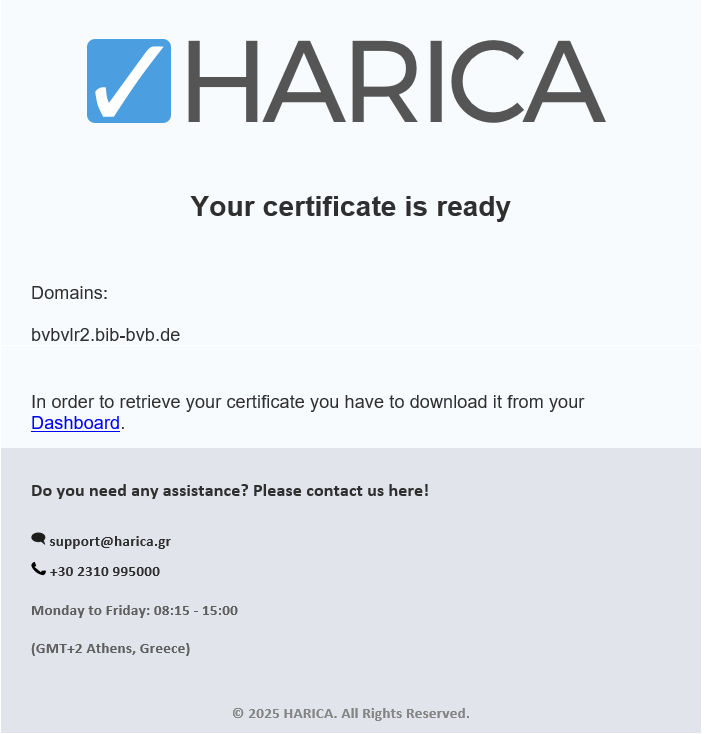
You will then see a download button in your dashboard that leads to the following menu:
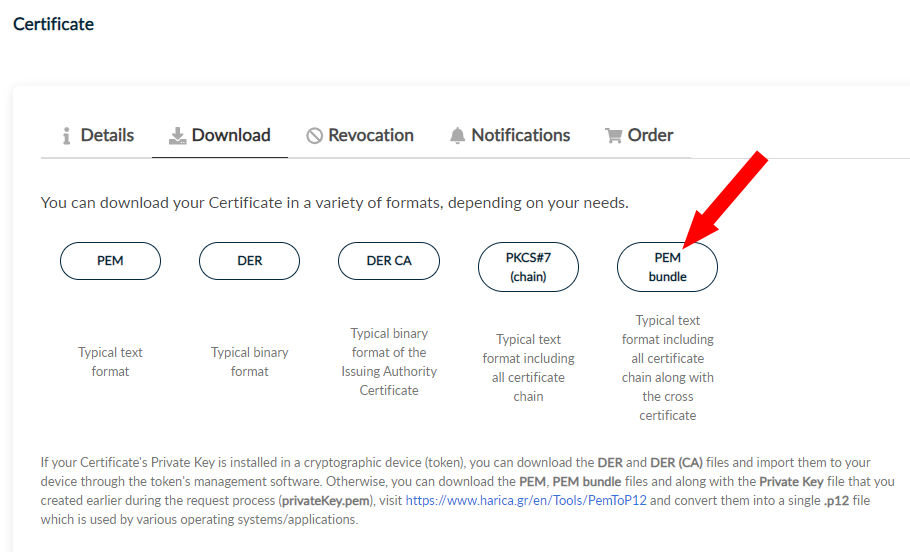
For web servers you probably need PEM bundle.
1.3. Open an IET Incident
As practically anyone can apply for a certificate, we need an incident in our IET ticket system to check the authorization:
Please briefly state who you are or which institution you are from, for which FQDN you want a certificate, and perhaps a few words of explanation, especially for wildcard domain applications and similar cases.
1.4. Certificates withs SANs in different Domains
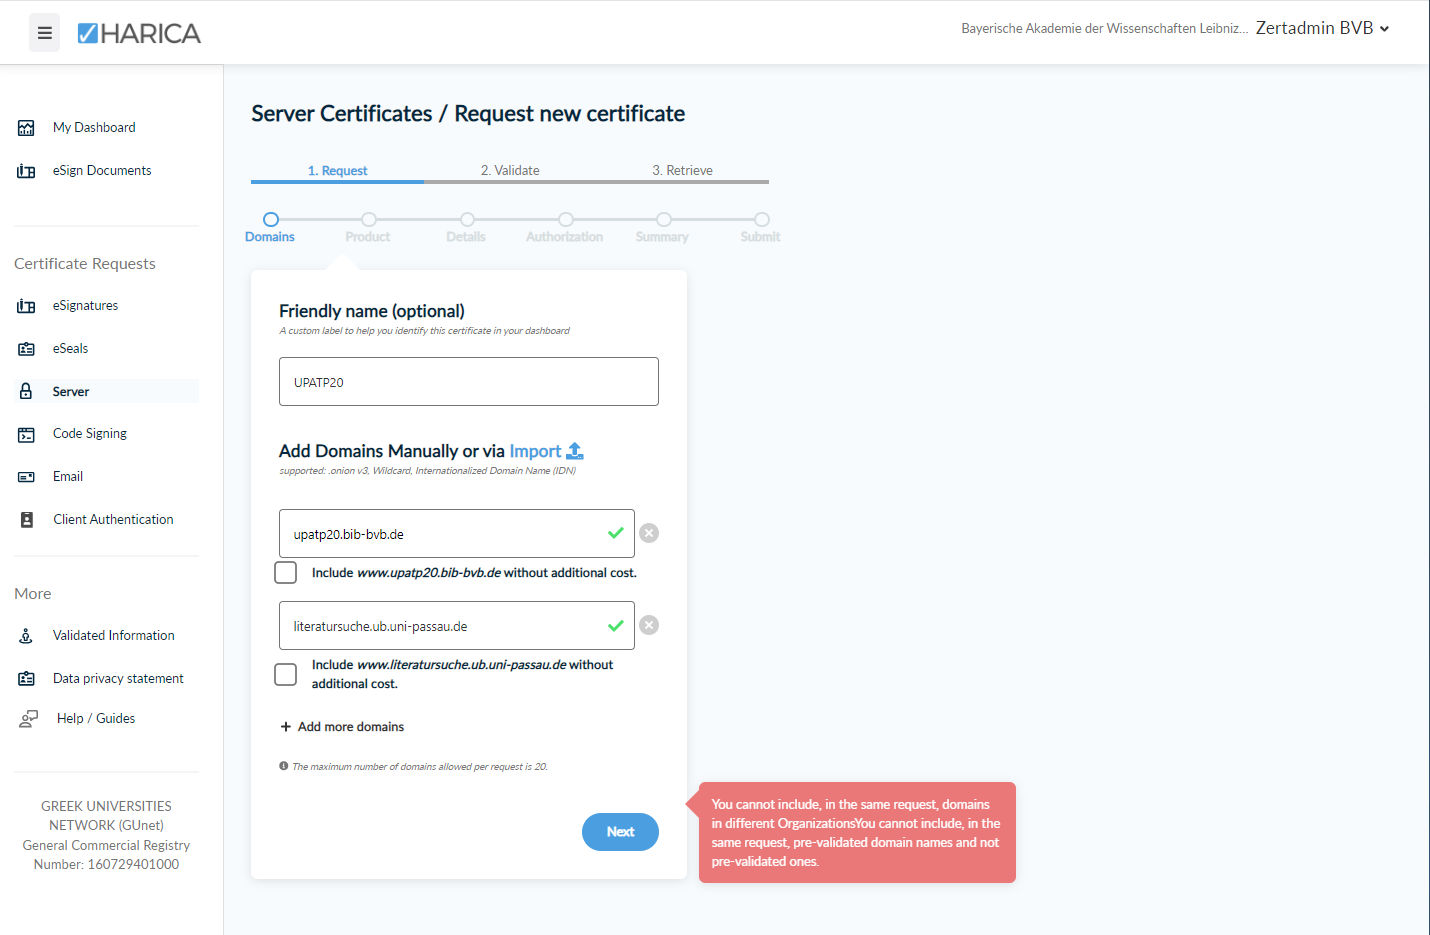
All domains of a request must belong to the same organization, i.e. be registered and validated there. However, as HARICA only assigns a domain once, the LRZ cannot register domains that are already registered elsewhere (e.g. all universities). However, sub-domains are possible; in the example, the LRZ could enter ub.uni-passau.de or literatursuche.ub.uni-passau.de. After validation, the above certificate could be issued.
Otherwise, this certificate cannot be created in this way, but must be split into two requests, or it is created in another way, e.g. with Let's Encrypt.
1.5. Re-use of CSRs and Private Keys
If a CSR has already been used before, you get the following warning message:
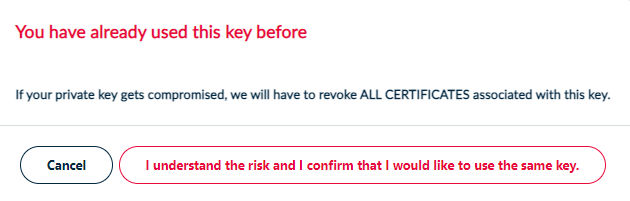
However, the certificate can still be issued.
Please note (1): Apparently there is a requirement of the browser forum that a private key (and thus also the associated CSR) is valid for a maximum of 5 years. After that you have to create a new one.
Please note (2): After the revocation of a certificate, the belonging private key / CSR might not be accepted any more, depending on the reason of the revocation ("key compromised").
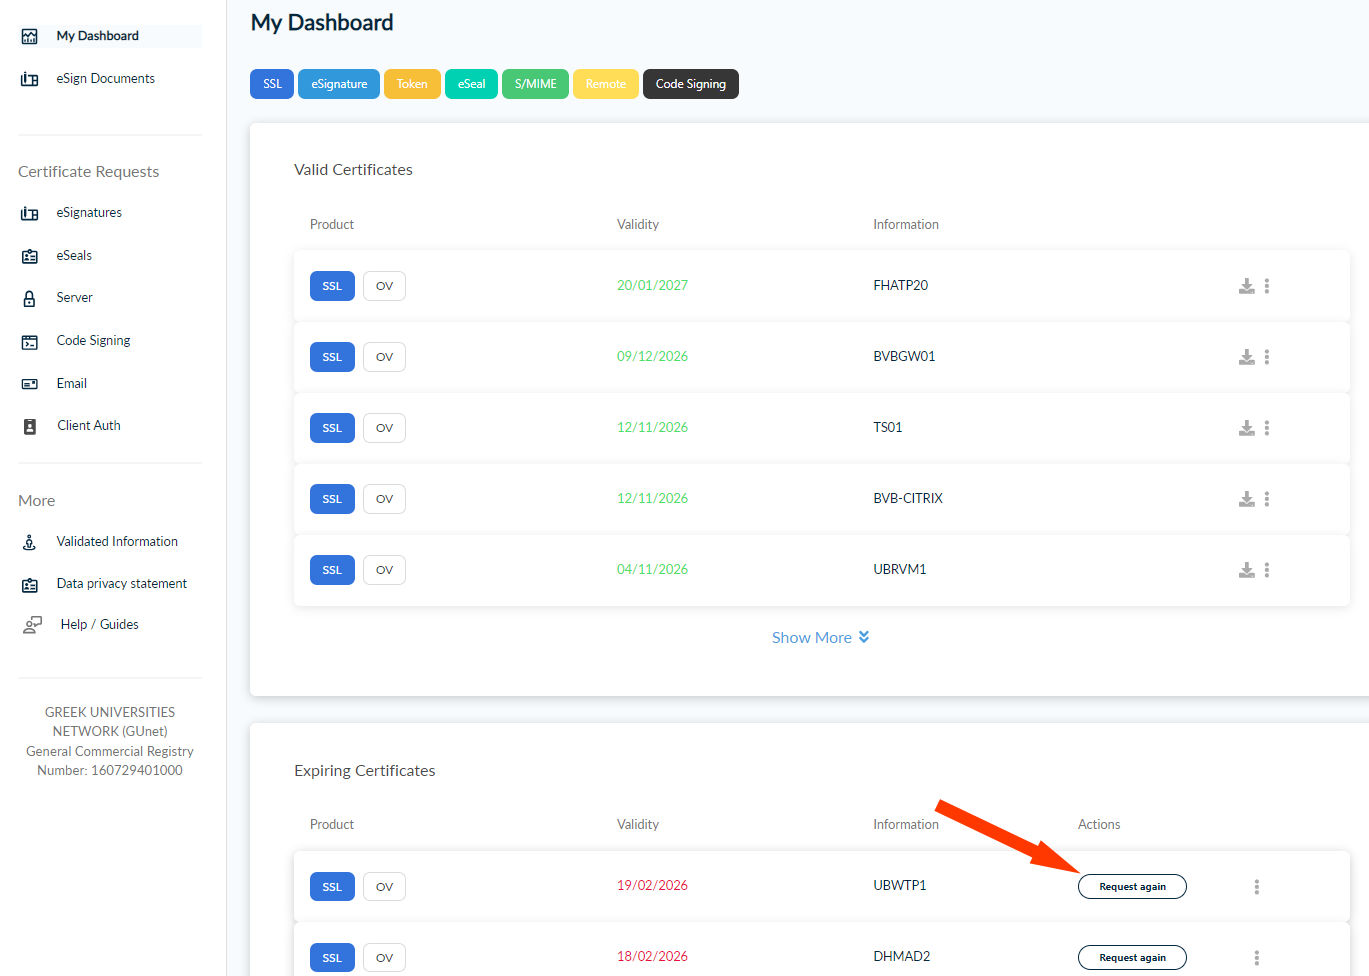
1.6. Renewal of expiring Certificates
The Dashboard shows expiring certificates and offers the possibility to renew them.
Please note: You need the old CSR.
2. Domain validation
-
Only the certificate admin of the respective institution can enter and validate domains. Nevertheless, the processes are shown here using screenshots so that you know what information we need and what you may have to do yourself.
-
We validate domains that are hosted at the LRZ ourselves. In all other cases:
-
HARICA currently (as of January 2025) offers two validation options:
2.1. Validation using DNS
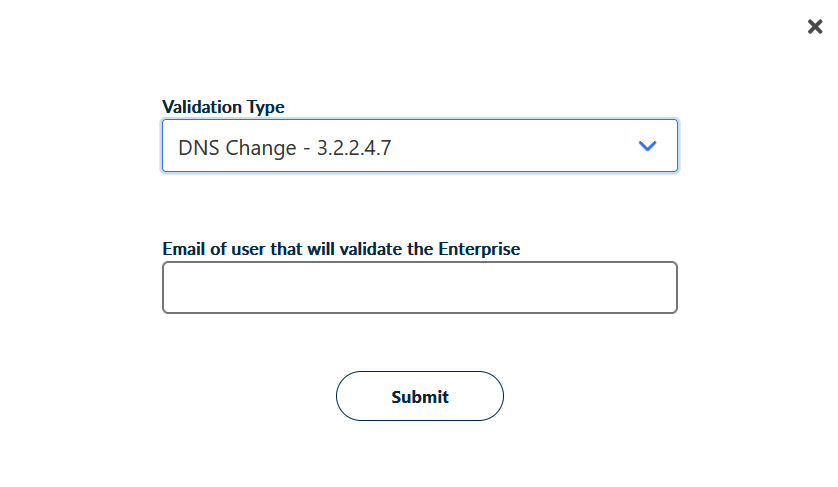
You need to enter the mail address of a DNS admin, who then receives a mail with instructions on what to enter in the DNS configuration. HARICA automatically checks from time to time whether this entry has been made and then validates the domain if necessary.
2.2. Validation using E-Mail
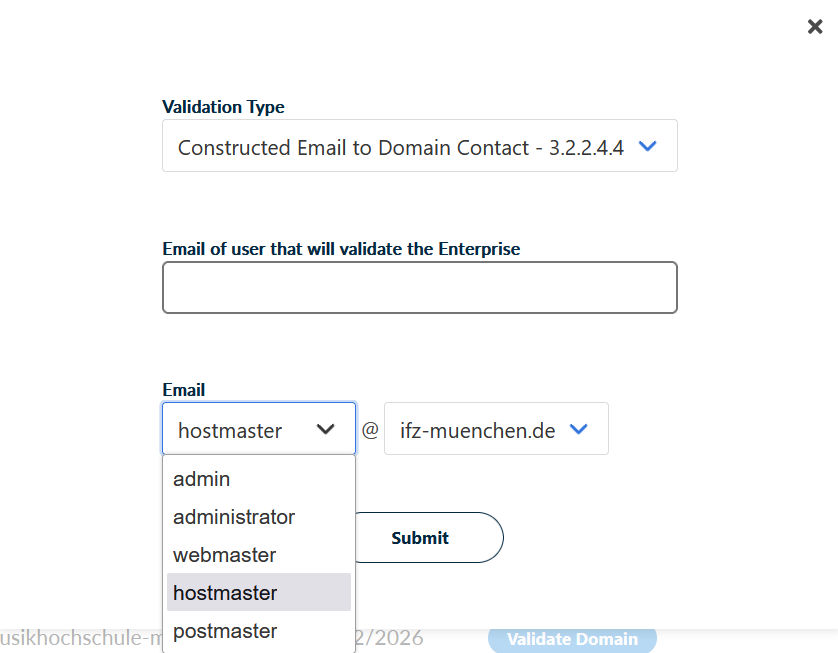
Here, two e-mail addresses are relevant. HARICA first sends an e-mail to the address selected below (e.g. hostmaster@<domain>). The recipient must then forward this to the address specified above, which must belong to a person who has admin rights to validate the desired domain in the HARICA system.
3. Overview
3.1. Web-Hosting
- If you use a custom name for your web server, you must ensure that this name or domain is validated. See above → Domain Validation.
- If the domain is validated, you don't need to do anything else. Your web server will get its certificate from us automatically.
3.2. Server-Hosting
Since you, as the server administrator, are responsible for the certificate, you have a choice of where to obtain it from. Essentially, you have the following options:
- From your own institution (for TUM: https://www.it.tum.de/it/zertifikate/ or TUM-Serverzertifikate, for LMU: pki@lmu.de)
- From the LRZ (this is especially necessary if the server name ends with srv.mwn.de or mhn.de, because nobody else but the LRZ can issue certificates for these domains)
- From the free market like Let's Encrypt
In case 2, the following applies:
- In case you use a custom name for your web server, you need to ensure that this name or domain is validated. See above → Domain validation.
- Once the domain is validated, create a private key and the request (see below → Generate private key and CSR).
- You can then apply for the desired certificate in your HARICA account with the restrictions explained above.
Please note: Once a certificate has been issued, it can no longer be changed. If you later realize that you need additional SANs, you must have the certificate reissued. However, you can use the old request (and therefore also the old private key).
4. Creating of Private Key and CSR
4.1. LINUX
4.1.1. Only 1 host name
If the certificate contains only one host name (Common Name - CN), the following command is sufficient:
- Version with private key without password, generated on the corresponding host (here, for simplicity, it is assumed that the computer name, i.e. the hostname, should also be in the certificate. If not, just write the desired name instead of `hostname`):
openssl req -nodes -newkey rsa:4096 -out `hostname`-request.pem -keyout `hostname`-sec-key-ohnepass.pem -subj "/CN=`hostname`.xxx/O=Bayerische Akademie der Wissenschaften/L=Garching b. Muenchen/ST=Bayern/C=DE"
- Version with password-protected private key generated on the corresponding host:
openssl req -newkey rsa:4096 -out `hostname`-request.pem -keyout `hostname`-sec-key.pem -subj "/CN=`hostname`.xxx/O=Bayerische Akademie der Wissenschaften/L=Garching b. Muenchen/ST=Bayern/C=DE"
The names of the output files are of course freely selectable. xxx must be replaced by the belonging domain name. If the key length of 4096 causes problems, also 2048 is possible.
4.1.2. More than 1 host name
Please note: currently (as of February 2025), HARICA doesn't evaluate the alternative names (SANs) contained in the request. The following text is therefore for general reference only.
A certificate can contain more or less any number of CNs. These can be aliases of one server or names of several different servers, which then all get the same certificate (and the same private key). Unfortunately, the above openssl command only works with a single CN. If you want more than one name in the certificate, you have to assemble it as follows:
Write a text file (called zert.conf in the example) with the following content (for the LRZ CA):
|
|
Key and CSR are being created with the following command:
openssl req -config zert.conf -reqexts req_exts -newkey rsa:2048 -sha256 -keyout key.pem -out csr.pem
The names of the output files (here key.pem and csr.pem) are, as usual, freely selectable.
4.2. WINDOWS
The details of the following steps depend on the Windows version and look more or less like this:
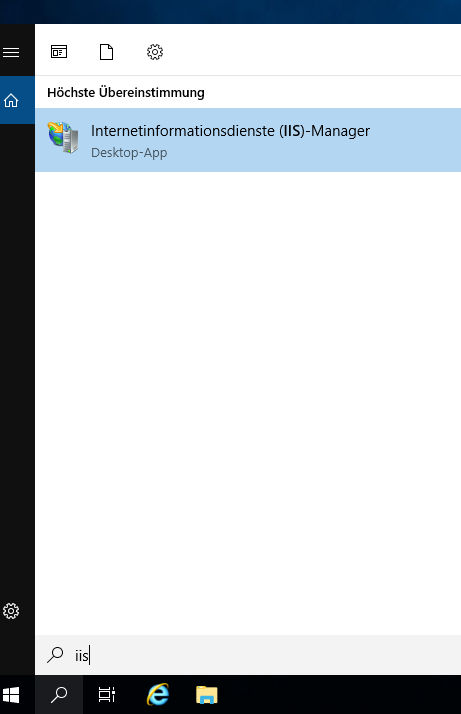
- Run the IIS console (e.g. by entering iis into the search field):
Select the site → Serverzertifikate:

Click on Zertifikatanforderung erstellen:
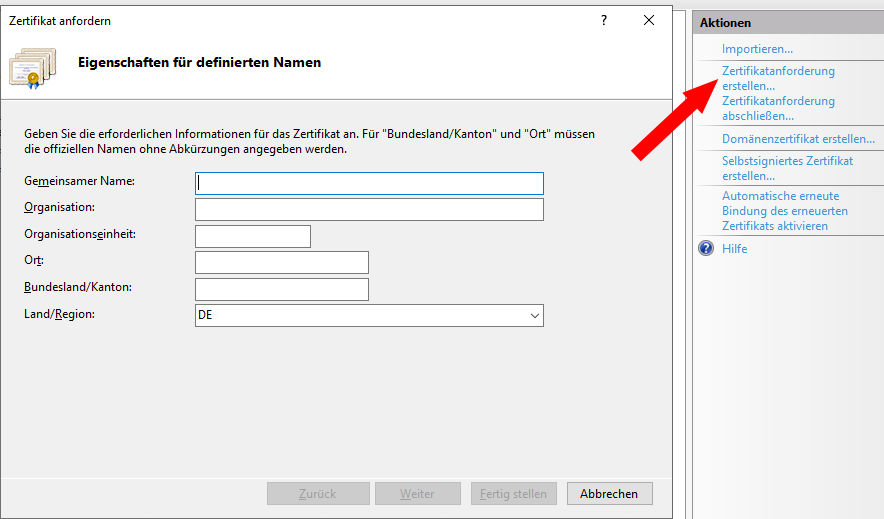
Enter the following values into the belonging fields:
Gemeinsamer Name (CN): name of the computer, e.g. test123.lrz.de
Organisation (O): Bayerische Akademie der Wissenschaften
Organisationseinheit (OU): leave this blank
Ort (L): Garching b. Muenchen
Bundesland/Kanton (ST): Bayern
Land (C): DE
4.3. How to bind an existing Certificate to a Webserver
The certificate must be in .p12 format which means it contains the private key.
Please note: Such certificates are normally encrypted, You need to know the password.
To prvide the webserver (IIS) with the certificate, open the IIS console. select the Site → Bindungen:
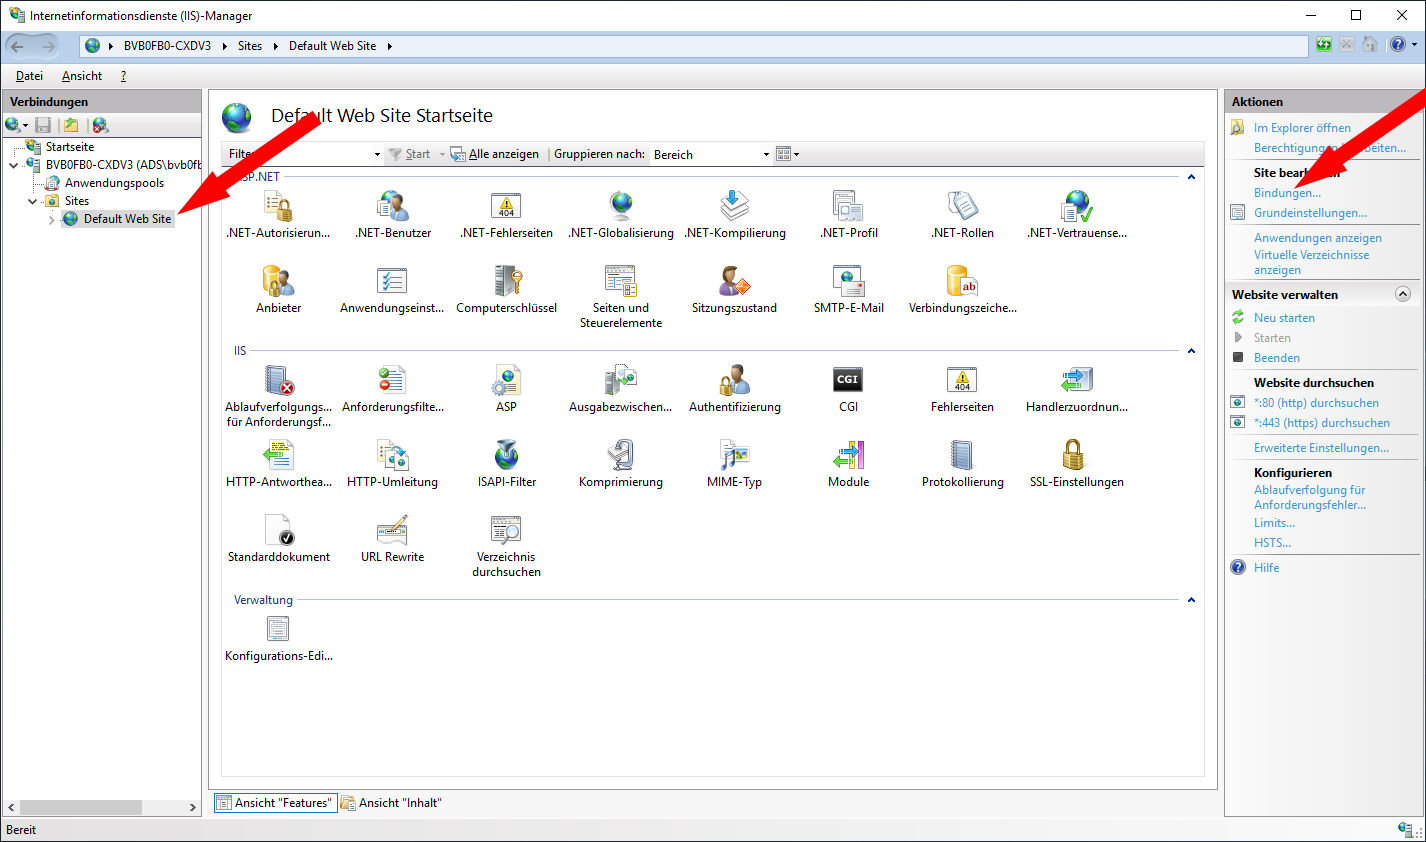
In the following dialog select the https entry and edit it:
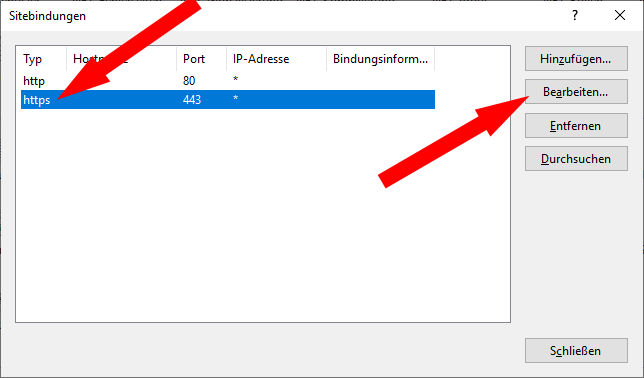
Here you can select the certificate:
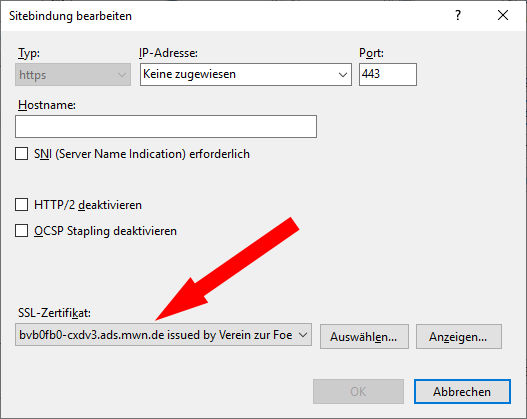
In the list you can select one of the certificates which have been installed into the Windows certificate store under Webhosting → Certificates.
5. Miscellaneous
Infos from TUM: http://www.it.tum.de/zertifikate/
Infos from LMU: https://www.serviceportal.verwaltung.uni-muenchen.de/services/it/infrastrukturdienste/ausstellung_zertifikate/index.html#goto404268 (LMU-Login erforderlich.)
Last update: Feb. 3, 2026