Create a VM
This tutorial covers the initial creation of a VM in the LRZ Cloud.
Make sure that you have read and understand that you are responsible for your VMs.
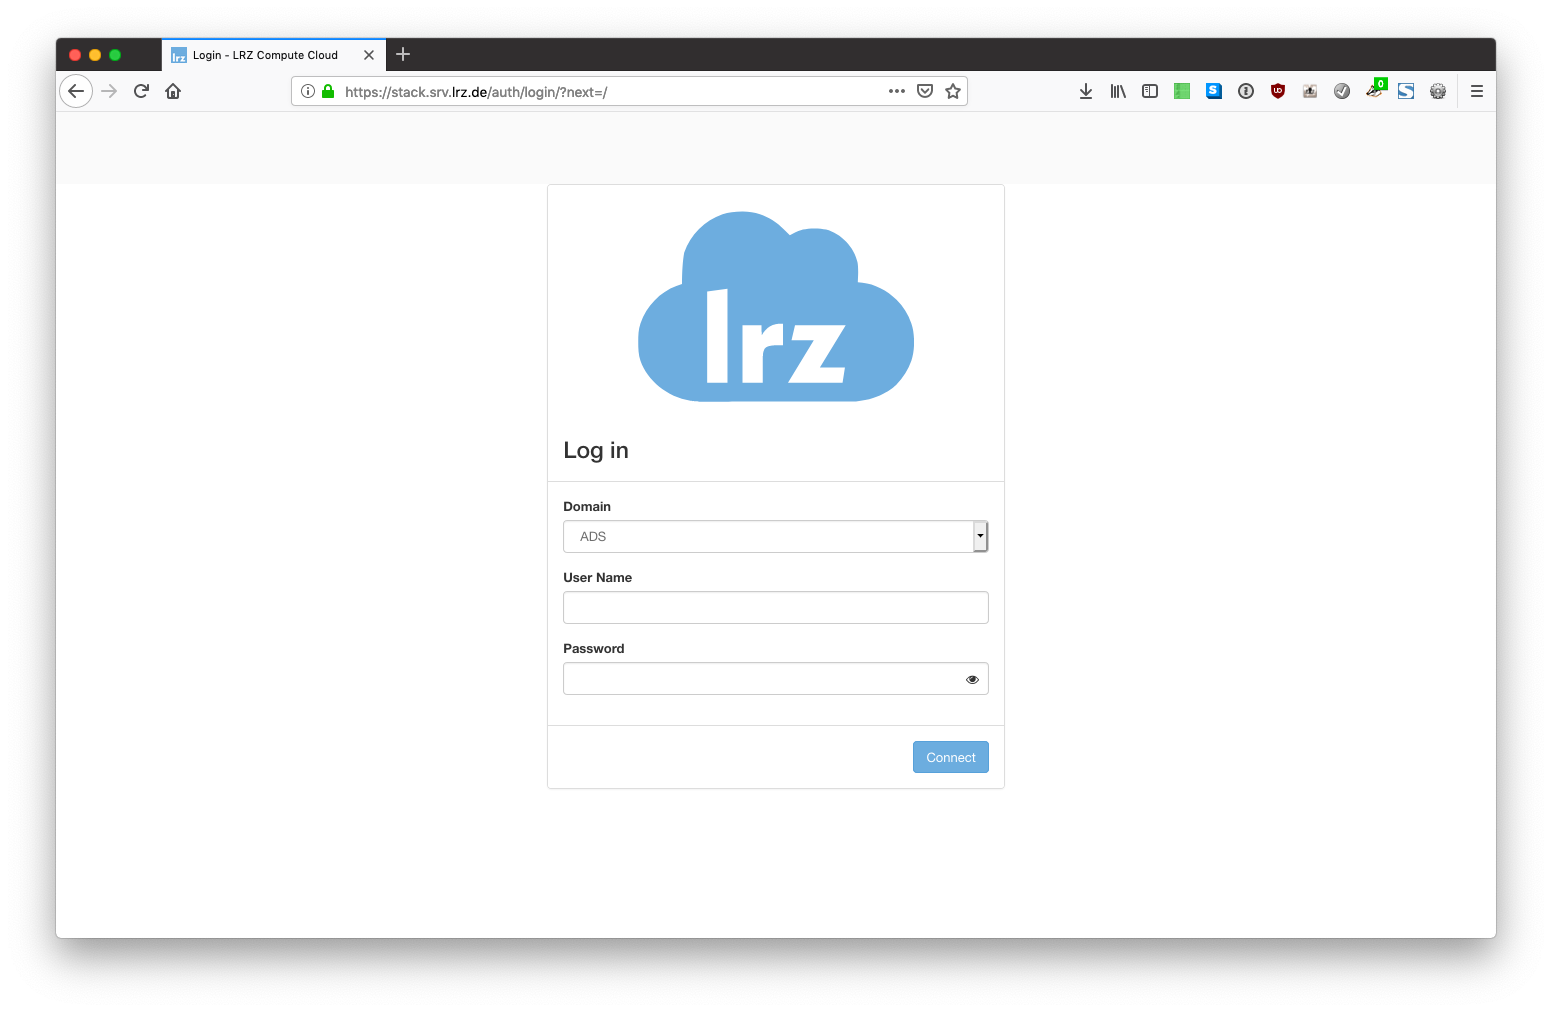
- Log in to the LRZ Compute Cloud web interface: https://cc.lrz.de/
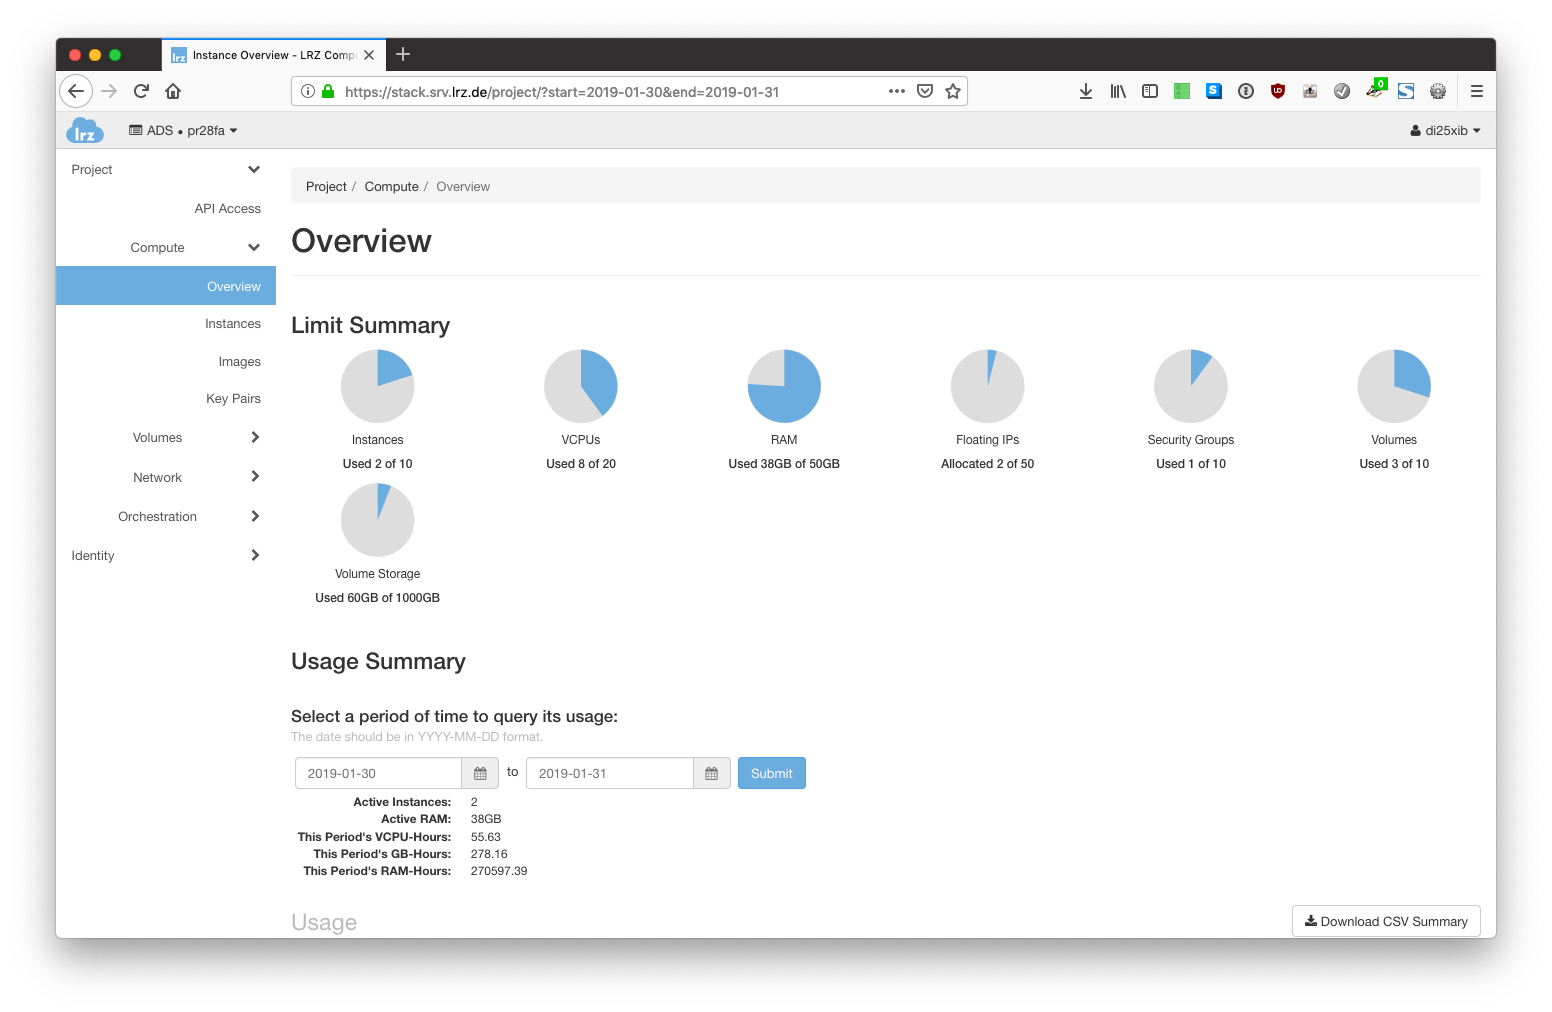
- After login, you will find yourself on an overview page providing important information about your project. It shows you the current consumption of your quotas like the number of active instances, the number of CPUs used, and so on.
- If you have not done it yet, you must add a rule to your security group that allows you to connect to your VMs using SSH. If you need additional open ports (e.g. when running a webserver), you must add rules to the security group or create different security groups reflecting the different (firewall) configurations for your server.
- Expand the "Network" submenu on the left hand side and click on "Security Groups".
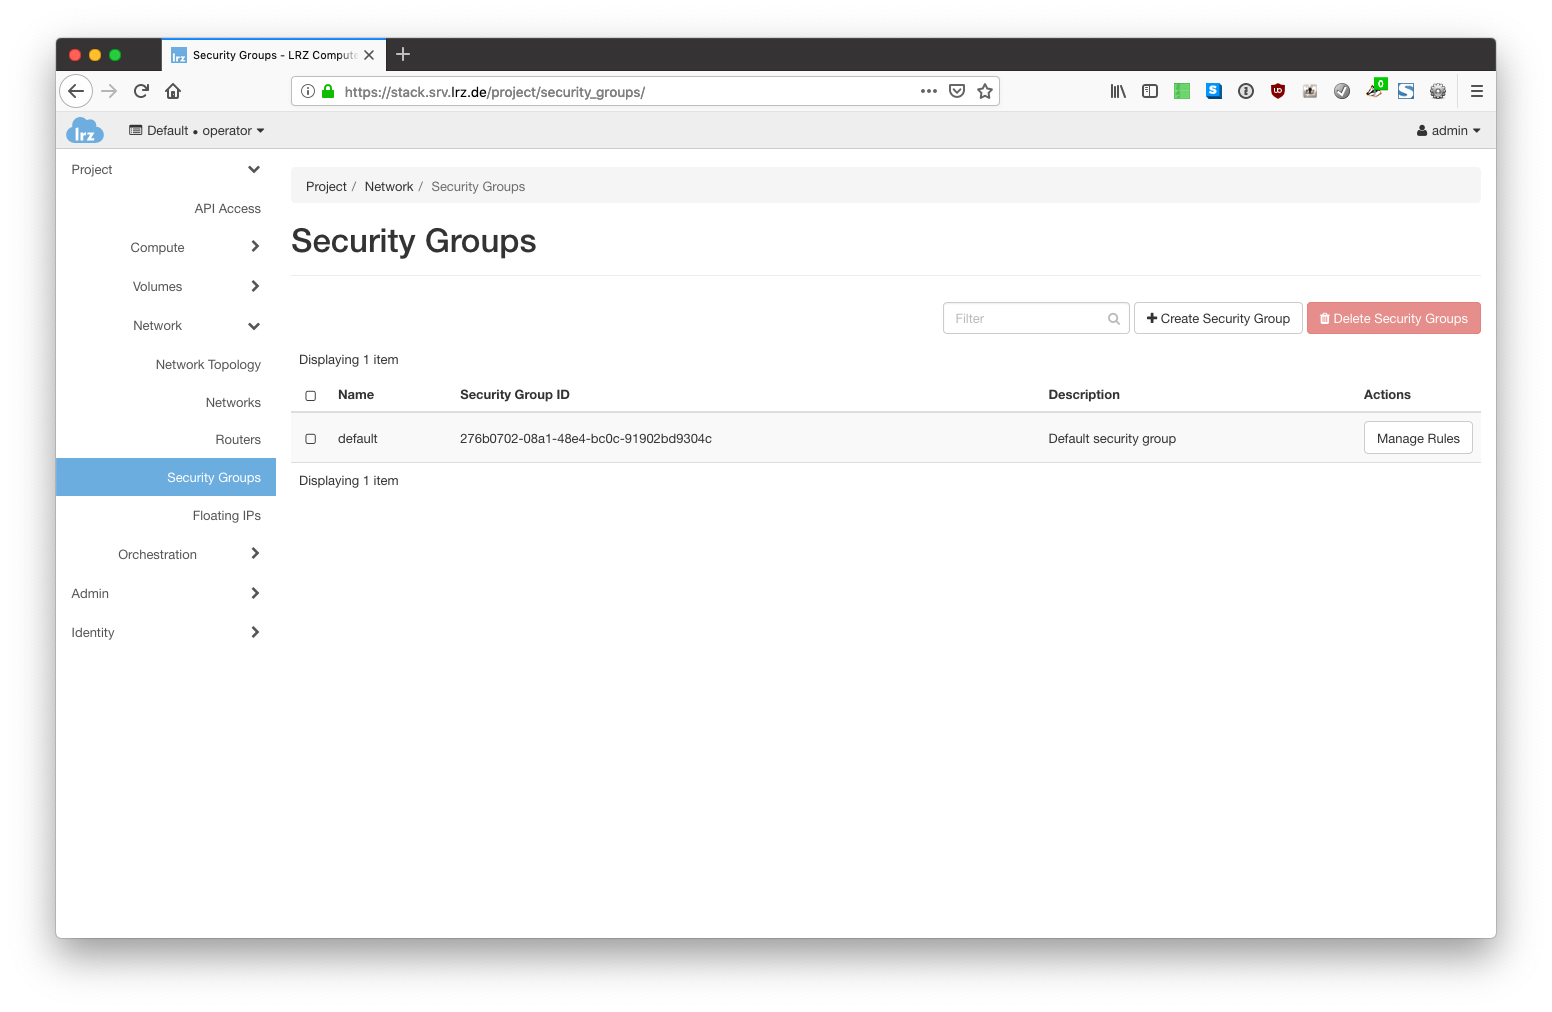
- To add a rule to the existing default security group click on "Manage Rules" in the row of the default group. You will see the existing rules configured for this group.
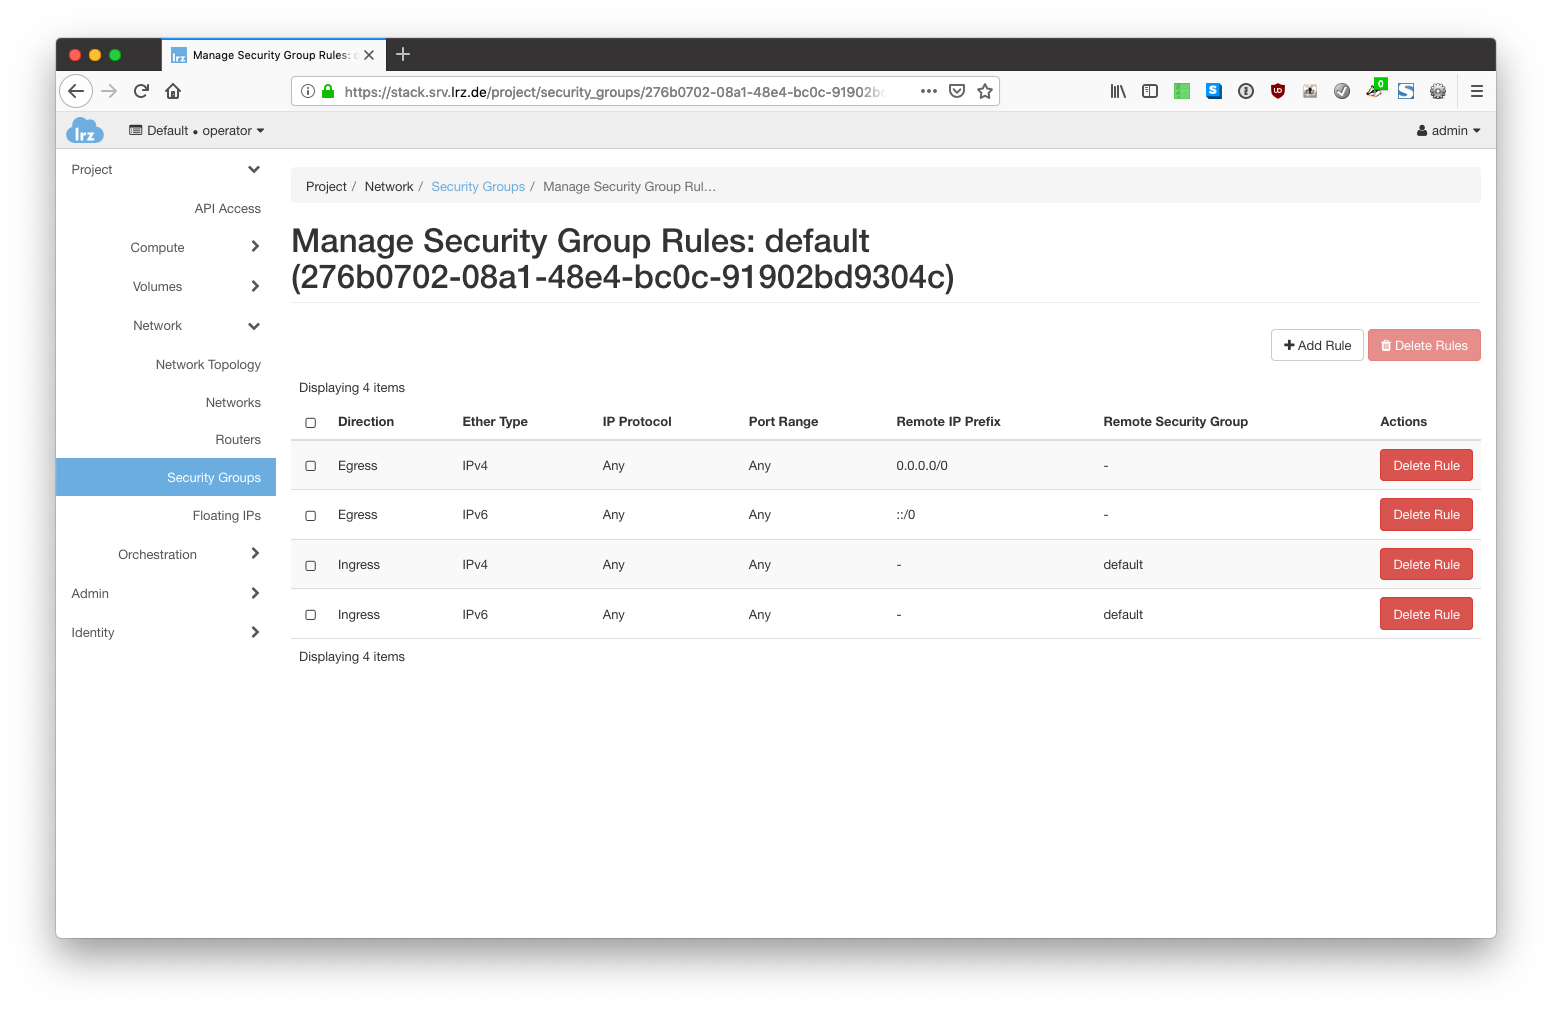
- To add a new rule, click on "Add Rule" on the upper right of the table.
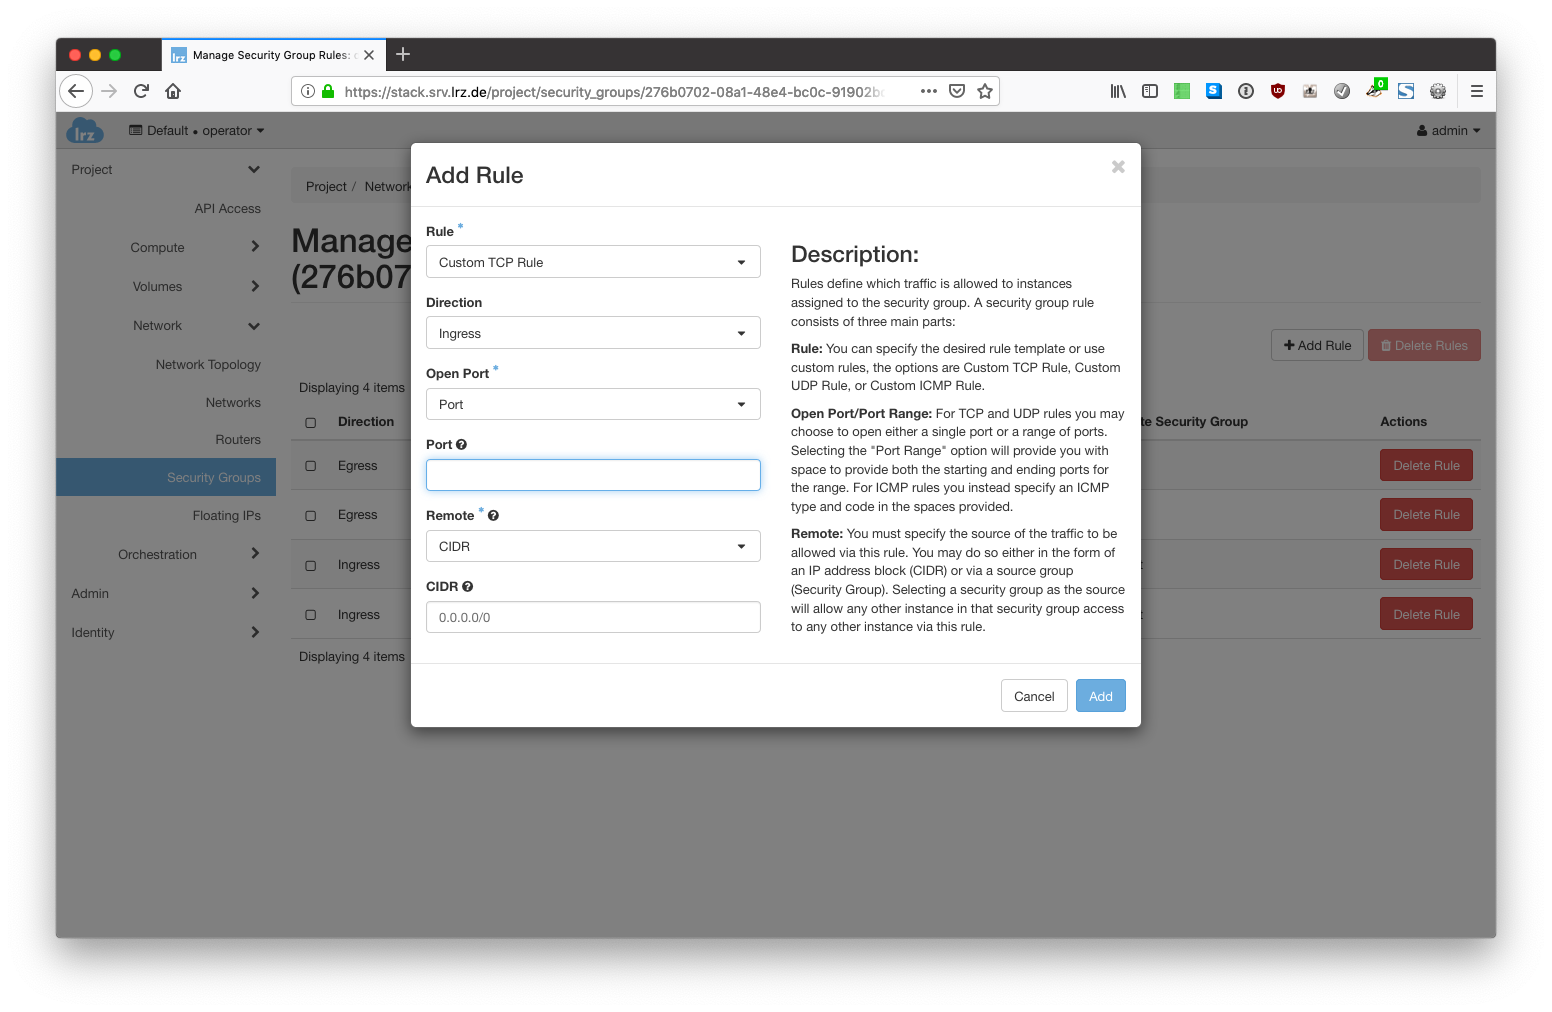
You need to provide some information to specify the exact rule you want to add. To allow SSH access to machines using the default security group, you can just click on the "Rule" drop-down menu, scroll to the bottom and select "SSH". Click "Add" to add this Rule to the security group.
- Expand the "Network" submenu on the left hand side and click on "Security Groups".
- To create a new VM you need to go back to the "Compute" submenu on the left side. Click on the "Instances" tab.
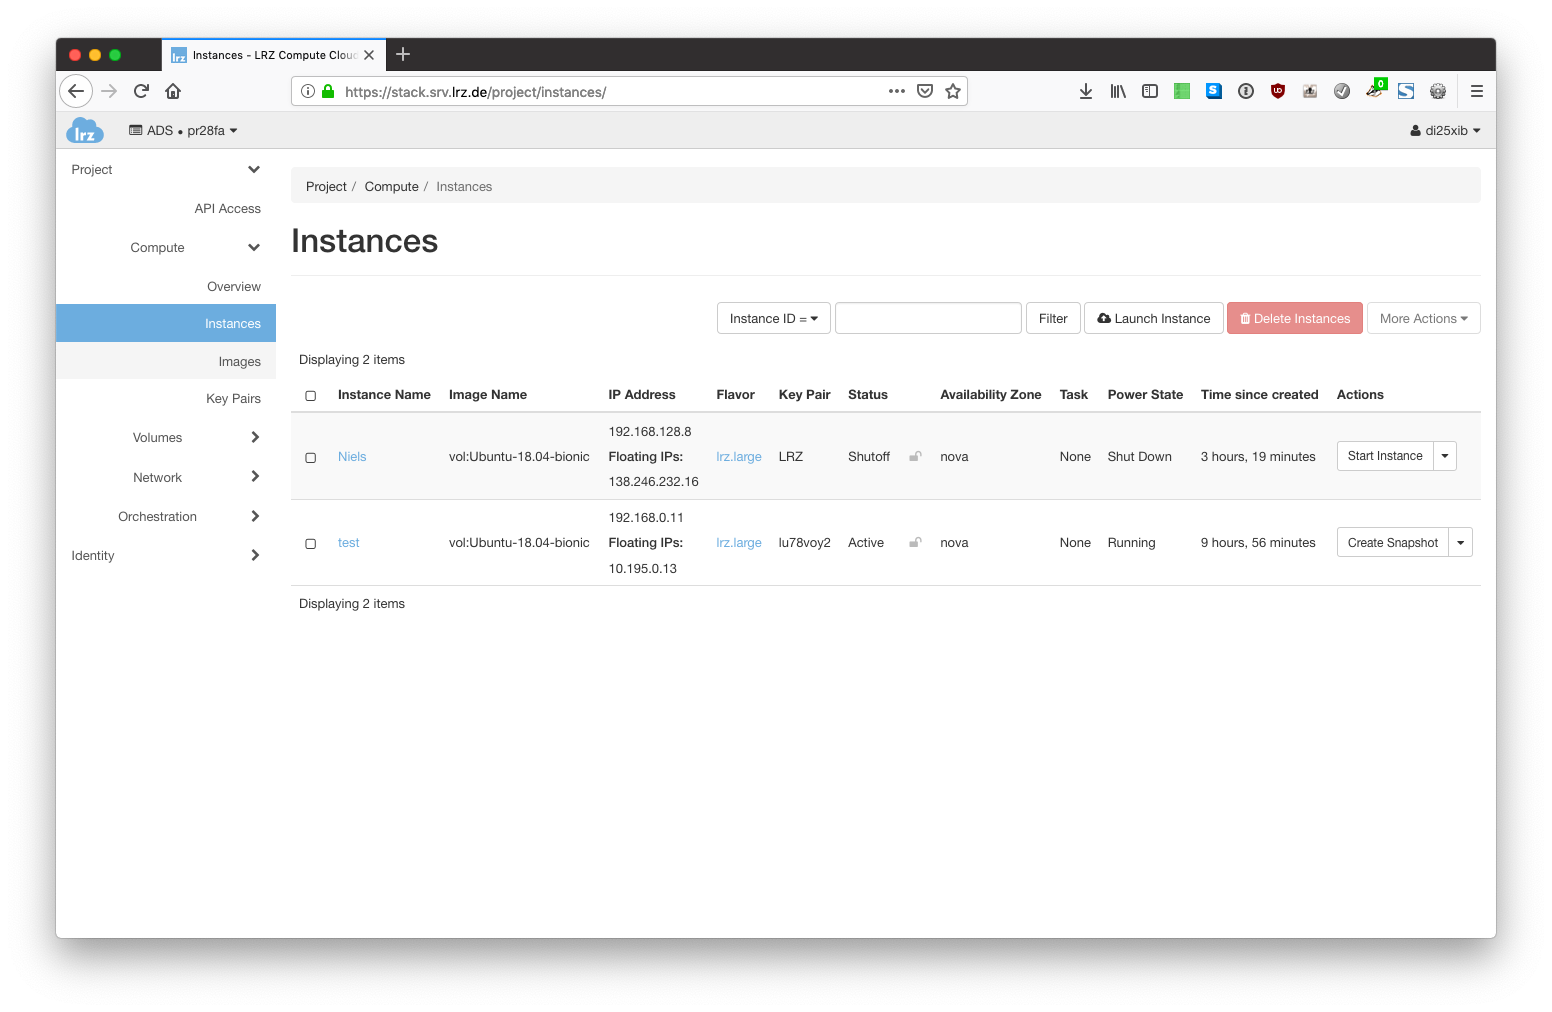
- This pages shows the the current instances of your project and allows you to manage them. To create a new instance, click on the "Launch Instance" button at the top of the table.
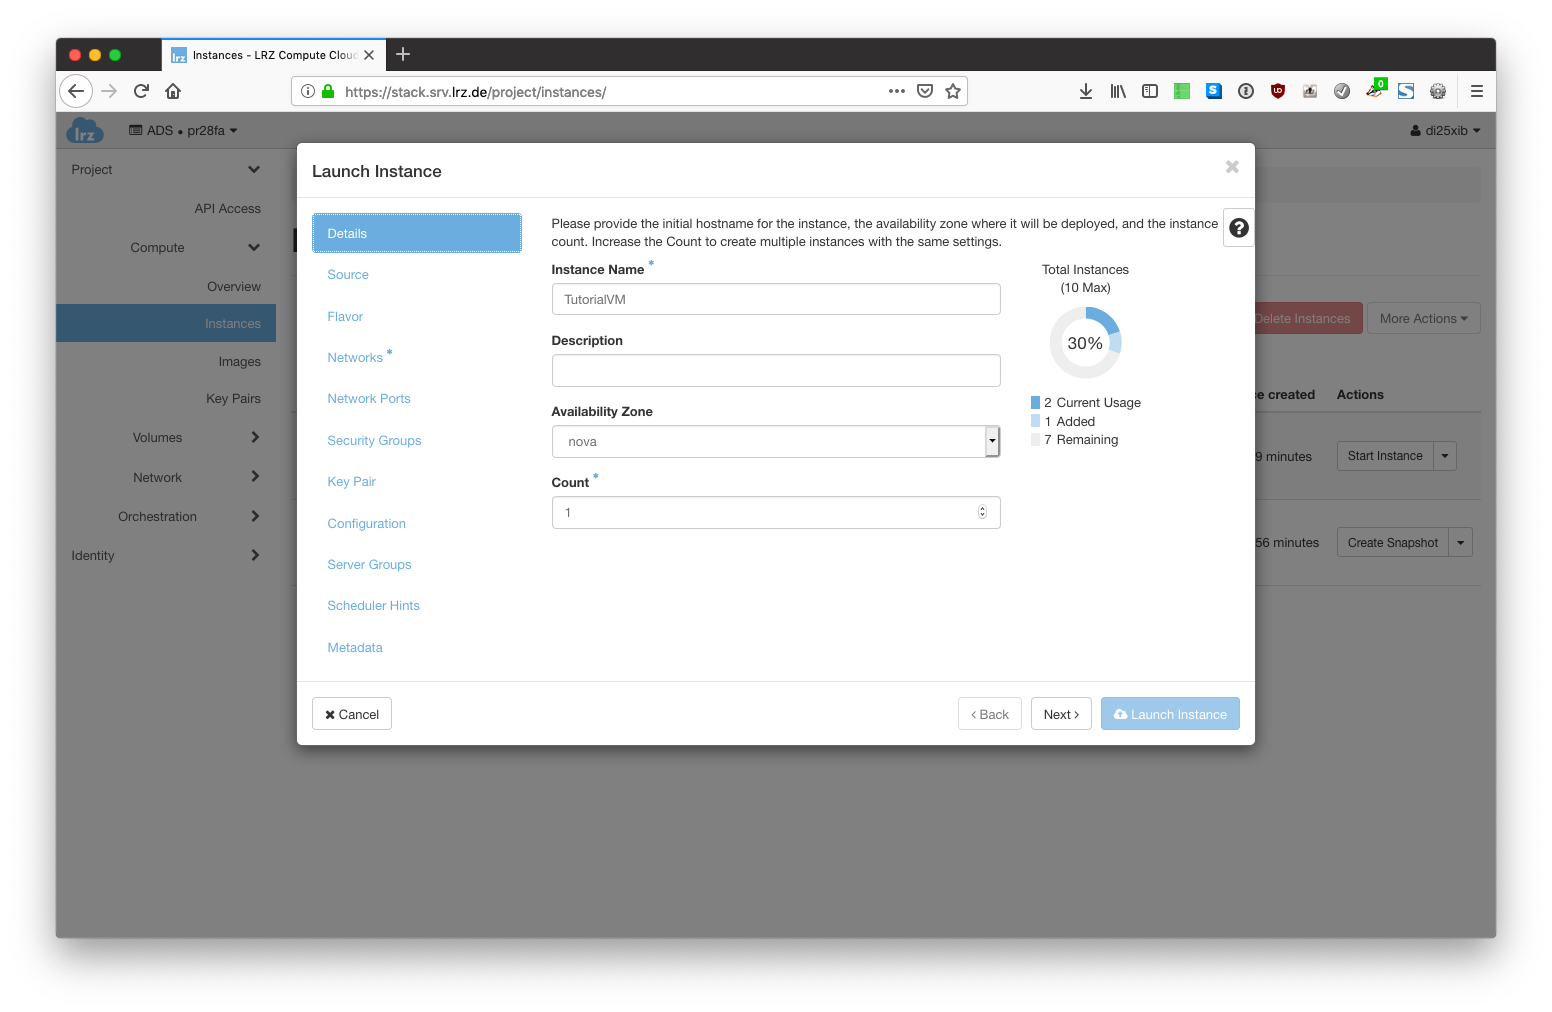
Before you can start a new instance, you must provide some information like the operating system or the resources you want to use. - In the "Details" tab, your instance need a name. You can also use a description to clarify to yourself or your colleagues what this instance is used for. If you want to create several instances at once (with the same characteristics) you can increase the Count in this tab.
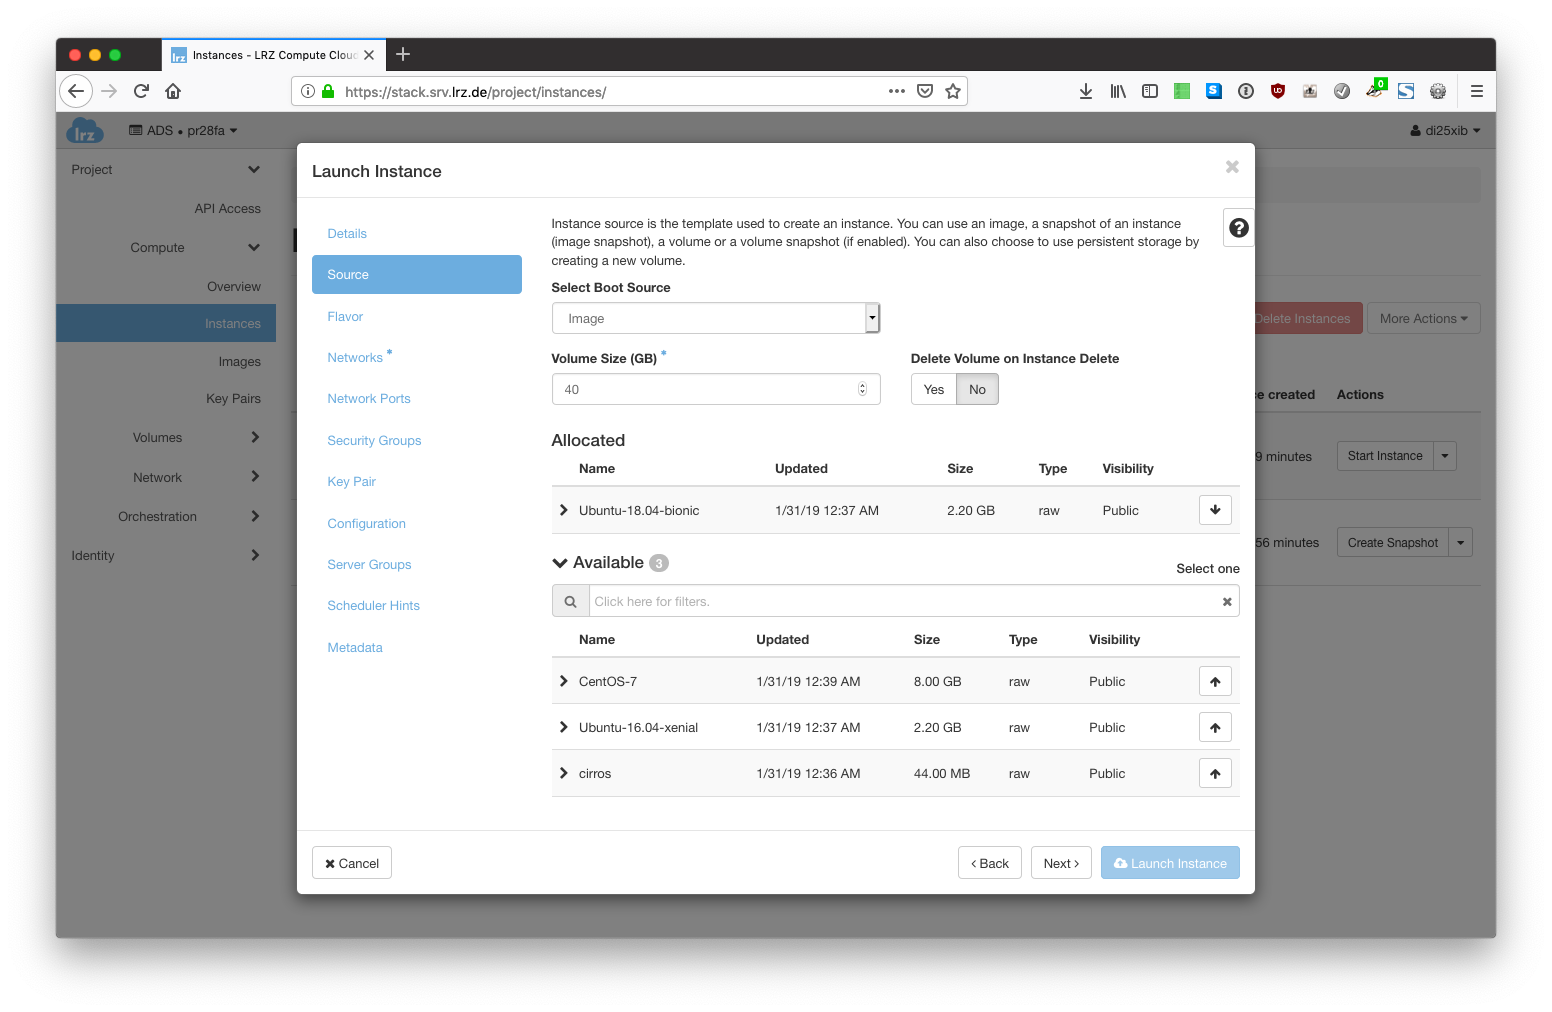
- Change to the "Source" tab to choose which operating system you want to use. To choose an OS image, click on the up arrow next to the OS image you want to use. You can also adjust the Volume Size if you need more space in your VM and can choose if the Volume will also be deleted when your instance gets deleted.
- In the "Flavor" tab you need to choose from a list of predefined resources profiles. Each profile defines the number of CPUs your VM gets, the amount of RAM and default sizes of disk images. Depending on your choice of the OS and your current quota usage you might see
 symbols next to some values in this table showing you that you either do not have the amount of resources available (limited by quota) or that the chosen OS does need more resources to boot, i.e. if the root disk is too small.
Pick the flavor that provides the resources you need by clicking on the up arrow next to it.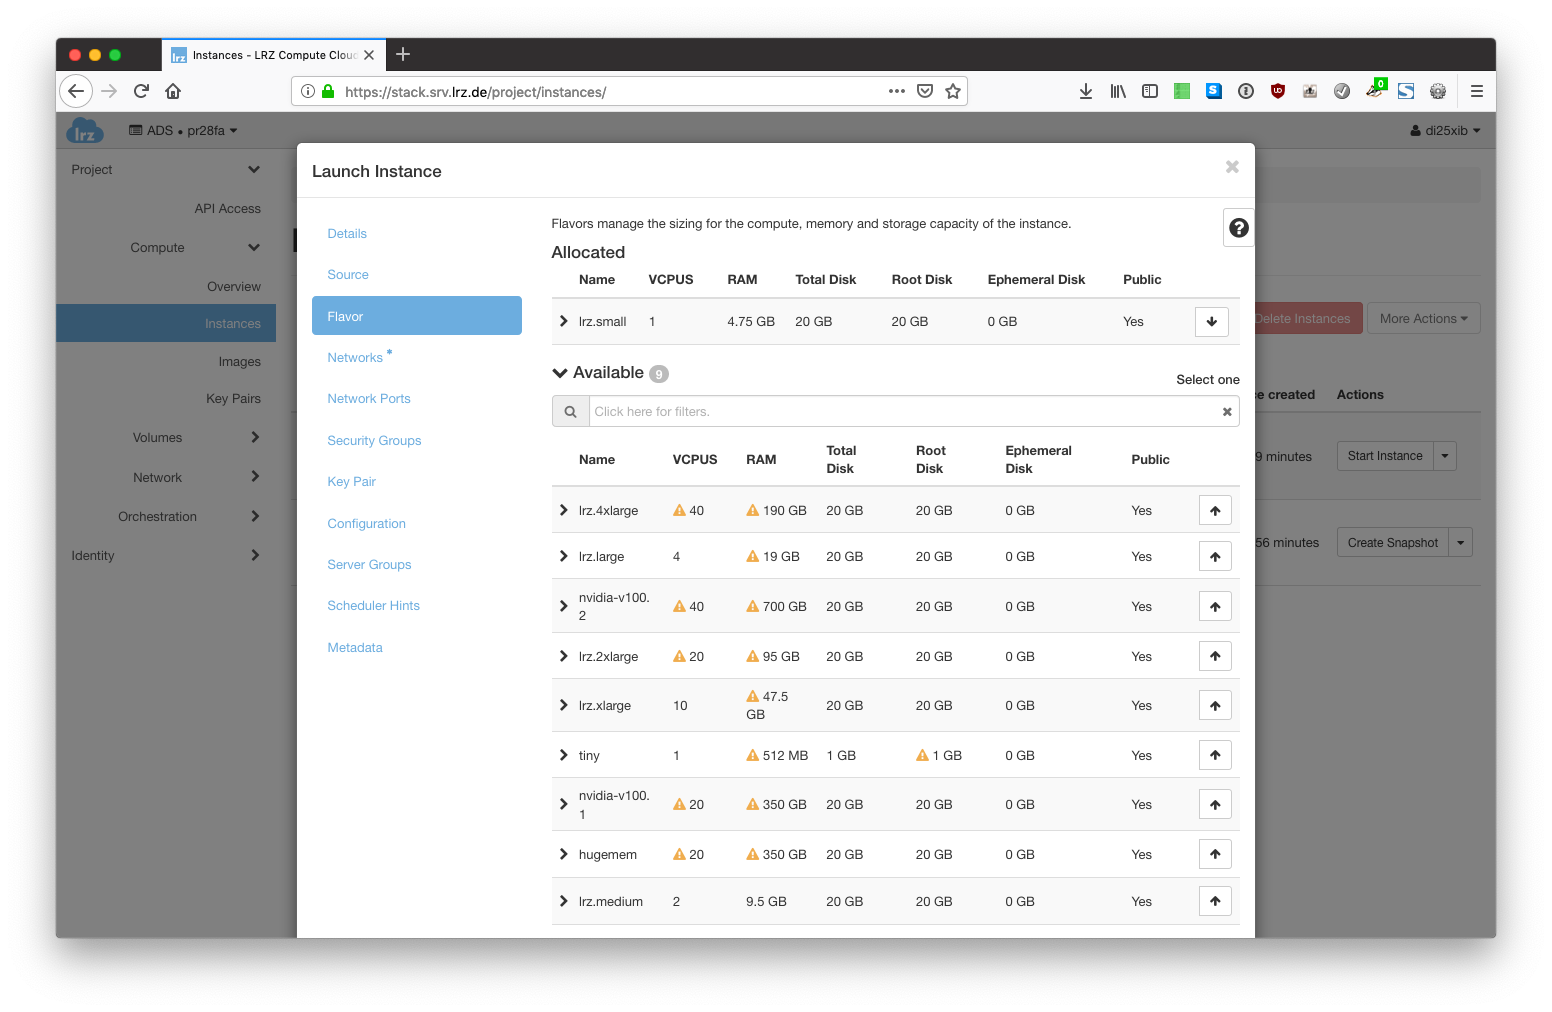
- Next, you need to choose one of the "Networks". If it is not absolutely necessary you should choose MWN over Internet. When you attach the MWN network to your VM this VM will be located in the Munich Research Network (MWN) that can be seen as a large intranet that has mechansims to find and mitigate threats. Moreover, machines in the MWN are not exposed to the world, access is limited to the MWN. You can connect to the MWN via VPN and access this machines easily.
In contrast, if you attach your VM to the Internet network it is completely exposed to the public. You can be sure that attacks and port scans will start almost immediately. We highly recommend to put your VM in the MWN network if there is no important reason to change that.
Select MWN by clicking on the up arrow next to it.

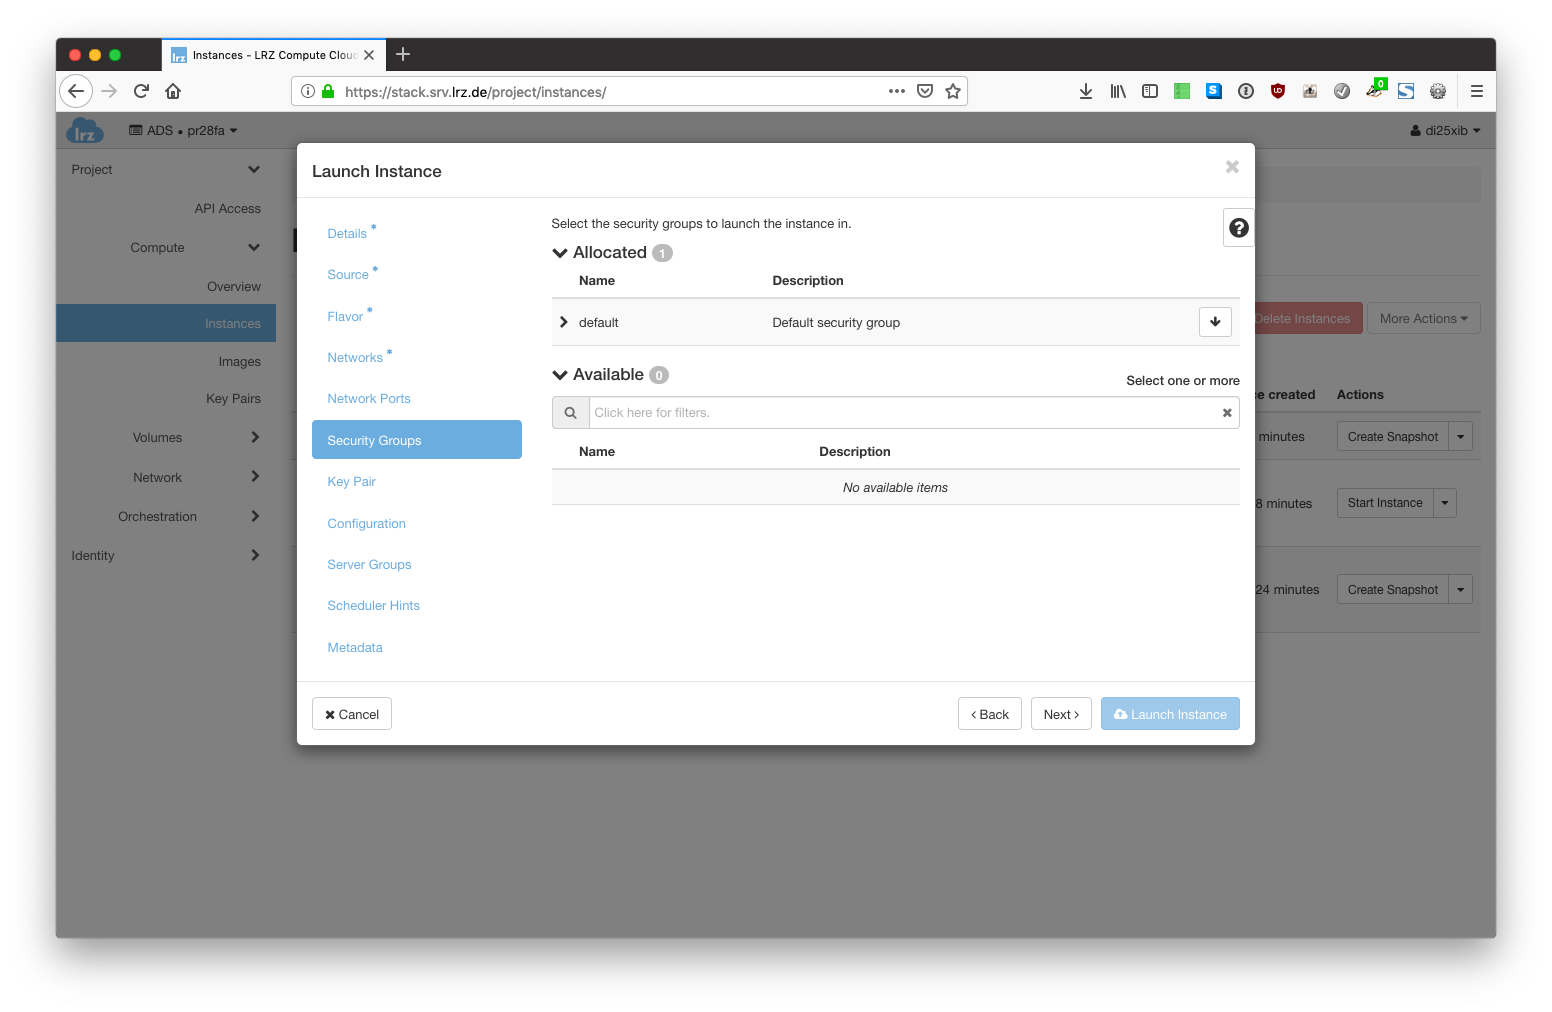
- Have a look at the "Security Groups". By default, the default security group is allocated. If you expand it by clicking the right arrow left to its name you can see what firewall rules are put in place. Check for SSH (port 22), it should be enabled. By default, all incoming ports are disabled in the default security group, see point 3. above.
- In order to log in to your VM you need to provide a "Key pair" here. If you already have an SSH key pair you want to use (e.g. in the ~/.ssh directory of your machine) you can import it (at the moment only RSA keys are supported). If you do not have a key pair, you can create a new one. If you create a new one, an RSA key pair is created for you. You must save the Private Key on your local machine because you need to provide this private key when connecting to the machine via SSH. You can exactly allocate one key pair to the machine.
Important note: This step is carried out only once - at the first time when the machine is created. If you start this instance later updated SSH keys will not be injected into the existing server! If you need to inject an updated key you can create a snapshot of the existing server and instantiate a new server from this snapshot.
- To launch the instance, click the blue button on the lower right side of this form.

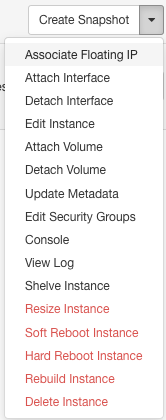
- Your instance should appear in the list of instances of your project. It will display the state of the VM and the (private) IP assigned to this VM. Your machine does not necessarily need a public IP but can be reached from other VMs. If you want to login from the outside world, you need to attach a floating IP address to your machine. To do so, you need to click on the right small down arrow in your instance's row and select "Associate Floating IP".
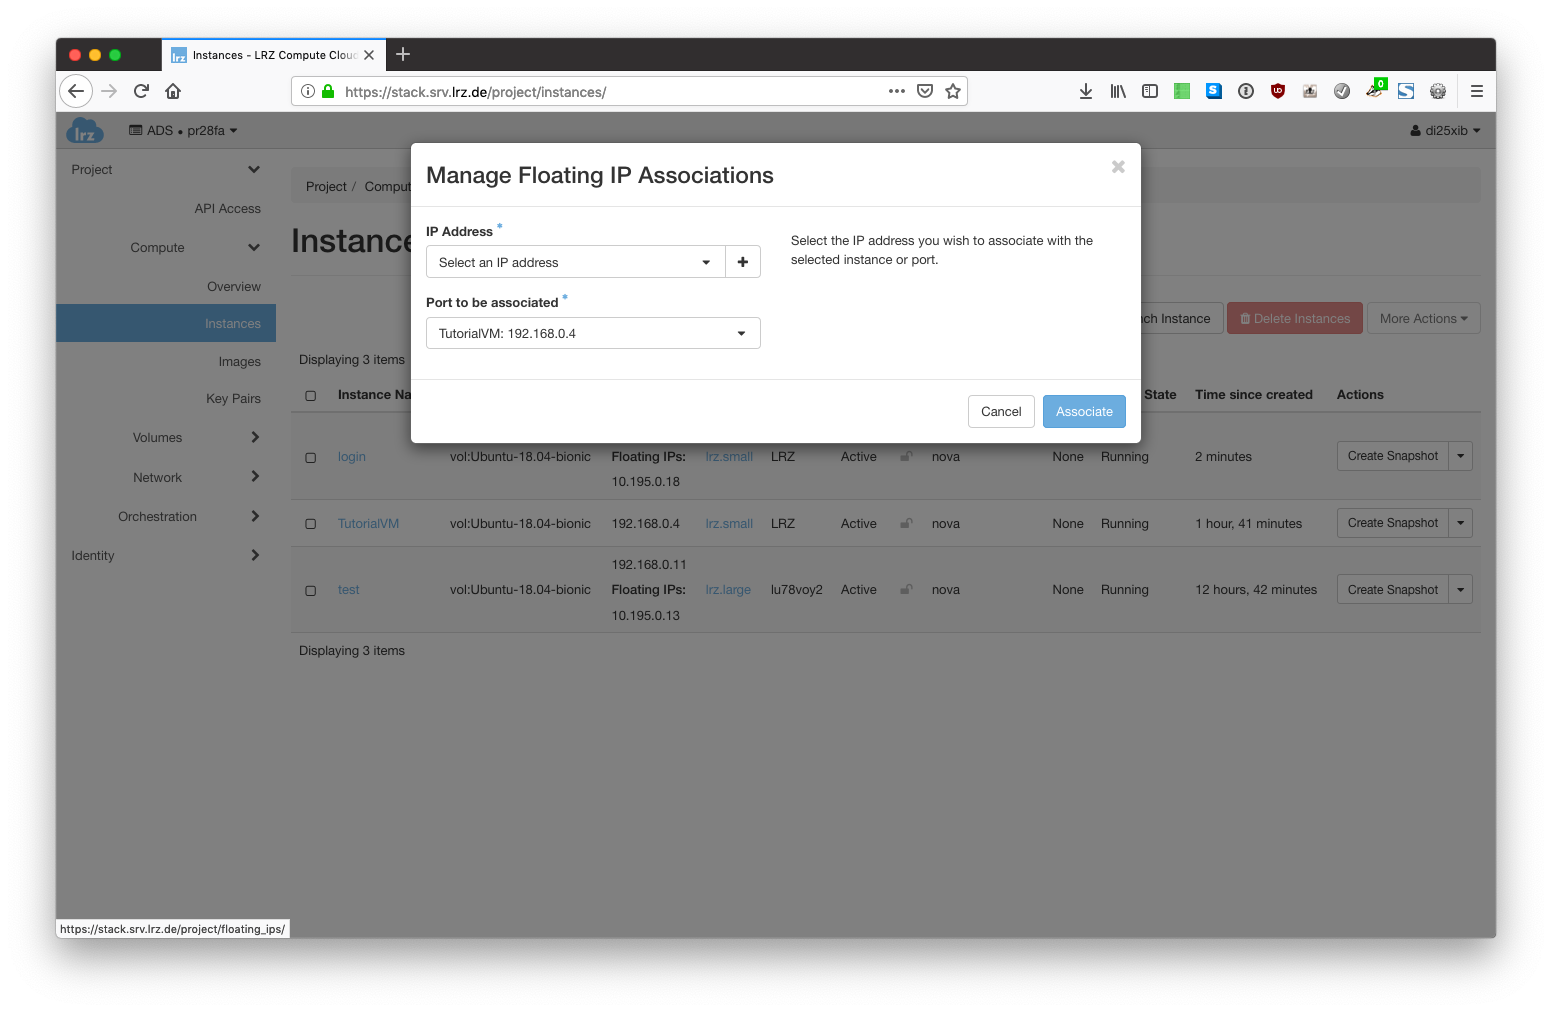
- A drop-down menu appears asking you to select a free floating IP to a network port of your VM. There are IPs from 2 different subnets. IPs starting with "10." can be assigned to Ports connected to the MWN network, IPs starting with 138. can be assigned to network interfaces in the Internet network. If no floating IP address is available you can click on the + sign to create a new one:
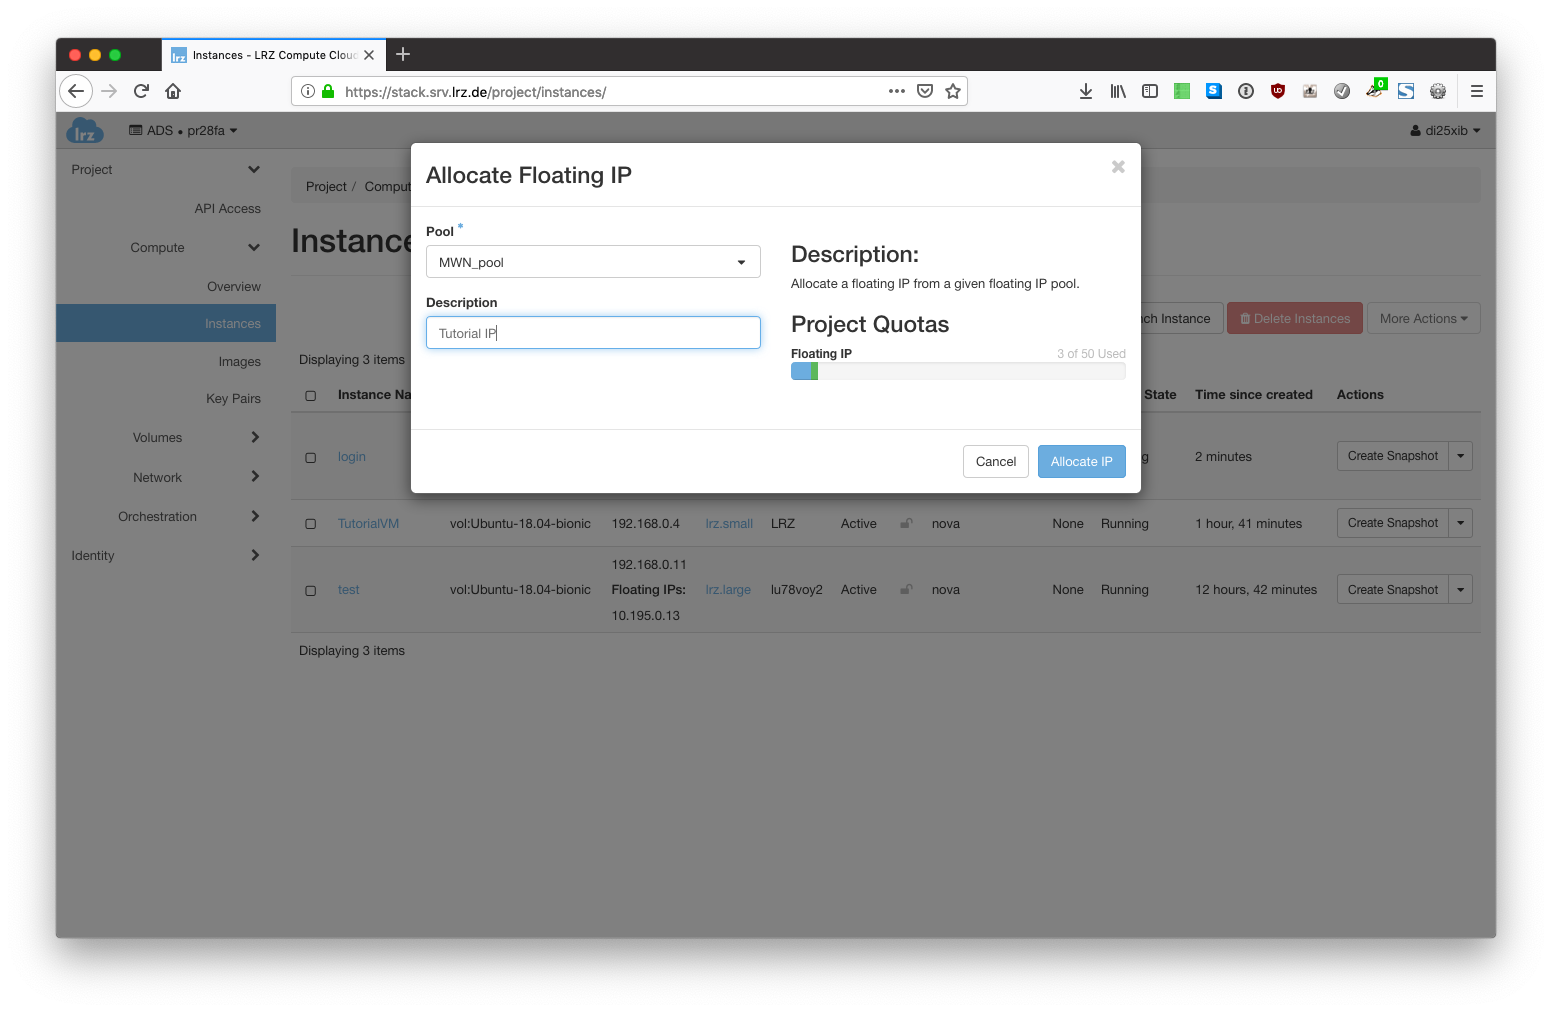
- You need to choose the pool to which this IP is assigned. If you want to connect your VM to the MWN you should choose MWN_pool here. Click on "Allocate IP" to create it.
- In the Floating IP form the newly created IP is now selected. Click on "Associate" to associate the IP to the VM's network port.

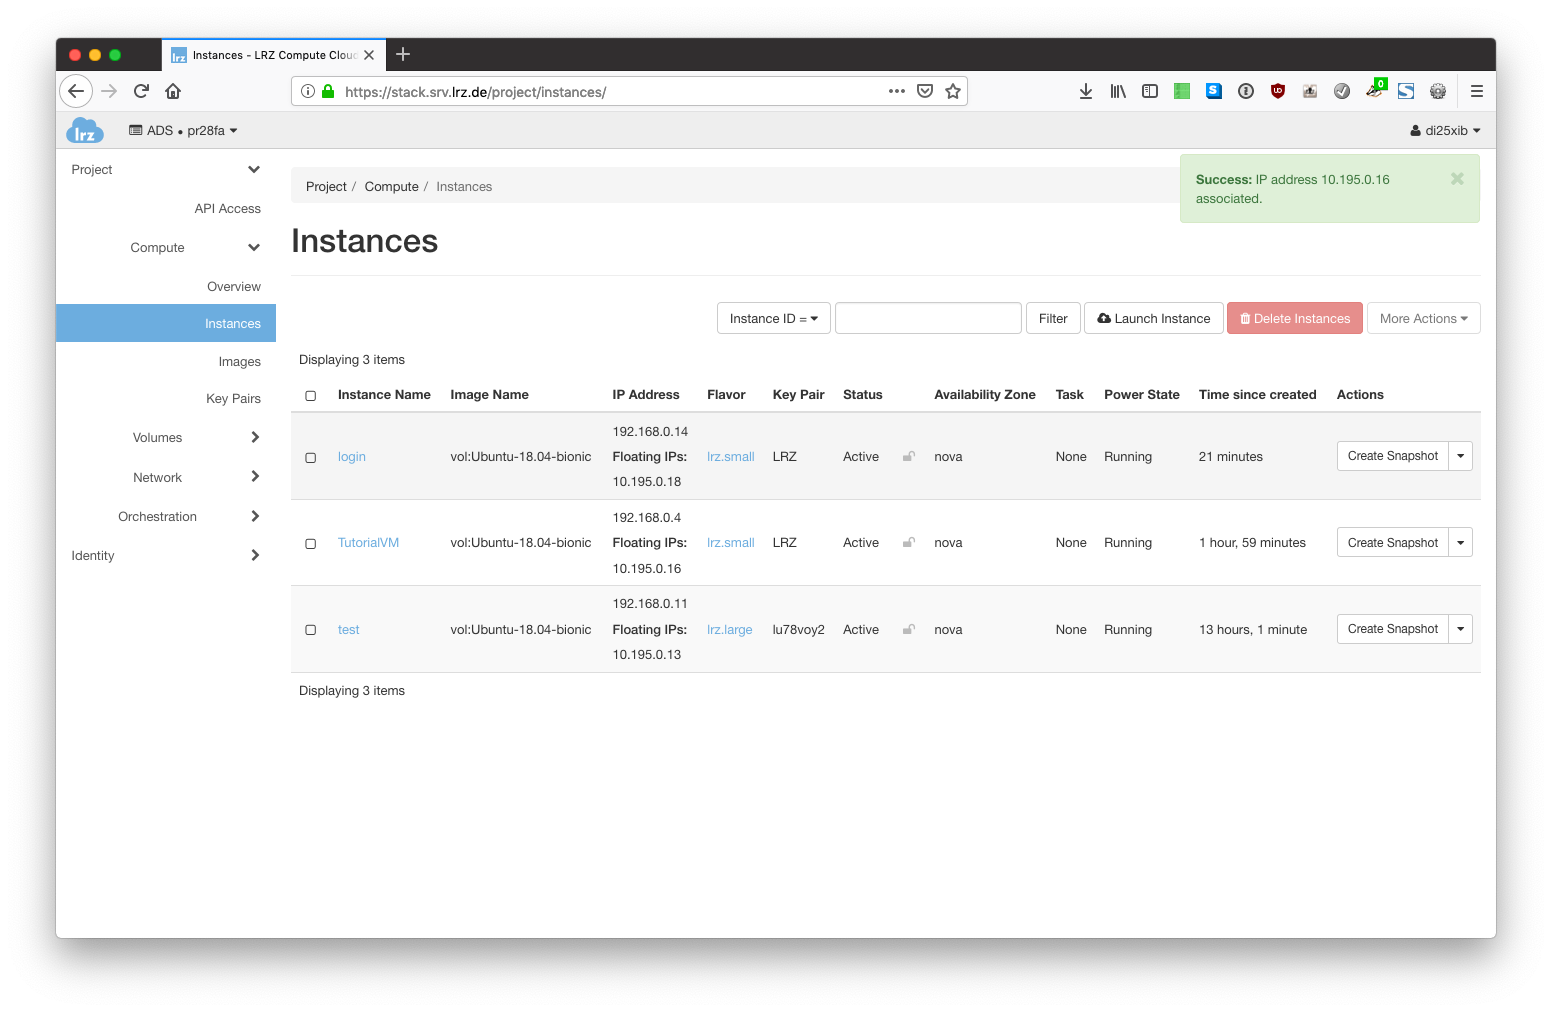
- The newly created IP address is now associated to your VM. It is also displayed in the "IP Address" column of the instances list.
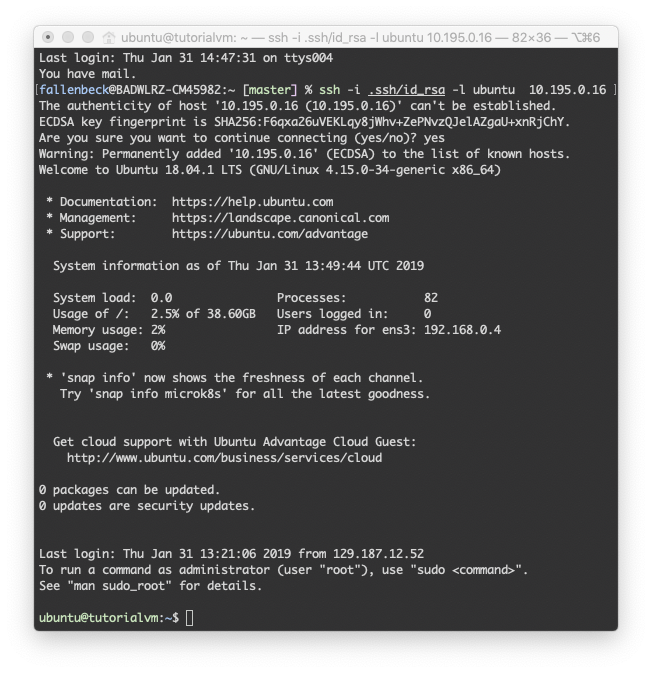
You can now connect to your VM using SSH. Do not forget to be connected to the MWN network (VPN) in case you've chosen a floating IP from the MWN_pool. You must specify the private key of the keypair you specified in step 10. You also must provide a username that is dependent on the Source image you used when you created your VM. The usernames for the images can be found in the images' description and in our F.A.Q.
For Ubuntu-based images, the username is "ubuntu":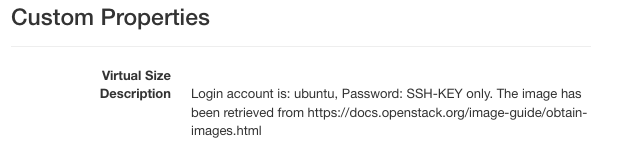
Use the following SSH command to connect to your VM via its floating IP:
ssh -i <path/to/private/key> -l <username> <floating-ip>